
An intake form is a document that collects important information from clients, customers, or patients when they first interact with a service or organization. In this post, we’ll explore what an intake form is and how to easily create one using Google Forms. By the end, you’ll have a user-friendly and efficient tool to gather client information and streamline your onboarding processes.
What is an intake form?
An intake form is meant to gather pertinent information from an individual or organization. The information collected includes essential details that help companies and organizations in a few critical ways:
- It helps them understand clients and customers better so that services may be tailored to their needs
- It provides a systematic way to onboard clients or customers, improving their overall experience
- It offers a comprehensive view of clients, enabling a more informed decision-making process in the future
- It helps ensure that necessary legal and compliance information is collected upfront, reducing potential liabilities
Intake forms are vital in numerous industries. Healthcare uses patient intake forms to gather medical history. Education institutions use them for student registration. In business services, such as consulting and real estate, client intake forms are utilized to understand customer needs and preferences.
How to create a sample intake form with Google Forms
The below steps are for a sample intake form. Not all businesses and organizations will require all the information this sample form collects. Follow these steps and include relevant questions to create your own intake form in Google Forms.
Step 1: Create a new Google Form
Navigate to your Google Forms.
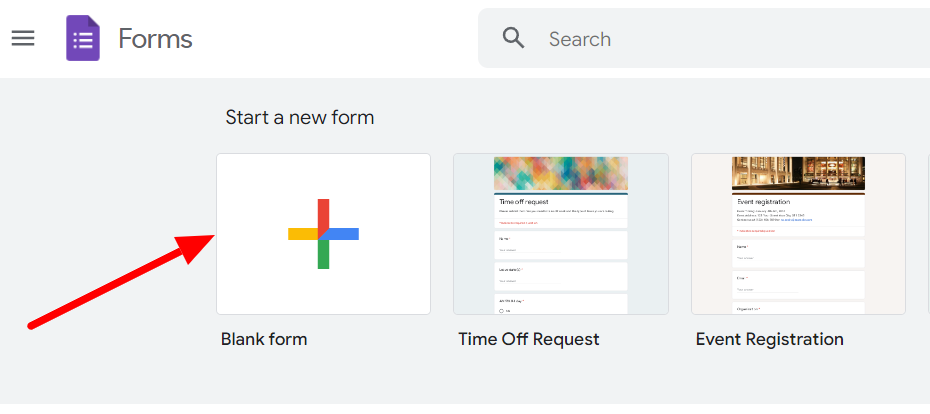
Click the ‘Blank form’ button to start a new form.
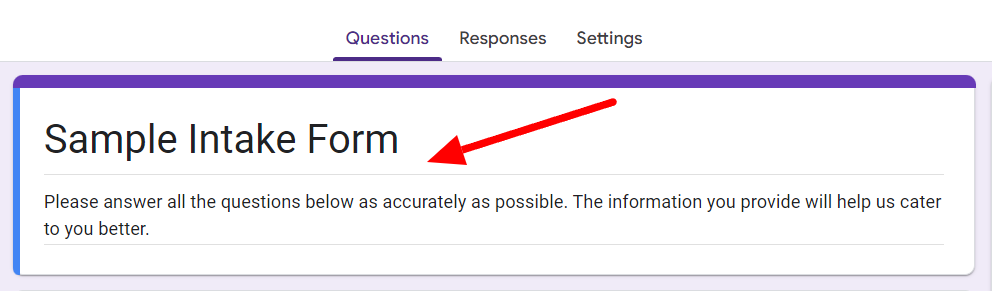
Title your form appropriately and also offer a helpful description for your recipients.
Step 2: Enter fields for personal information
Now we’re going to add questions to gather personal information:
- Full name
- Date of birth
- Gender
- Address and contact details
- Occupation
- Preferred Language
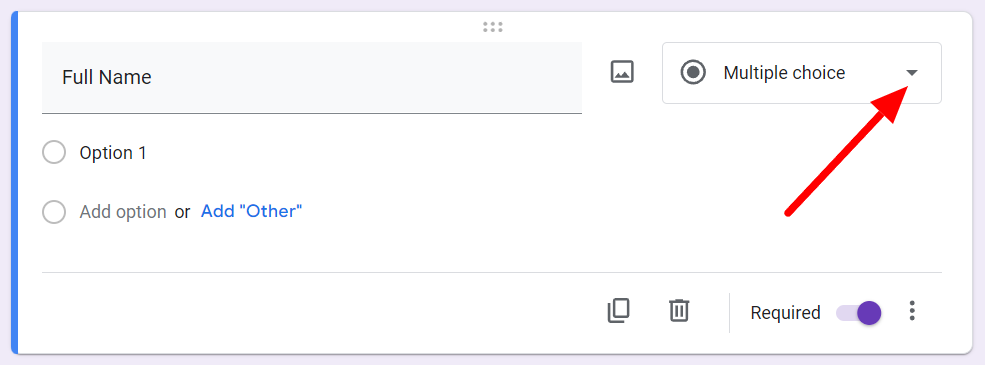
Edit the default, untitled question to gather the name of your client/customer/patient. Click the button next to the question field to change the question format.
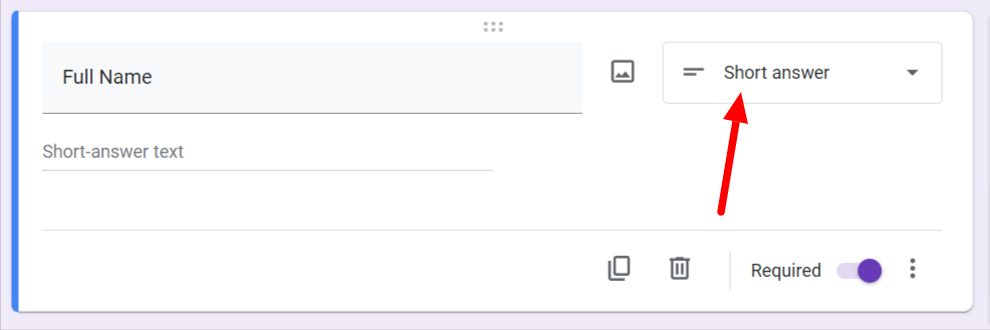
Select the ‘Short answer’ question format.
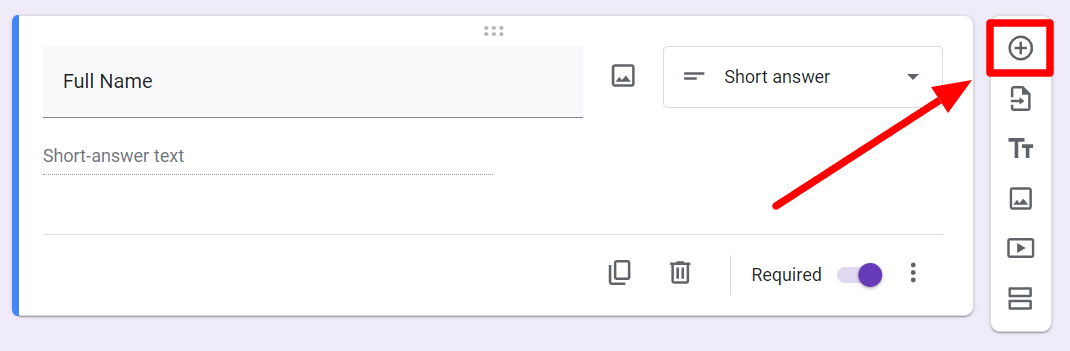
Click the ‘Add question’ button on the floating menu to add all the personal information questions you need in your intake form. Learn about the different question types in Google Forms to choose the most appropriate question format in your form.
Step 3: Collect necessary background information
Now, you may want to collect some background information. This information will vary depending on the industry and type of services the intake form is intended for. For example, if it’s a patient intake form, the background information may comprise questions around:
- Family history of diseases or past medical history
- Blood group
- Allergies or sensitivities
If the intake form is for business consulting, the background information relevant may be:
- Number of employees
- Have you worked with us before?
- Goals for consulting?
For legal services, necessary background information can be:
- Reason for seeking legal assistance
- Prior legal cases
- Current legal representation
Add new questions for all the background information you want your intake form to collect. Here are a few things to keep in mind while deciding which questions to include:
- Relevance: Ensure each question is directly relevant to the form's purpose.
- Privacy and sensitivity: Be mindful of privacy concerns and only ask for essential personal details. Google Forms aren’t anonymous by default.
- Legal and compliance requirements: Include any questions necessary to meet legal or regulatory requirements specific to your industry.
Step 4: Ask how they heard about you
Once you’re done adding questions to gather background information, you can include a question to inquire about how your client/customer heard about you. This question is crucial for understanding the efficacy of your marketing and referral strategies.
The information gathered can help identify which channels or campaigns drive traffic and attract your business's clients. By analyzing responses, you can allocate resources more efficiently and enhance successive marketing efforts.
Additionally, a question like this provides insights into client behavior and preferences, enabling you to meet your services and communication methods.
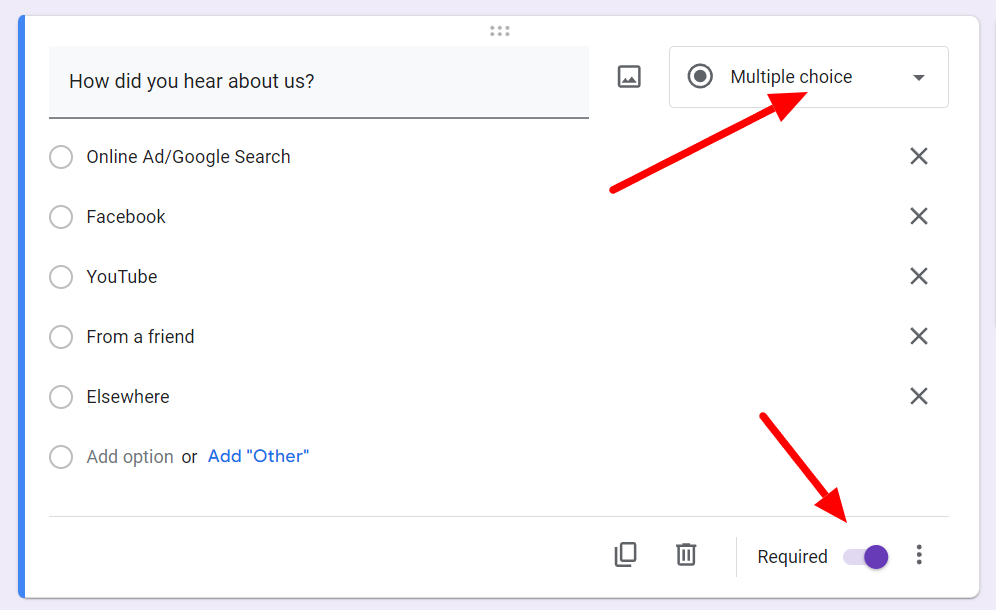
Add a question and use the multiple-choice question format to enter your marketing or referral channels. You can also check to make sure this question is mandatory.
Step 5: Create a PDF intake form
With that, your intake form is complete. Now, consider turning it into a PDF. This is because turning a digital intake form into a printable PDF form provides flexibility and accessibility. It allows clients to fill out the form offline, ensuring convenience for those without reliable internet access.
Additionally, having a physical copy can be beneficial for record-keeping. If you’re wondering how to turn your intake form made in Google Forms into a printable PDF that looks exactly how you want it, there’s an easy way. It’s called Form Publisher.
Create intake forms for free using Form Publisher
Form Publisher is a free Google Forms add-on that allows you to make printable PDF intake forms without losing your digital Google Forms version. This way, you can have the ease of a digital form with the accessibility of a printable PDF version.
Not only forms, Form Publisher will allow you to convert your digital form responses into PDFs, too. Save it digitally or print it out for physical record keeping - the choice is yours! Explore Form Publisher today!