

Are Google Forms anonymous and if they’re not then is it because they’re made that way or because a feature has not been turned on? The answer may surprise you. While the form itself is not anonymous, you can make it so if you only knew how to make a Google Form anonymous. When dealing with sensitive information, you would want to create anonymous Google Forms. They include examples such as anonymous surveys about controversial topics, anonymous questionnaires on sensitive subjects, or even anonymous feedback forms.
Anonymous Google Forms help protect the identity of respondents by not requiring them to input their name or other personal information. The form will still collect data, but it will be harder to identify individual responses. This way your respondents can feel safe answering honestly without fear of retaliation.
In this article, we’ll explain what makes a form anonymous and how you can make Google Forms anonymous.
Anonymous forms allow anonymous submissions if they're made that way
What makes anonymous Google Forms anonymous?
If you are interested in ensuring that your Google Form is anonymous, there are a few things to keep in mind. First, any questions that would reveal personal information, like a name or email address, should not be included in the form, especially as required questions.
Additionally, you must make sure that the form is not set to collect email addresses from respondents. Collecting email addresses would defeat the purpose of a survey that is supposed to only collect anonymous submissions. This is a setting in your form that can be turned off to maintain anonymity.
Does limiting form responses affect the functionality of anonymous Google Forms?
When creating a Google Form, you have the option to limit form responses. However, this requires the user to sign in to complete the form. Does this affect if the form is anonymous? In other words, do Google Forms show your email to the creator of the form after collecting it from you?
No, it doesn’t. The information that Google collects from you is not shared with the owner of the form. Therefore, you could argue that it’s still anonymous. Respondents, on the other hand, may feel differently if they’re being prompted with a sign-in.
If you’d still like to limit form responses, you could send respondents a message that this is required by Google and that you have no access to the information. But it may be best just to disable this option if you’re serious about anonymous polls, surveys, and feedback mechanisms.
How to make Google Forms anonymous
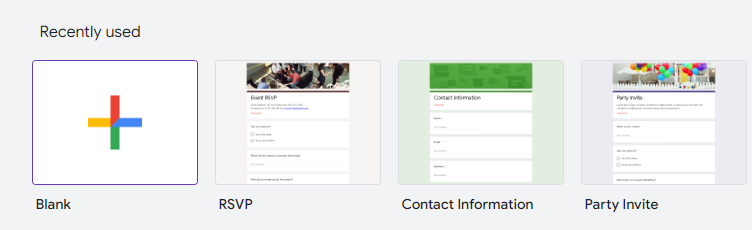
Step 1: Create a new form
The first step is to create a new form.
Go to Google Forms and select from a variety of form templates or start with a blank form.
Once you've created your form, it's time to start adding questions. Google Forms makes it easy to add different types of questions, including multiple-choice, short-answer, and essay questions.

Again, make sure you’re not including questions that reveal personal information, like a name, address, or contact information.
Step 2: Go to Settings
Once you've added all of your questions, it's time to adjust some settings to make your form anonymous. To do this, click on the "Settings" icon in the top-right corner of your screen.

There are a few different settings you can use to make your form anonymous.
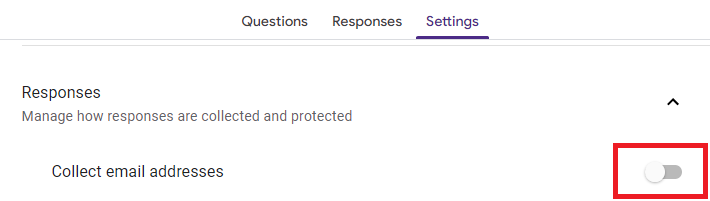
Step 3: Ensure “Collect email addresses” is unchecked
The first setting you'll want to adjust is the "Collect email addresses" setting. By default, this is set to "On," which means that Google Forms will collect the email address of every person who responds to your form.
If you want to keep your form completely anonymous, you'll need to ensure that this setting is turned off. To do this, go to “Settings” and then the ‘’Responses” section. Turn the "Collect email addresses" slider off. This will prevent Google Forms from collecting any email addresses.
Step 4: (optional) Ensure “Limit to 1 response” is unchecked
The next setting you can adjust is the "Limit to 1 response" setting. By default, this is set to "Off," which means that respondents can submit your form multiple times. This feature can be useful if you're using your form for something like a poll, questionnaire, or survey.
This will also ensure that you get anonymous polls, questionnaires, and surveys, as respondents will be able to submit anonymous answers without an email address.
However, if you want to prevent people from submitting your form more than once, you can turn this setting on. To do this, simply check the "Limit to 1 response" box. This will ensure that each person can only submit your form once.

When you're finished, your settings will automatically be saved and you can close the Settings window.
Step 5: Test your anonymous Google Form
Assuming you've followed all the steps above, your form should now be anonymous. To test this, simply copy the link of your form and paste it into an incognito window or another browser where you aren't signed in to Google. Then, fill it out with anonymous answers and submit the form.
If everything is working correctly, you should be able to see your anonymous response in the "Responses" tab, but there should not be any information about who submitted the form, and your asnwers shouldn't be associated with any email address.
And that's it! You've now successfully created an anonymous Google Form.
Is your Google Form not submitting? Learn how to troubleshoot here.
Create anonymous online surveys, questionnaires, and feedback forms
So, are Google Forms truly anonymous? The answer is both yes and no. If you don't add any identifying information to the form itself, then your respondents will remain anonymous. However, if you include questions that ask for personal information or email addresses, then those responses will be tied to specific individuals.
Whether you make an anonymous survey or not depends on how you set it up. So, if you want to keep your respondents' identities a secret, make sure you create an anonymous survey.
Ready to get started? Follow the steps above to make an anonymous survey using Google Forms.