
Managing expenses carefully is essential for all businesses, but it’s especially true for small businesses. Small businesses simply don’t have the financial leeway to take their eyes off daily expenses. This is where expense forms come in.
Expense forms are an easy and effective way for small businesses to track and deal with daily expenses efficiently. In this post, we’ll show you how to create expense forms for small businesses that simplify financial processing. Let’s get started!
What are small business expense forms?
An expense or reimbursement form is a document used to record and detail business-related expenditures incurred by employees within an organization.
Think of it as a way for employees to report their out-of-pocket expenses and get reimbursed by the company. The form typically includes essential information such as the date of the expense, description of the expenditure, the amount spent, and relevant receipts needed for processing it.
Expense reports and expense forms are frequently used interchangeably, but there’s a slight difference between the two. An expense report is a bigger and more comprehensive document that includes information from multiple expense forms.
How to make a business expense spreadsheet with an associated form
Step 1: Create a new expense form on Google Forms
Navigate to your Google Forms.
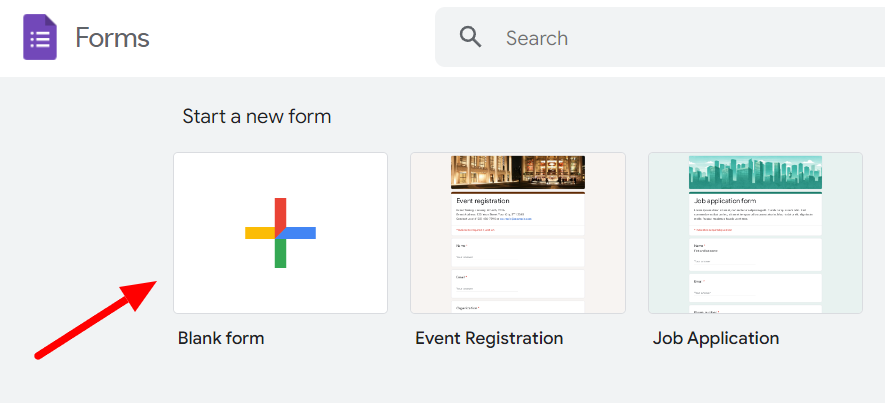
Start a new form by clicking the “Blank form” button.
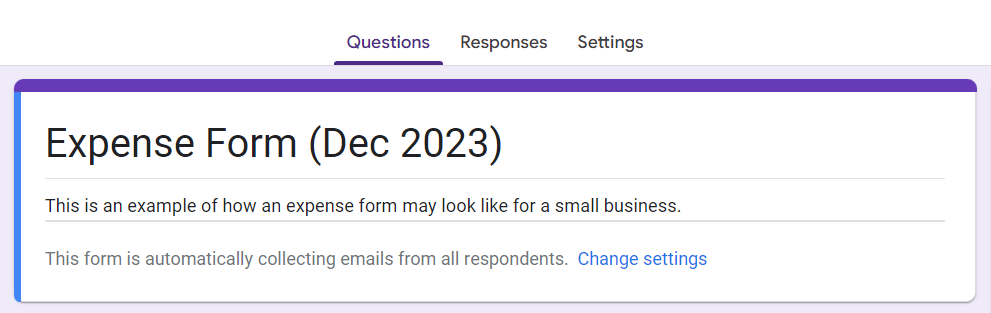
Name your form appropriately so it’s easy to find in your documents. If you’re maintaining separate monthly sheets, you may consider putting the month and year in the title.
Step 2: Include a question for each necessary field
Now, it’s time to add the questions. Remember that this form is going to feed a spreadsheet. This means that whatever information your financial department needs to process monthly/yearly expenditures, you want to add to this form. While each business has its own additional unique requirements, some common ones may include:
- Employee name (or ID)
- Date of purchase
- Expense description
- Expense category (operations, maintenance, travel, etc.)
- Name of the vendor/seller
- Method of payment (cash, credit, etc.)
- Approval/authorization
- Receipts attached
- Amount paid
- Total expenses
Since there can be more than one expense in one instance, you could have separate forms or separate fields for individual costs. Separate forms will require the employee to fill in the same repetitive information like employee name, ID, and date, so consider carefully whether it’s viable. It all depends on how much separate detail you want to keep.
Having separate fields within the same form can work depending on what kind of expenses your small business usually encounters. However, it’s essential to add a total expense field in each form so that the column is easily added with the auto sum function in the spreadsheet.
Step 3: Link to an expense spreadsheet for responses
Now, it’s time to link this form to a Google Sheet that will form your expense report. There are two ways to do this: you can link it to a new spreadsheet or create a new one and link your form to that.
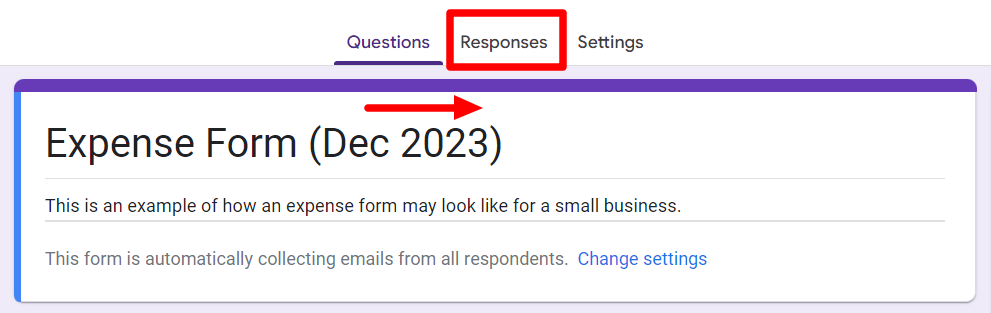
To do this, toggle to the “Response” tab from the “Questions” tab and click the “Link to sheets” button.
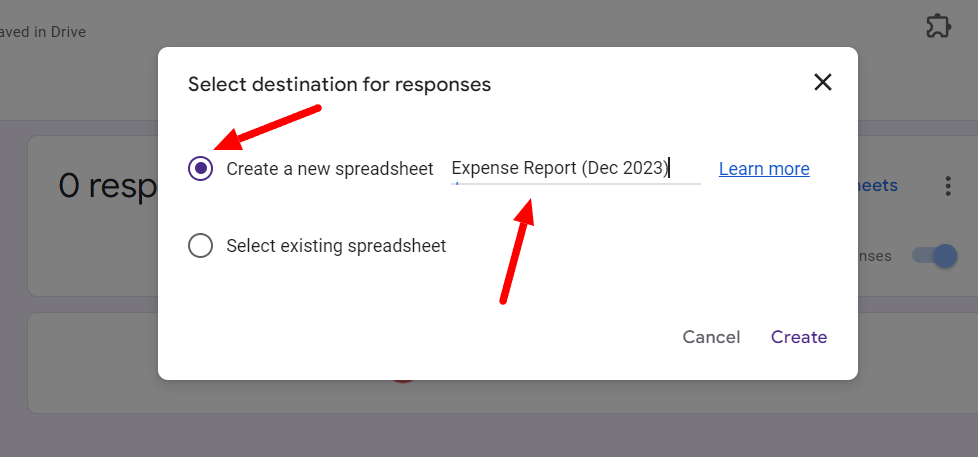
Now select the “Create a new spreadsheet” option. Name your spreadsheet appropriately and click “Create.”
If you decide to link your form to an existing spreadsheet, Google Forms will prompt you to select it from your Google Drive. See a step-by-step on how to put Google Form responses in a Google Spreadsheet.
With that, you’ve successfully created a small business expense form and linked it to Google Spreadsheets so you can easily create expense reports when you want. Want to take it one step further and create an approval workflow? Let’s see how you can do that.
Step 4: Create an approval workflow with Form Publisher
Some small business expenditures are unrestricted. Other times, you may need to insert an approval stage before the spending. Imagine an employee requires approval from the manager to carry out a particular spend. They could generate a written request or fill out another form.
Either way, it would be slower than if you simply insert Form Publisher into the process. Form Publisher is a Google Forms add-on that allows you to create approval workflows within Google Forms easily and do a lot more.
With Form Publisher, the moment an employee fills out an expense form, the competent approving authority receives an email notification to approve/disapprove the request. Likewise, the employee gets a notification for the approved/disapproved request, and they can move forward accordingly.
Step 5: Return automated response documents to respondent
Another step you can add to your small business expense form and report process is sending an automated response document. This, too, is easily doable with Form Publisher and can benefit your small business as well.
Sending automated response documents ensures prompt acknowledgment and receipt confirmation for submitted expense forms. It also streamlines and documents your internal business communication.
Create better expense forms for small business with Form Publisher
That’s how you can easily create a business expense spreadsheet with an associated expense form. You can upgrade the entire process and add approval workflow to add ease and efficiency to your operations with Form Publisher.
You can do more and achieve more when your business processes are streamlined. Make all this possible with Form Publisher, a Google Forms add-on that allows you to do more with forms. If that sounds like something your small business could use, try Form Publisher!