
Approval workflows are a powerful tool in the modern office. With the right workflow, offices can significantly reduce the time spent on tedious tasks such as reviewing and approving documents.
By automating processes, teams can focus on other important tasks and improve efficiency. Approval workflows can also help teams stay organized by providing an easy way to track the progress of documents and ensure that deadlines are met.
You may be wondering if there’s a way to set up an approval workflow with Google Forms. This post is all about how you can easily set up an efficient Google Forms approval process and simplify office procedures. Here we go!
What is a Google Forms Approval Workflow?
Workflow is simply an automated series of tasks repeatedly carried out in offices. Workflows can be set up for administrative tasks such as record keeping, e-signature requests, leave requests, etc.
Workflows can reduce the risk of errors and oversight by standardizing the review process. With the right approval workflow, offices can save time and improve the team's efficiency. There are many types of workflows, but we’ll focus on approval workflows. This is when a stage requires approval from someone like a manager before you can move on from it.
Google Forms is an excellent platform for collecting data and can also be used to create an effective approval workflow. The only thing you need now is to download and install a free Google add-on: Form Publisher.
What is Form Publisher?
Form Publisher is a Google add-on that simplifies the process of mass document generation. It can instantly create documents from Google Form submissions or even Google Sheets data.
The great thing about the documents generated with Form Publisher is that they’re customizable with markers and placeholders. Further, they’re also available in multiple file formats like Google Docs, Microsoft Docs, or even PDFs.
When you add Form Publisher to your Google Forms, you have everything you need to set up powerful approval workflows that simplify work. In the next section, find out how to set up your Form Publisher approval workflow in Google Forms.
How to set up a Google Forms workflow with Form Publisher
Step 1: Open Form Publisher in your form
Navigate to your Google Forms and open the form you want to use to set up the approval workflow. For our example, let’s use a leave request that needs approval from an HR manager.
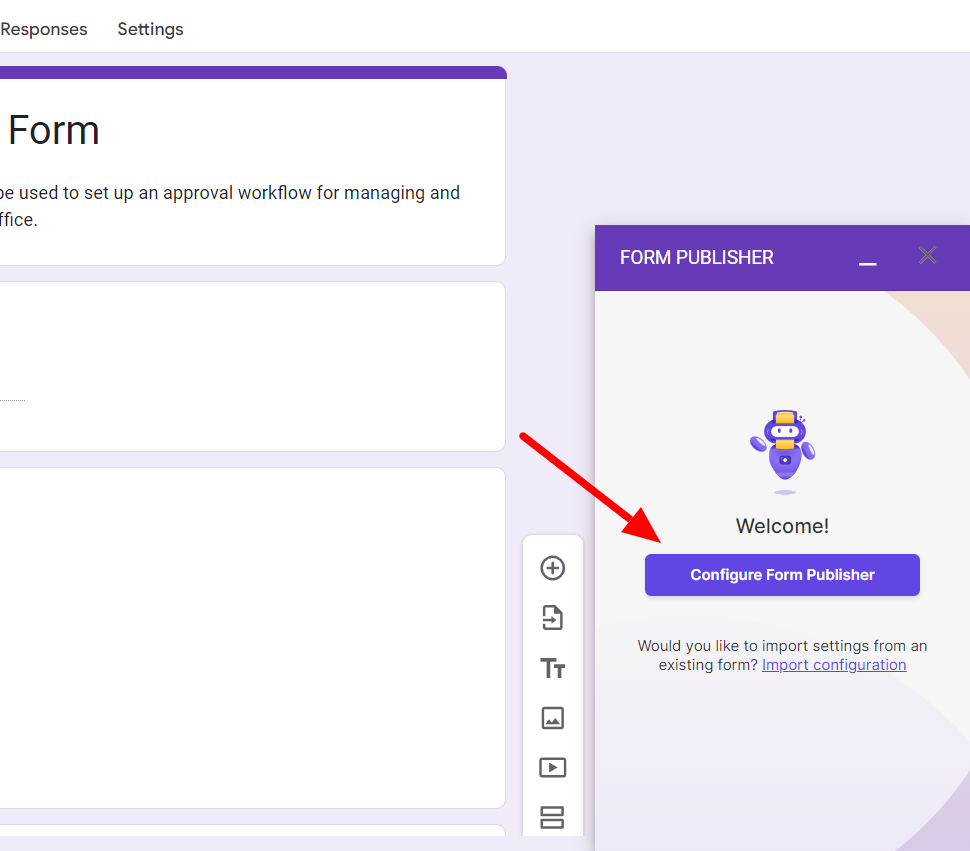
To open Form Publisher in your form, click on the extensions button. Then, click Form Publisher.

When you open Form Publisher for a form, it will prompt you to “configure” it for that particular form. Click the “Configure Form Publisher” button and run the process of selecting a template. Form Publisher will then create a destination folder in your Google Drive.
Step 2: Enable approval workflow in Google Forms
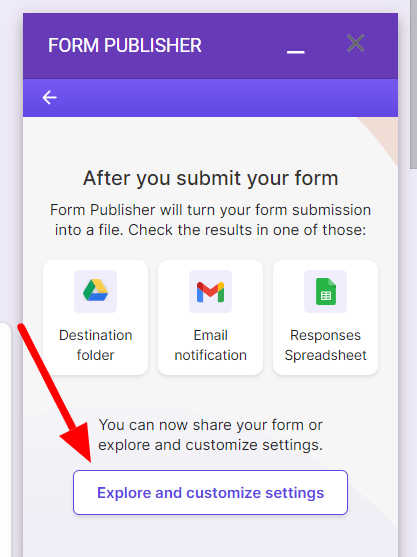
To enable approval workflow for a form, click “Explore and customize settings.”
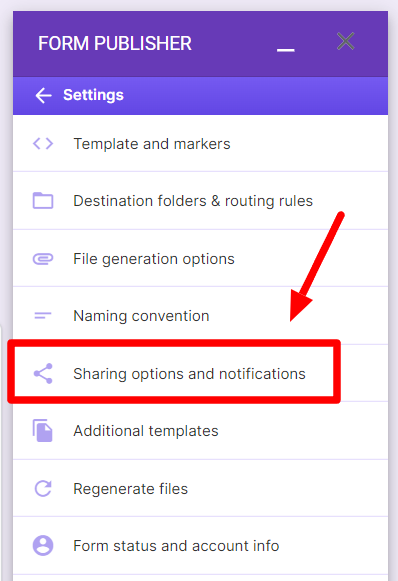
Under settings, click “Sharing options and notifications.”
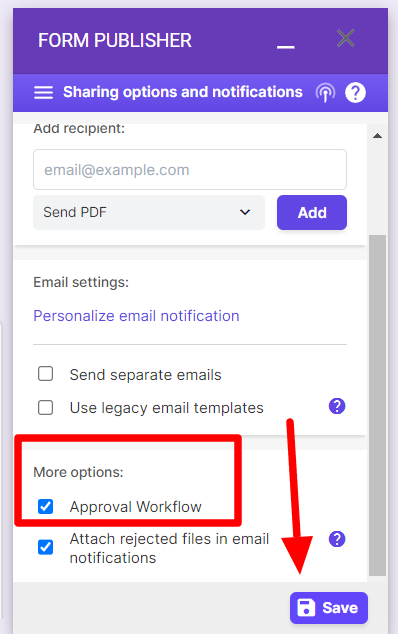
In the next window, ensure “Approval Workflow” is turned on under more options. Then click Save. Now, you’ve enabled the approval workflow for this form.
Step 3: Add relevant markers to your template
Next, we’ll add approval-related information on the template for the document that will be generated when an employee fills it out.
To do this, return to settings and click “Template and markers.”
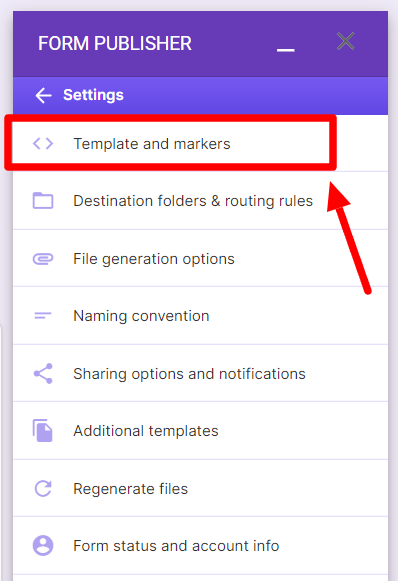
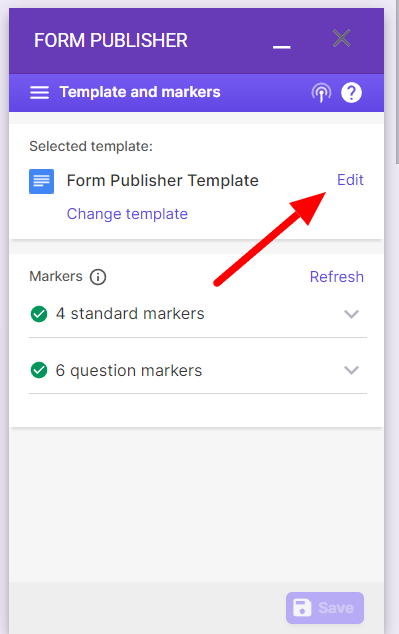
Here, you’ll be able to see the Form Publisher template that’s in place to generate a document when someone fills in this form. Click the “Edit” button next to the template. Clicking this button will take you to the template stored in your Google Drive.
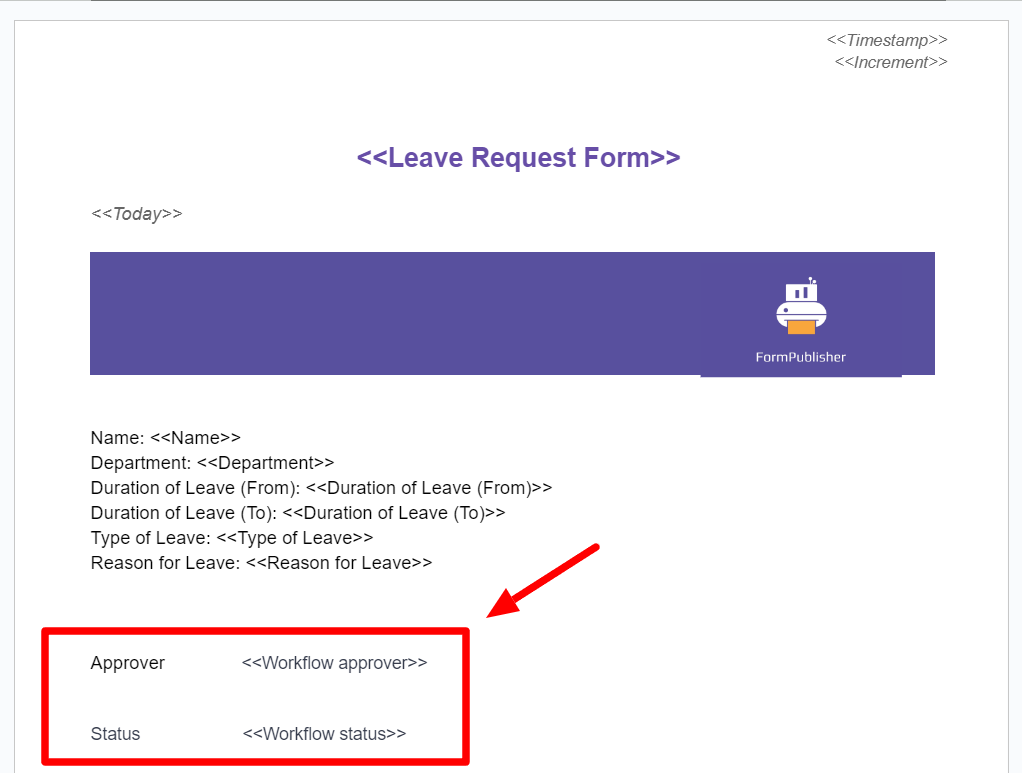
To add the approver data add the <<Workflow approver>> marker to display the name of the approver and the <<Workflow status>> marker to display the status (such as approved/rejected) of the request.
Step 4: (optional) Add a signature field to template
You can also make other formatting changes to this template, such as adding an e-signature field.
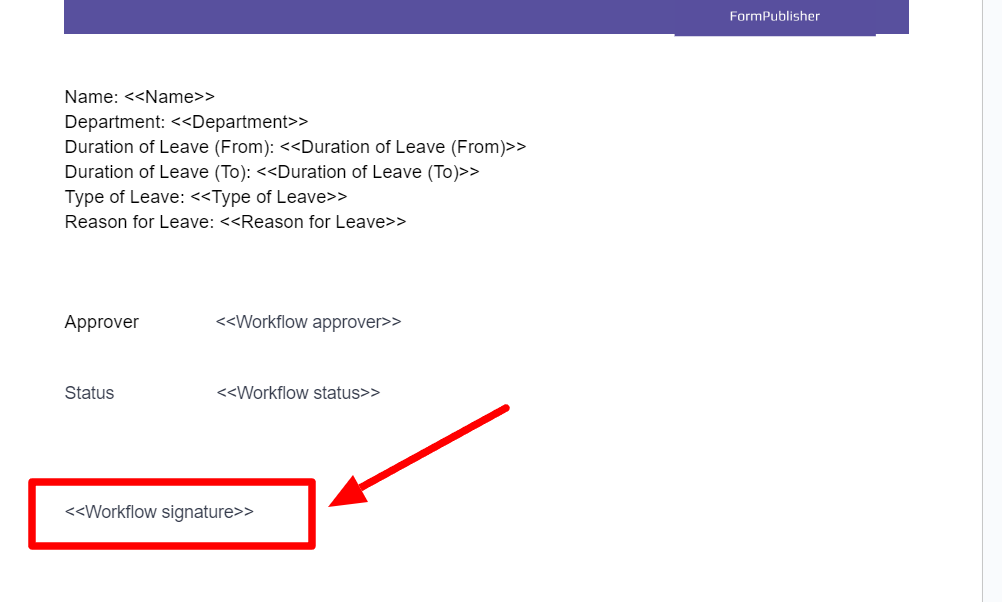
For adding a signature field to the template, add the standard marker <<Workflow signature>> where you want the approver's signatures to appear.
This feature of Form Publisher is especially helpful, as e-signatures are not an inherent feature of Google Forms. Learn more about how to add signatures for Google Forms.
Step 5: Add approver(s)
Now that you’ve enabled the approval workflow and modified the template accordingly by adding the correct markers, the approver will be notified that they have a pending action when someone fills in the form requesting leave.
It’s important to mention here that the owner of the form is the approver by default. You can change that and add other people as approvers.
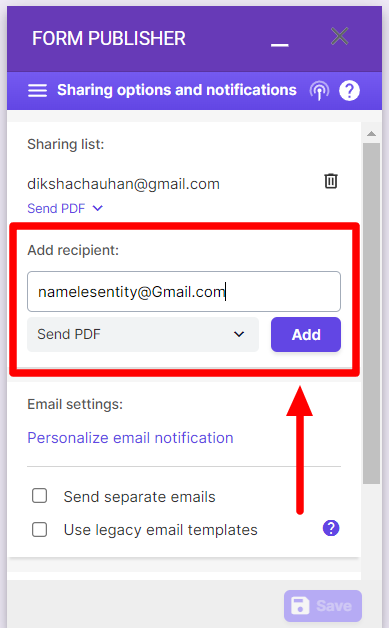
To do this, under the ”Add recipient” option in the “Sharing options and notifications” settings, add the new approver’s email, select the file format you want to send, and click “Add.” Learn more about how to add approvers.
And with that, you’re done! When an employee fills in the form, your added approver(s) will get an email notification with a document for a pending action on their part.
Once they’ve approved or rejected the request, the employee will receive an email notification with a document containing the approver's name, the status of the request, and an e-signature.
Set up Google Forms approval workflow for free with Form Publisher
Setting up a Google Forms approval workflow is essential for today’s workplace. If you already use Google Forms, you’re only steps away from setting up workflows that enhance team productivity by automating repetitive tasks.
With Form Publisher, you can easily set up approval workflows with Google Forms for common administrative functions like leave requests, order form approvals, invoice approvals, employee onboarding, etc., and effectively cut out paperwork.
If you’re interested in setting up approval workflows for your office, explore all that you can do with Form Publisher. It’s free to get started!