
Google Forms is a great way to collect data quickly and easily, but if you don’t have response validation rules, you may be collecting inaccurate or incomplete information.
This is your beginner’s guide to understanding and implementing the Google Forms response validation feature. We’ll look at what Google Forms validation is, why you need it, and the available validation options. We’ll also cover how to set up and manage validation in Google Forms. Let’s go!
How to use response validation in Google Forms
Response validation is a feature in Google Forms that allows users to limit the type of responses they receive from people completing the form. You can do this by setting restrictions on the accepted response types, such as numbers, text, or a specific format.
Google Forms response validation also allows users to set custom validation messages that will be displayed when an individual doesn’t meet the criteria for the response. This feature ensures that all responses are consistent, accurate, and valid.
Step 1: Open up a new Google Form
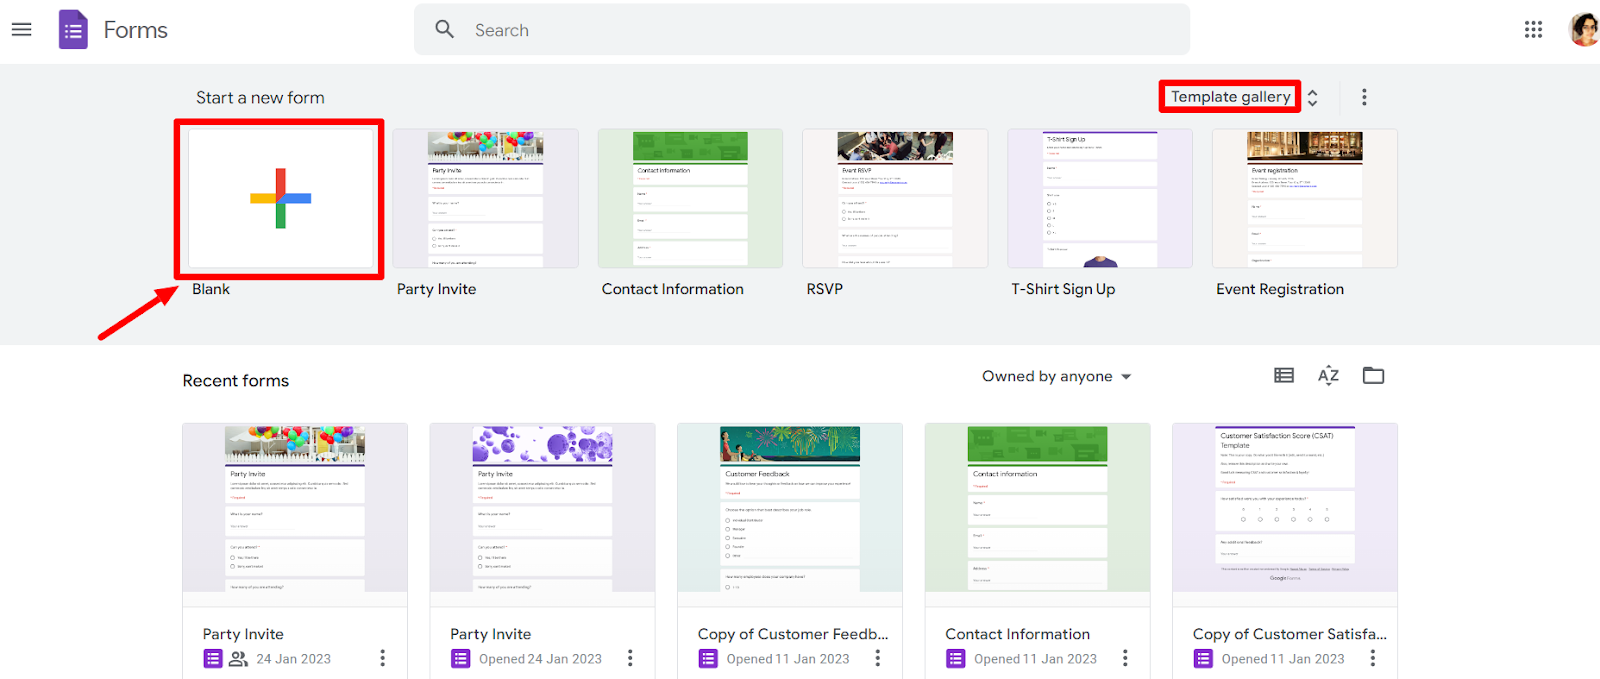
Log in with your Google account at the Google Forms website. Click the ‘+’ button in the top left corner and select ‘Blank’ for a new Google Form. You can also choose from the many templates provided within Google Forms. Let’s go ahead and do that.
Step 2: Add a new question
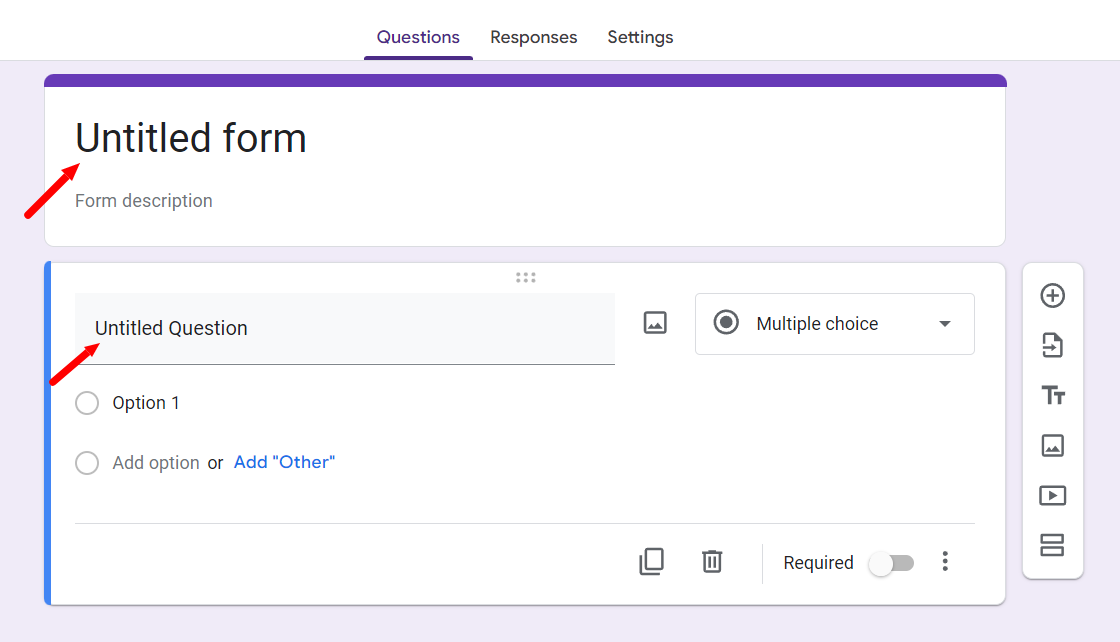
When you open a blank form, you start with a form that looks like this. You can rename the form where it says ‘Untitled form.’ Now, you can formulate your question in the field that says ‘Untitled question.’
For example, let's say you were creating a resistance training workout program that requires individuals to commit to working out at least three and at max six days in a week.
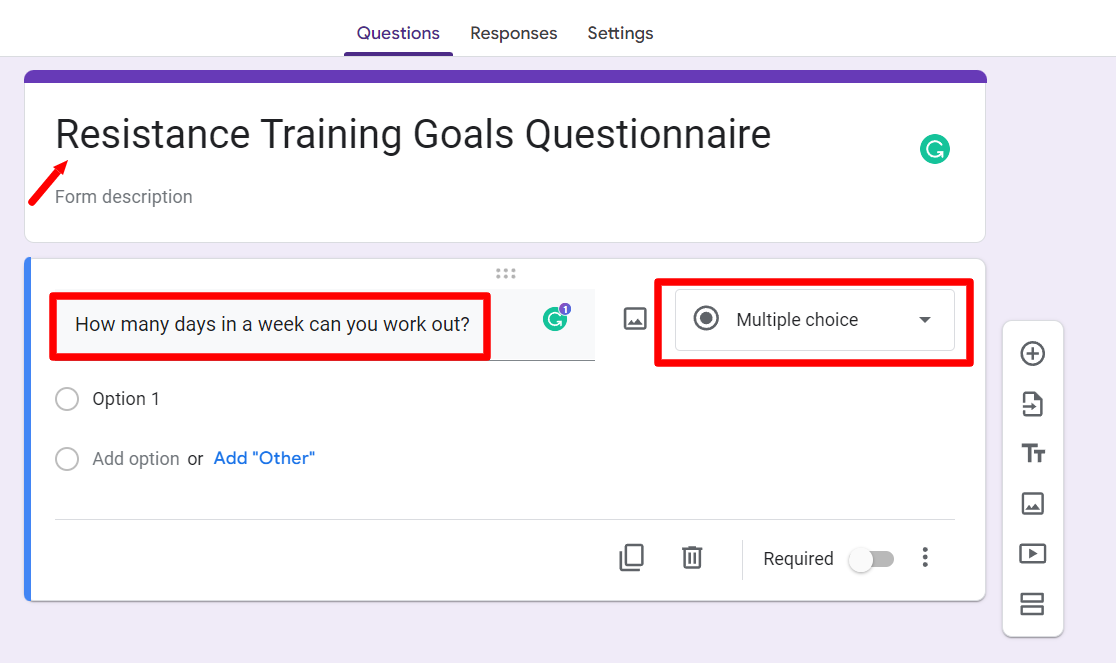
After appropriately naming the form and filling in a specific question, click on the ‘Multiple choice’ box. This will open up a menu where you must select the type of response you want to admit for the question. The options are ‘Short answer,’ ‘Paragraph,’ and ‘Multiple choice’ responses.
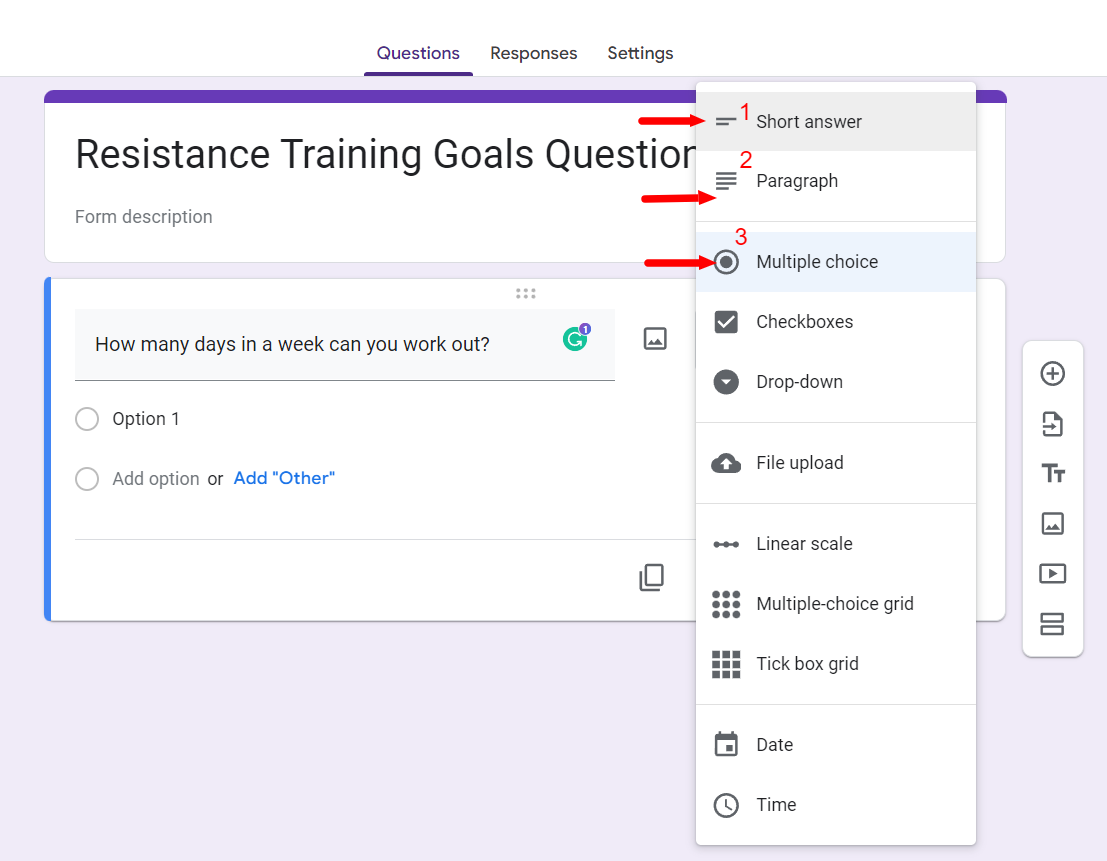
For this particular question, let’s select a short answer. You can learn more about how to set rules for the other types of questions at the tutorial here.
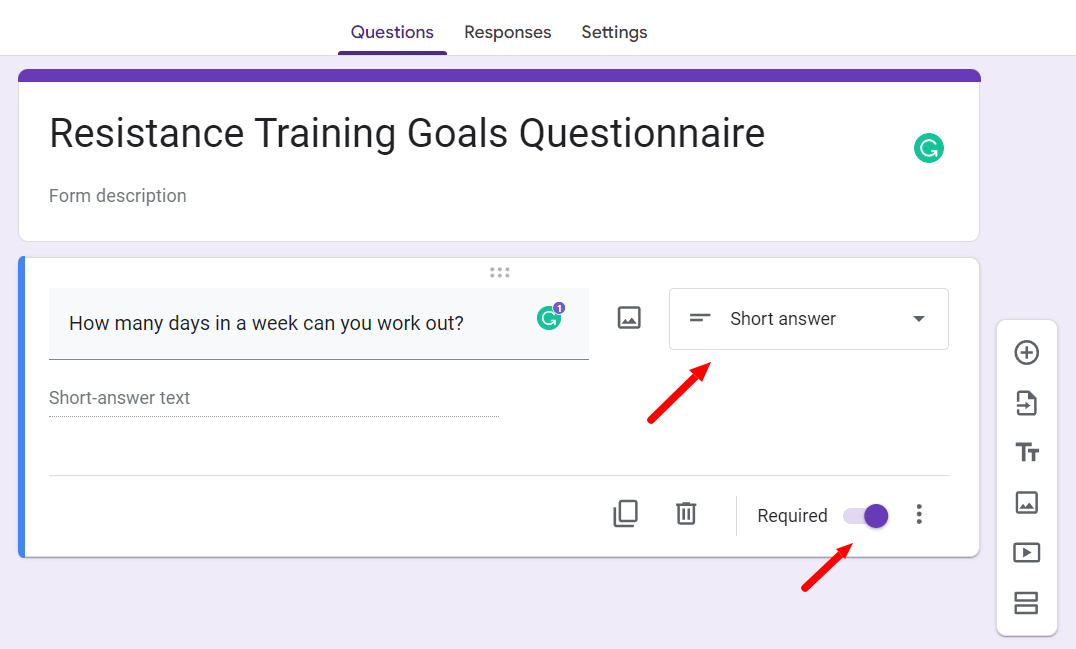
At this stage, you can also make sure that the question is ‘Required,’ which means that the respondents have to respond to this question before moving on to the next.
Step 3: Enable Google Forms validation
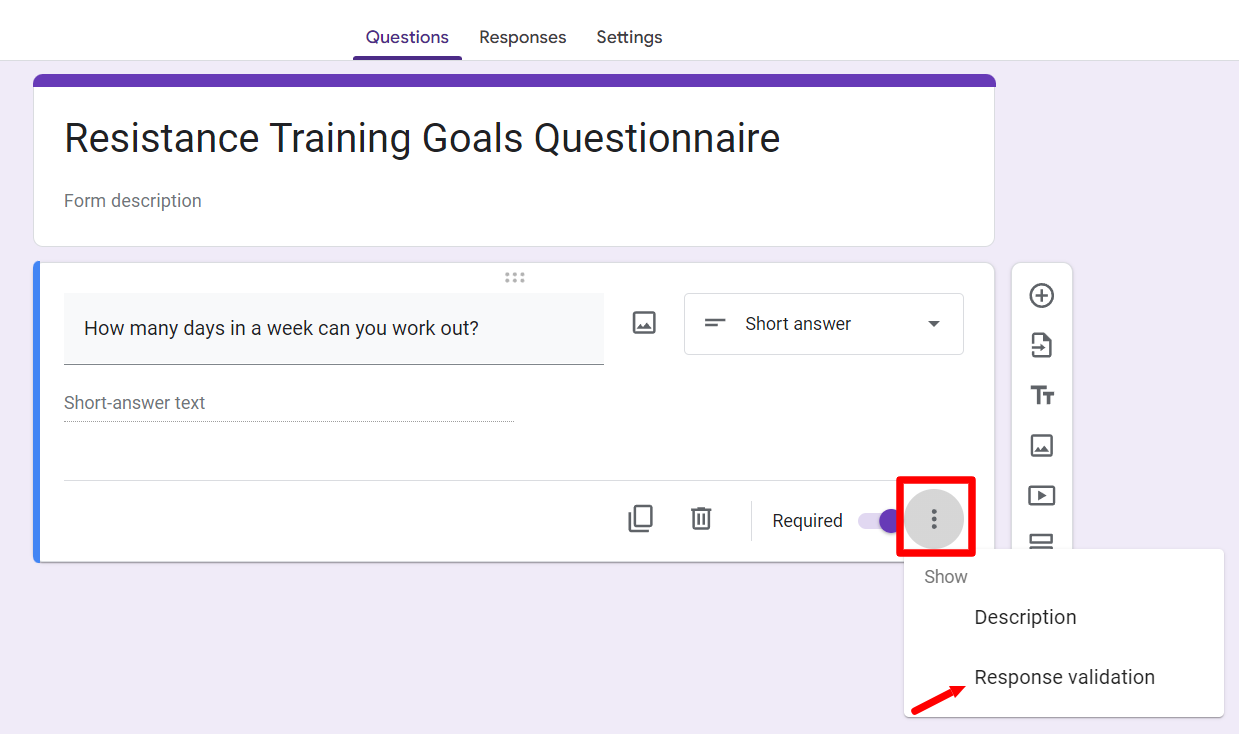
Click on the three dots to set up response validation for this question. When you do this, a drop-down menu will open up where you have to click ‘Response validation.’
Step 4: Choose the rule you want
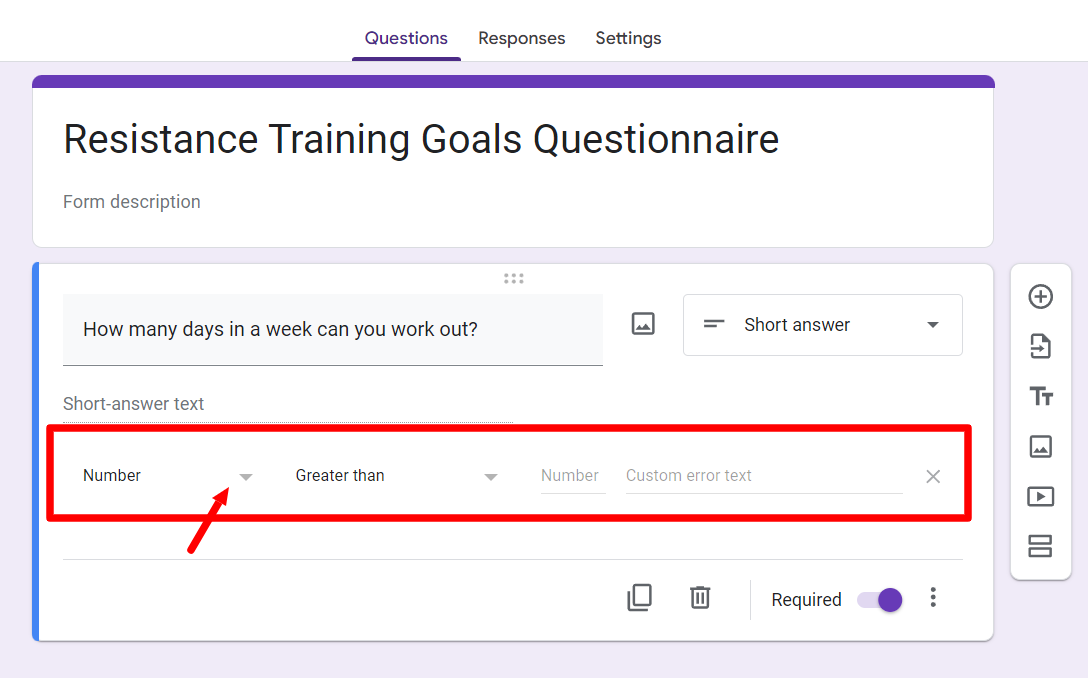
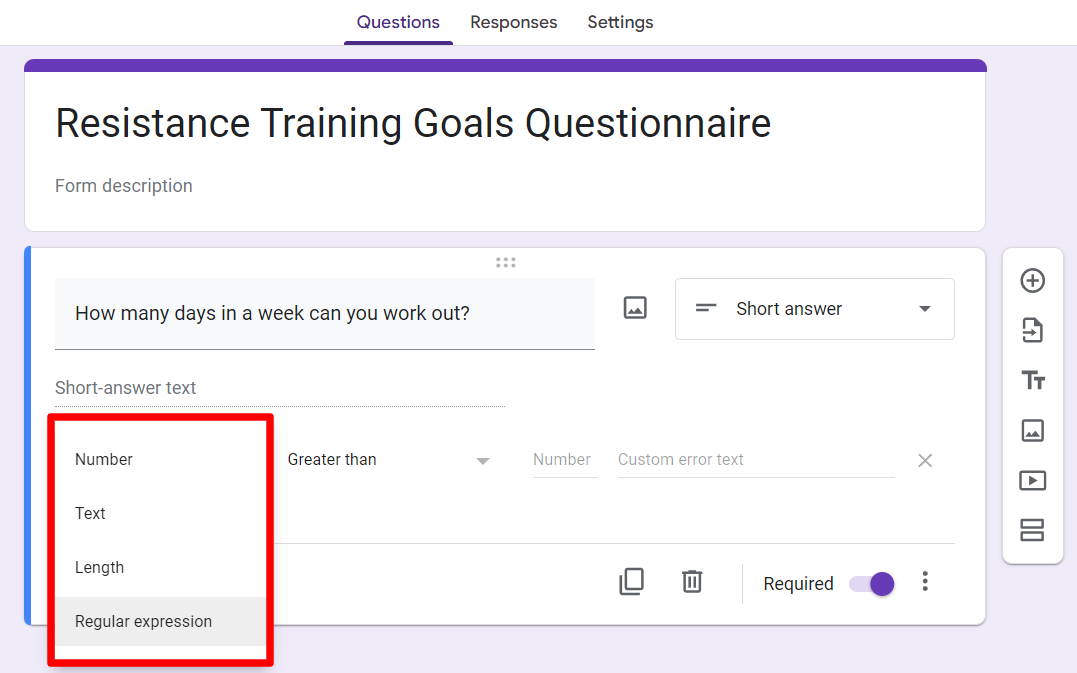
Clicking on response validation will open up another field like the one in the image above. This is the most crucial part of setting up response validation. In the first field, you can choose the rule you want to set for this question.
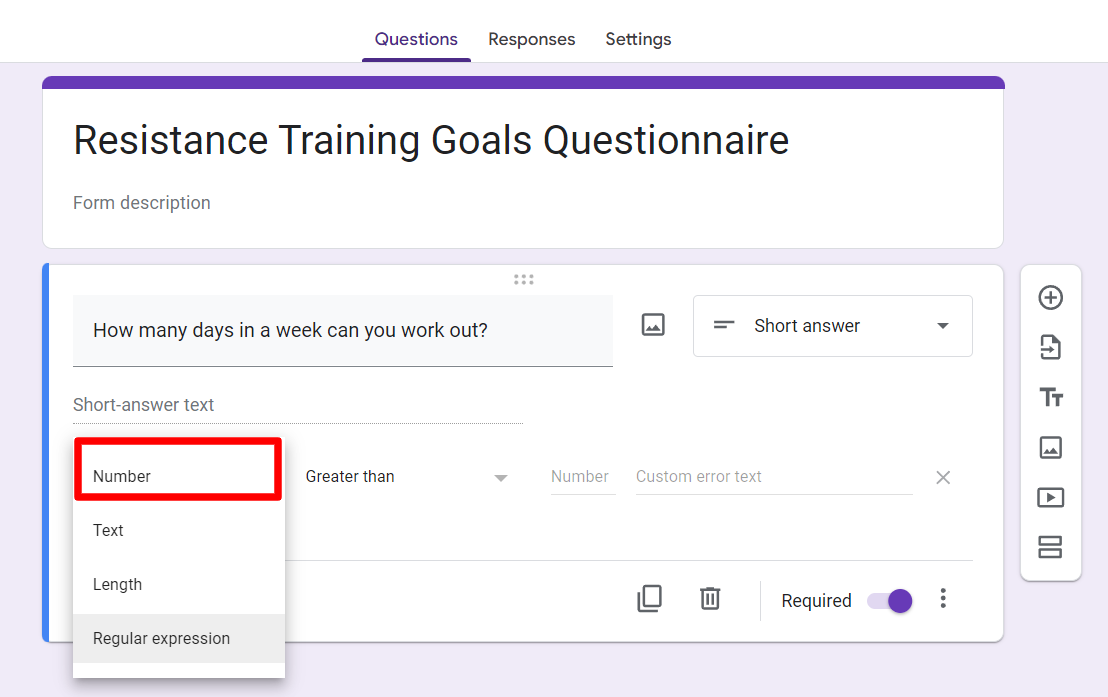
A drop-down menu will appear when you click it, showing all the options available as rules. Here we’ll go with ‘Number’ as we want the respondents to pick anywhere between 3-6 days.
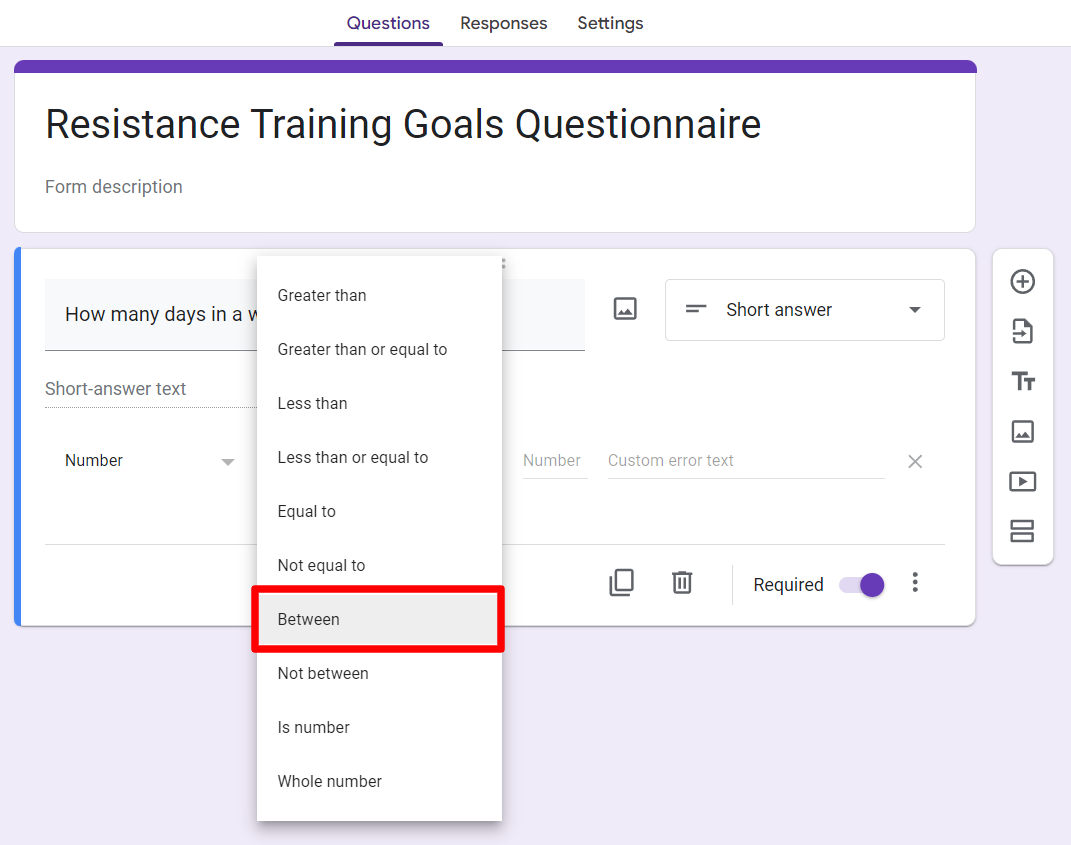
In the following field, there are many options, but we’ll select ‘Between’ as we want the response to contain a number between 3 and 6.
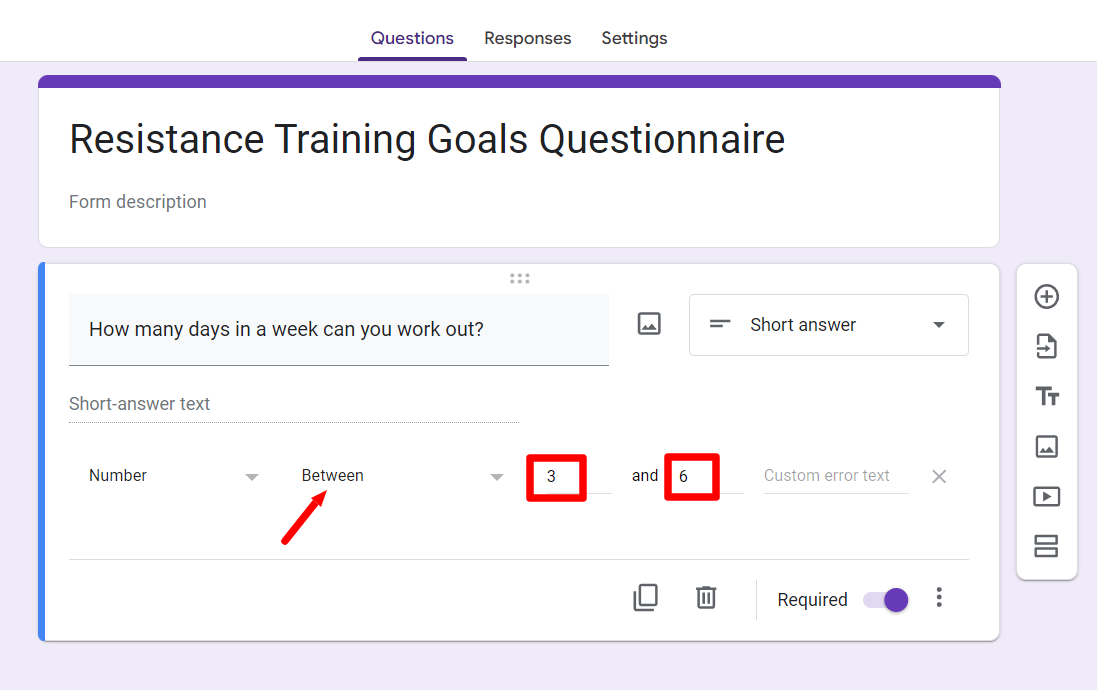
After selecting our second field, we input 3 and 6 to confine the rule within these numbers.
Step 5: Enter an error message
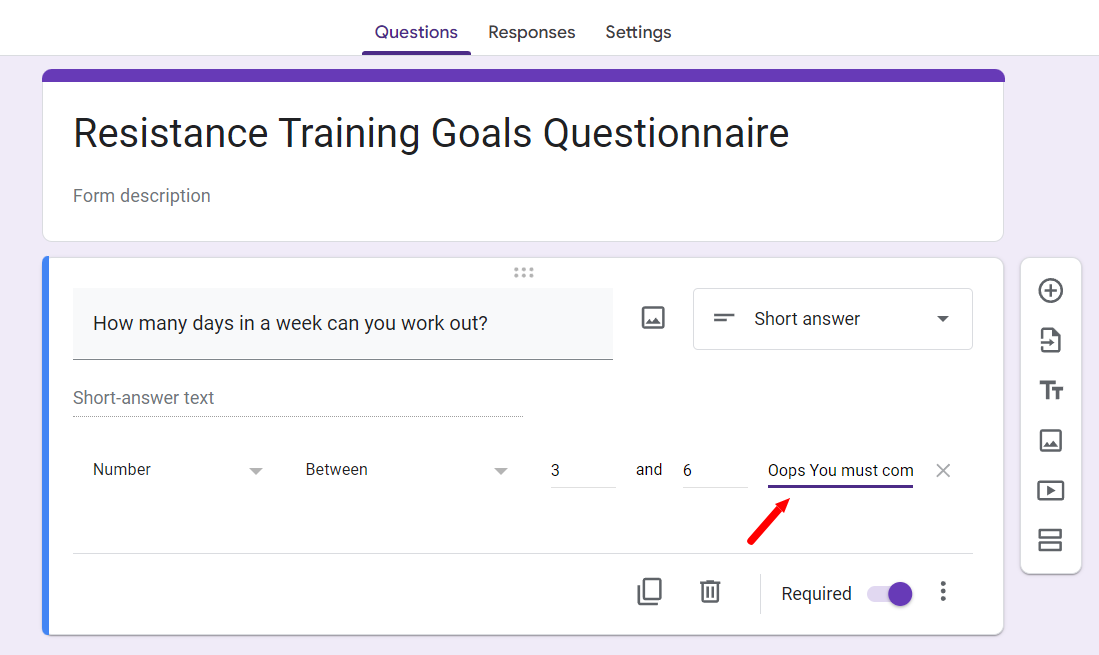
Now that you’ve filled in the details regarding the rule you want to set, it’s time to write a custom error text. A custom error text is the message the respondent gets to see if the respondents don’t answer within the rule's parameters.
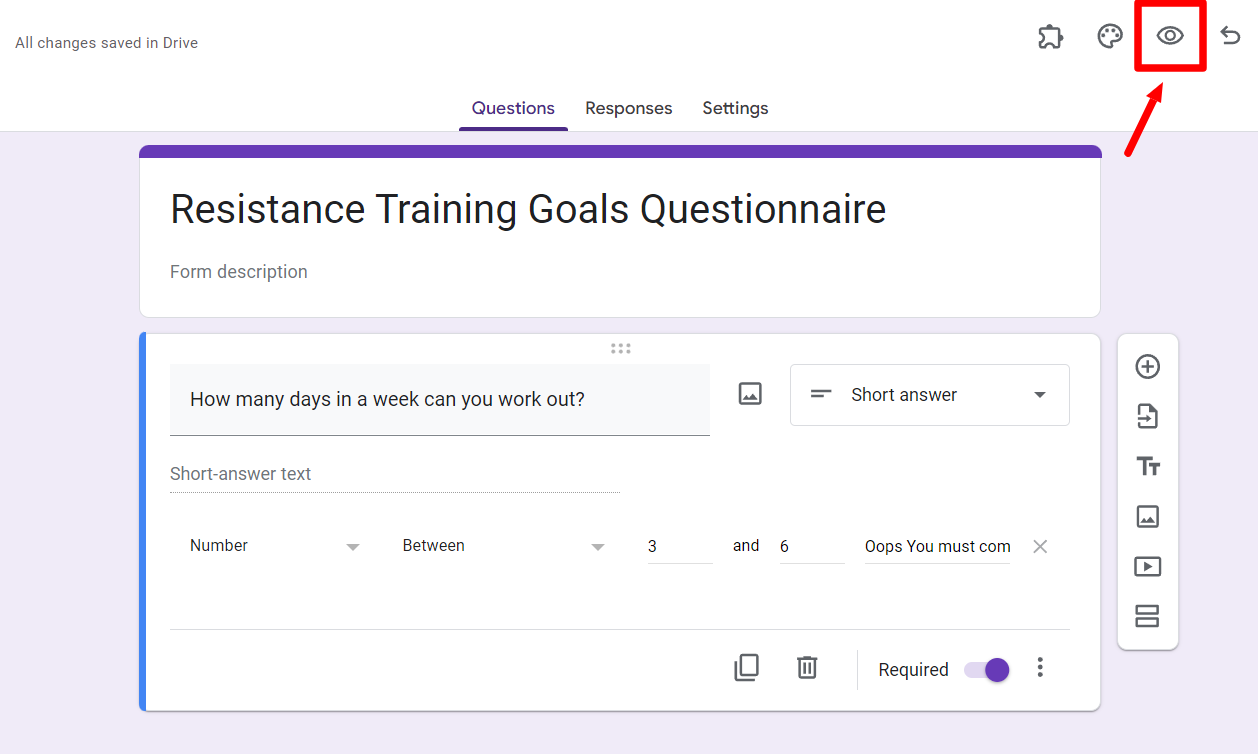
To test the form and Google Forms validation you set up, click on the eye button, which will enable you to preview your form.
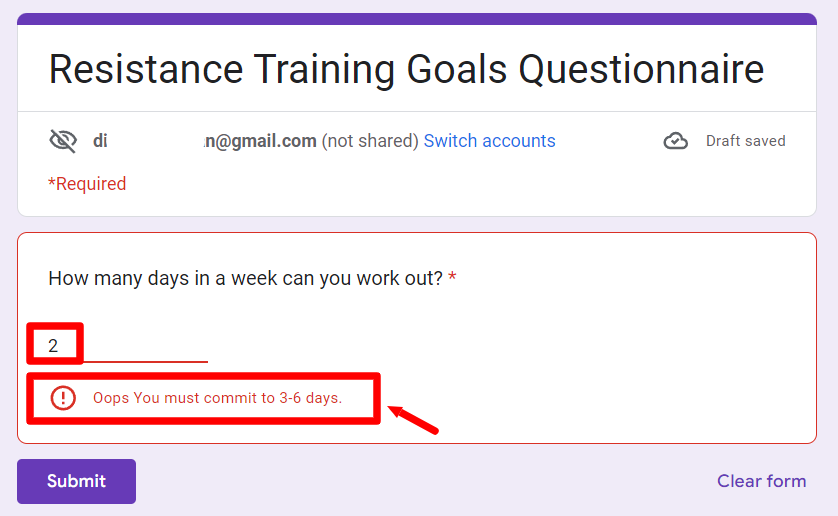
Just type in a response that you know falls outside the parameters that you have set to view your error message.
You may now add more questions and finish up your form. If you’d like to learn more about Google forms, read this post about the icons and functions of Google Forms.
What can you do with Google Forms response validation?
Types of rules you can set for different questions
When creating a form with Google Forms, you can set different rules for different questions. Google Forms have four rules: number, text, length, and regular expression.
The numbers rule lets you set boundaries for how your respondents answer questions in your form. You can choose the lowest and highest number they can enter and how many decimal places are allowed.
The text and length rule allows you to require that responses to questions in your form are a certain length. You can specify the minimum and the maximum number of characters allowed. You can also require that the response is provided in a specific format (e.g., all lowercase).
What is Google Forms regular expression?
The regular expression rule allows you to set a specific pattern for how you want responses to be entered by your respondents.
For example, you could set a response to only accept words that start with a capital letter and end with a period. This means that any phrases entered by your respondents will have to follow this pattern (e.g., "Hello." or "Goodbye.").
If someone tries to submit a response that doesn’t follow this pattern, they will receive the custom error message that you set earlier and be prompted to enter a valid response.
Google Forms response validation and Form Publish work perfectly together
So there it is. Setting up Google Forms response validation is easy and a great way for admins to ensure their forms collect the correct information. Those who use response validation typically use Google Forms for administrative purposes. If that’s you, you should check out Form Publisher!
Form Publisher is a powerful Google Forms add-on that helps you manage your form submission like never before. You can turn your form submissions into professional documents in various file formats and set up an approval/rejection workflow system.
The best part about working with Form Publisher is that you never have to leave the familiarity and ease of working on your favorite platform: Google Forms. Check out the other valuable features of Form Publisher that can elevate your Google forms to the next level.