
If you’re new to Google Forms, then you’ll have a sharp learning curve. After all, there are a lot of Google Forms icons and functions that you’’ll have to familiarize yourself with. Most of these Google Forms icons and their respective functions are grouped in two main areas: the toolbar and the individual question fields. Let's take a look at each one so you can understand the meaning of all the Google Form icons and how to use them.
What do all the Google Forms icons for questions mean?
Add question
The first Google Forms icon you'll see is the ‘’Add Question’’ icon on the right-hand side of the menu. The symbol looks like a plus sign (+) in a circle. This icon allows you to add a new question to your form.

Every time you click on this icon, a new question will be added to your form. You can then type your question in the provided space and choose the answer format you'd like to use.
Question type drop-down
The next function is the “Question Type” drop-down menu. This menu allows you to choose the format of the answer to your question. The most common question types are multiple-choice, short answer, and paragraph.
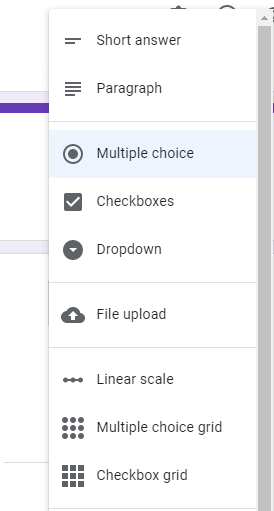
For multiple choice questions, you can provide a list of choices for the respondent to select from. For short answer questions, the respondent can provide a one-line answer. For paragraph questions, the respondent can provide a longer answer in multiple lines.
Import questions into Google Forms
If you’re wondering how to import questions into Google Forms, this is the icon you should be looking at. It will allow you to pull in or import questions into your chosen Google Forms from another Google Form. This can be helpful if you have a pre-existing form that you want to use as a template for your new form.
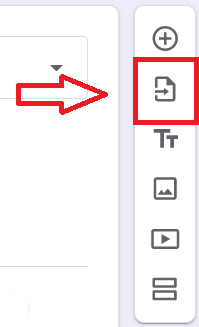
To use this function, click on the icon and select the form you want to import from. All of the questions from that form will appear, and you can select the desired questions to import into your new form.
Add title and description
The next icon is the add title and description icon. This icon allows you to add a title and description to your question. The title will be displayed at the top of each question box, while the description will be displayed just below the title.

Adding a title and description can help provide context for what the question is about and what respondents should expect.
Add image
The “Add Image” icon allows you to add an image to your form. This image will be displayed in the question area of the form. Adding an image can help to make your form more visually appealing and provide additional context for what the question is about.
The icon for this function looks like a mountain symbol in a square and is located on the right-hand side of the menu.
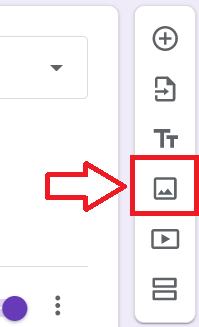
To add an image, click on the icon and select the image you want to use. If you don't have an image saved on your computer, you can also search for an image using the search function provided.
Add video
Similarly, the “Add Video” icon allows you to add a video to your question. This can help add context to a question or provide instructions on how to answer a question.
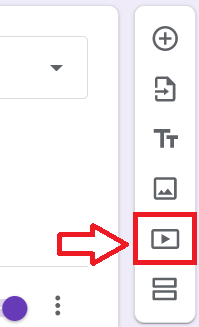
To add a video, click on the icon and paste the URL of the video you want to add. The video will be automatically embedded in your question. You can also search for a YouTube video directly from the pop-up window.
Add section
The “Add Section” icon allows you to add a new section to your form. This can help organize your questions into different sections. For example, you could have a section for contact information and a separate section for questions about the product or service.

To add a new Google Forms section, click on the icon and type the name of the section in the provided space. You can then add questions to that section by clicking on the add question icon.
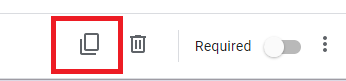
Duplicate question
The “Duplicate Question” icon allows you to duplicate a question that you've already added to your form. This can be helpful if you want to ask a similar question multiple times or in multiple different formats. The icon can be found on the bottom right-hand side of each question box.
To duplicate a question, click on the icon and choose which question you want to duplicate. The duplicated question will be added right below the original question.
Delete question
The “Delete Question” icon allows you to delete a question from your form. This can be helpful if you want to remove a question that is no longer relevant or if you want to reorganize your questions. The icon can be found on the bottom right-hand side of every question.

To delete a question, click on the icon and the question will be permanently deleted from your form.
Required question option
The “Required” option allows you to mark a question as required. This means that respondents will not be able to submit the form unless they answer the question. This option can be found on the bottom right-hand side of every question along with the Google Forms icons for duplicate and delete questions.

To mark a question as required, click on the button next to the required option. The button will turn blue to indicate that the question is now required and a red asterisk will be added next to the question.
What do the top row of icons in Google Forms mean?
Now that we've gone over the different features of the form builder, let's take a look at the Google Forms icons and functions that are located above the form.
Google Forms custom theme
On the toolbar above the form, the first icon is the “Google Forms Custom Theme”. It's located on the top right-hand side of the screen. Clicking on this icon will allow you to change the theme of your form. You can choose from a variety of different themes or create a custom theme.

You can also change things like the font, colors, and header image. To access this feature, click on the icon and make your desired changes.
Preview icon
The “Preview” icon is the icon to the right of the theme icon that looks like an eye. Clicking on this icon will allow you to preview your form. This can help see how your form will look to respondents.

To access the preview feature, click on the icon and a new window will open up with your form. Here, you can also test out the form yourself. To do so, just fill it out and click submit at the bottom.
Undo/redo icons
Next to the preview icon are the “Undo” and “Redo” Google Forms icons. They look like an arrow pointing to the left and an arrow pointing to the right, respectively. These icons work just like the undo and redo buttons on any word processor.

With these, you can undo your last action and redo your last action. These can be helpful if you accidentally delete something or if you want to change something that you've already done.
Send button
Next up is the “Send” button. This is the purple button located in the top right-hand corner of the screen and it says "Send." This button will allow you to send your form via email, social media, or a link. You can also embed your form on a website or blog.

To access this feature, click on the button and choose how you want to send your form. If you’re sending a link, there’s a checkbox you can click to shorten it for your users.
Google menu icon
The last icon on the top right-hand side of the screen is the “More” icon. It looks like three vertical dots. This icon gives you access to additional features such as adding collaborators, making a copy of your form, printing your form, or deleting your form.

When you click on the icon, a drop-down menu will appear with these functions listed.
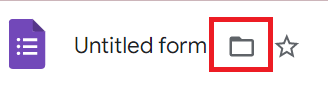
Move to folder option
On the left-hand side of the screen, there is a folder icon. This icon allows you to move your form to a different folder. This can be helpful if you want to organize your forms or if you want to put the form in a shared folder.
To access this feature, click on the icon and choose the desired folder.
Star/Favorite icon
The last icon we’ll discuss is the “Star” icon. This icon allows you to add a form to your favorites. This can be helpful if you have a lot of forms and you want to quickly access a specific form.

To favorite a form, click on the icon. The icon will turn yellow to indicate that the form has been added to your favorites.
That's it! You now know all of the icons on the Google Form creator. With this knowledge, you can create beautiful, functional forms that will help you collect the data you need. As you create more forms, you’ll discover more about what you can do with this amazing tool!
Get more out of your Google Forms with Form Publisher add-on for the Google Workspace!
We hope that this Google Forms guide has helped you understand the icons and functions of Google Forms. If you're looking for a way to add more functions to your Google Form, the Form Publisher add-on is definitely worth checking out.
With this tool, you can quickly turn form submissions into beautifully designed PDFs, Google Docs, or Microsoft Office documents. Install Form Publisher today and start taking advantage of all its awesome features.