

Due to the pandemic, all schools had to shut down and shift to online. During the online mode of schooling, Google Classroom picked up; everyone started taking classes, giving out assignments, and uploading notes on Google Classroom.
Making a Google Classroom and maintaining it can be a bit hectic for so many students in a school. Say you're the moderator of your school and your task is to create 10 Google Classrooms for different teachers. Manually doing this can be a very hectic process, so how do you create a Google Classroom at scale?
That’s where Google Apps Script comes in.
Using Google Apps Script, you can start automatically making a Google Classroom from a Google Sheet, and store the classroom codes in the Google Sheet.
Creating a Google Classroom with Google Apps Script
Step 1: Sample Google Sheet
In this blog, I already have a sheet that contains the name of the class, followed by the name of the teacher, section of the class, room and the description of the class. If you want to work with the Google Sheet when creating a Google Classroom, click here.

Step 2: Write the Automation Script
While you are in the Google Sheet, let’s open up the Script Editor to write some Google Apps Script. To open the script editor follow these steps:
- Click on Tools and open the Script Editor.

2. This brings up the Script Editor as shown below.
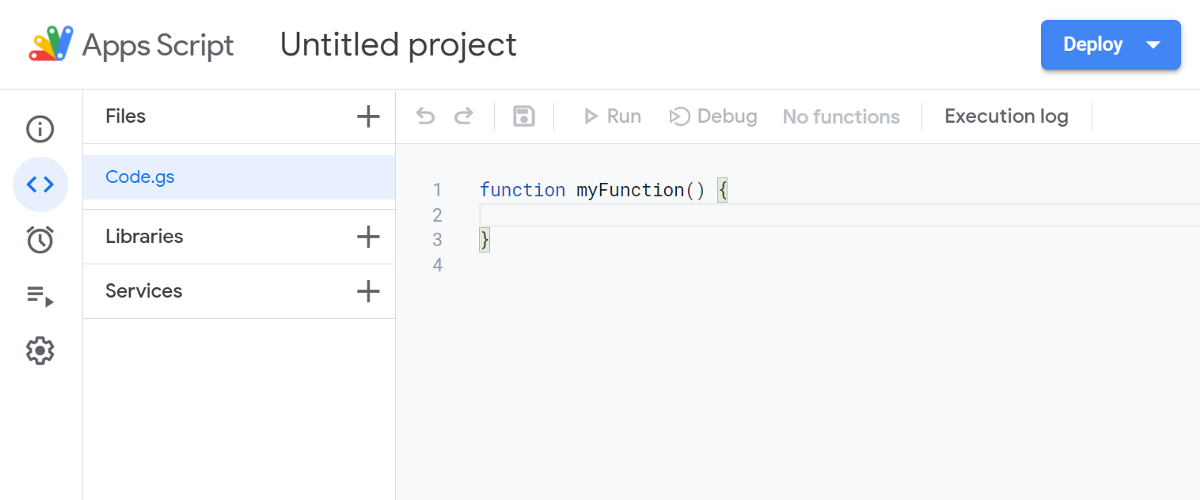
We have reached the Script Editor.
Step 3: Add the Google Classroom API
Before writing the code, we have to add the Classroom API to our Apps Script Project, to do that follow these steps:
- Click on the plus next to Services.

2. Scroll down and click on the Google Classroom API.
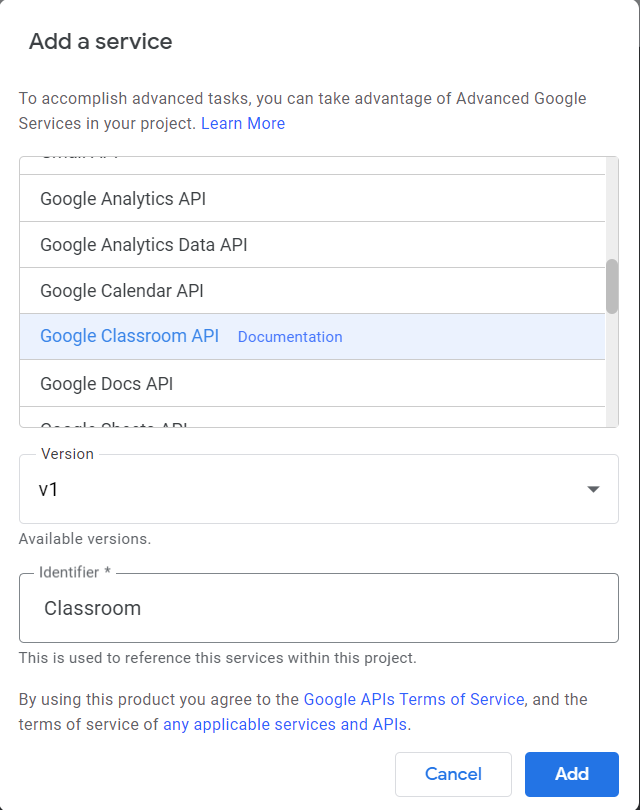
4. After selecting the API, click on Add.
OWNER_EMAIL = "aryanirani123@gmail.com"; //Don’t forget to update this value with your email address :)
function onOpen(){
    const menu = SpreadsheetApp.getUi().createMenu('Custom');
    menu.addItem('Create Classroom','createClasses');
    menu.addToUi();
}
function classroomData(properties){

    const crs = Classroom.newCourse();
    Object.keys(properties).forEach(key => {
        Crs[key] = properties[key];
    })

    const createdCourse = Classroom.Courses.create(crs);
    return createdCourse.enrollmentCode;
}
function createClasses(){

    const ss = SpreadsheetApp.getActiveSpreadsheet();
    const sheet = ss.getActiveSheet();
    const START_ROW= 2;
    const START_COLUMN = 1;
    const LAST_COLUMN= 4;
    const data = sheet.getRange(
        START_ROW,
        START_COLUMN,
        sheet.getLastRow()-1,LAST_COLUMN).getValues();
    const enrollmentCodes = [];
    const nameIndex = 0;
    const sectionIndex = 1;
    const roomIndex = 2
    const descriptionIndex = 3;
    const START_COLUMN = 5;
    const LAST_COLUMN = 1;
    data.forEach(row => {
        const eCode = classroomData({
            name: row[nameIndex],
            section: row[sectionIndex],
            room: row[roomIndex],
            description: row[descriptionIndex],
            ownerId: OWNER_EMAIL
        });
       enrollmentCodes.push([eCode]);
        sheet.getRange(
            START_ROW,
            COLUMN_START,
            enrollmentCodes.length,
            COLUMN_LAST)
            .setValues(enrollmentCodes);
    });
}
Here I have created a function to add a menu to run the code from the Google Sheet. This makes it easier for the moderator to create classes with the click of a button. To learn more about menus, check out the video given below.
To create a menu in the Google Sheet, I started out by getting the UI of the sheet using the getUi() function, followed by using the createMenu() function to create the menu in the sheet.
Every menu that we create has a name and the function that needs to be run on clicking it. So in the additem() function, we have passed the name of the menu, followed by the function that we want to run. After creating the menu, we use the addtoUI() function to add them to the Google Sheet successfully.
function classroomData(properties){
    const crs = Classroom.newCourse();
    Object.keys(properties).forEach(key => {
        Crs[key] = properties[key];    })
    const createdCourse = Classroom.Courses.create(crs);
    return createdCourse.enrollmentCode;
}
Here we have created a function called ClassroomData, where we pass an object properties, containing all the details about the classrooms.
Next, we create a new course using the Classroom.newCourse() function and store it in a variable crs. The properties object contains the following details:
- Name of the Class
- Description of the Class
- Room
- Email address of the class
Next, we are going to assign each of the details to the required variable. For example, to set the name of the classroom, we are going to assign ClassData.name to the crs.name variable. We will be doing the same for all the variables by iterating through each of them.
After we have all the data stored about the classrooms that need to be created in the variable crs. We are going to create the classroom and pass the crs variable as an argument using the Classroom.Courses.create() function.
As discussed previously, we want to paste the enrollment code into the Google Sheet. To get the enrollment code, we are going to use the Google Script setvalues and createdCourse.enrollmentCode functions.
function createClasses(){

    const ss = SpreadsheetApp.getActiveSpreadsheet();
    const sheet = ss.getActiveSheet();
    const START_ROW= 2;
    const START_COLUMN = 1;
    const LAST_COLUMN= 4;
    const data = sheet.getRange(
        START_ROW,
        START_COLUMN,
        sheet.getLastRow()-1,
        LAST_COLUMN).getValues();

    const enrollmentCodes = [];
    const nameIndex = 0;
    const sectionIndex = 1;
    const roomIndex = 2
    const descriptionIndex = 3;
    const START_COLUMN = 5;
    const LAST_COLUMN = 1;
    data.forEach(row => {
        const eCode = classroomData({
            name: row[nameIndex],
            section: row[sectionIndex],
            room: row[roomIndex],
            description: row[descriptionIndex],
            ownerId: OWNER_EMAIL
        });
        enrollmentCodes.push([eCode]);
        sheet.getRange(
            START_ROW,
            COLUMN_START,
            enrollmentCodes.length,
            COLUMN_LAST).setValues(enrollmentCodes);
    });

}
In this function, we are going to get the data that we need to send back to the above function followed by pasting the enrollment code for each of the Google Classrooms created.
We are going to start out by getting the Active Spreadsheet using the getActiveSpreadsheet function, followed by getting the active sheet.
Next, we are going to get the data using the getRange, by passing the following parameters:
- Start Row Index
- Start Column Index
- used the getLastRow function to get the last row
- Last Column Index
After using the getRange function we use the getValues() function to get the data according to the range specified.
const enrollmentCodes = [];Here we have created an object that will contain all the Enrollment codes for each Class.
data.forEach(row => {
    const eCode = classroomData({
        name: row[nameIndex],
        section: row[sectionIndex],
        room: row[roomIndex],
        description: row[descriptionIndex],
        ownerId: OWNER_EMAIL
    });
Previously, we stored all the data about the classes in the data variable, now using the forEach function we are going to go through each of them. Since, the name of the classroom is first, to get the name we wrote r[nameIndex]. This is the same for all the other variables present.
sheet.getRange(START_ROW,
               COLUMN_START,
               enrollmentCodes.length,COLUMN_LAST)
               .setValues(enrollmentCodes);
Now that we have all the enrollment codes, it’s time to paste them back into the Google Sheet. To do that we are first going to use the getRange function to get the exact column for the exact codes, followed by using the setValues function to paste the values to the sheet. In the setValues function, we have passed the object enrollmentCodes that we recently created.
We are done with our code, let’s move towards the output.
Step 4: Check the Output
At the beginning of the blog, we created a function that would add a menu to our Google Sheet, which will be later used to run the code. Select the correct function (onOpen) as shown below and run the program.

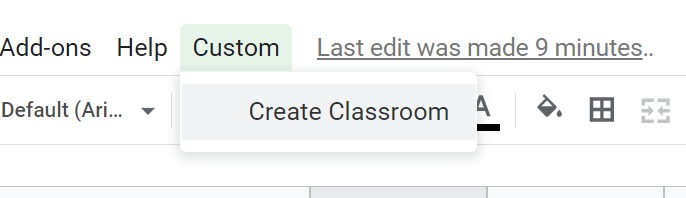
On successful execution, the script will add a menu to the Google Sheet with the name Create Classroom as shown below.
To run the main code, just click on Create Classroom. On successful execution of the main function, you will see the following output.
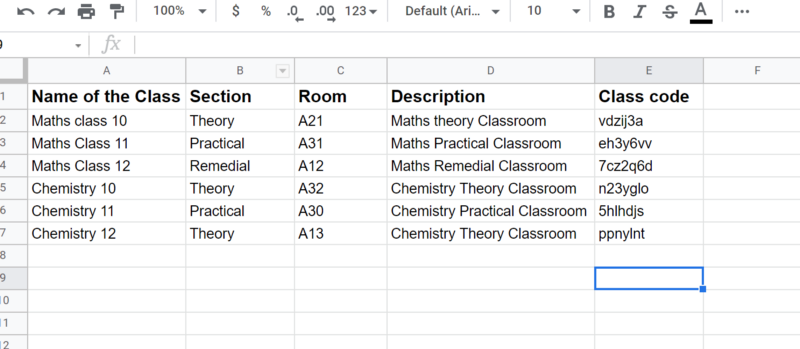
Here you can see the class code has been posted for each of the Classrooms. To check whether the mentioned details have been added to the Google Classroom created, go to and open Google Classroom. Here I have opened a Classroom and all the details have come in successfully.

What is Google Classroom?
Google Classroom is a free learning platform developed by Google for schools that aims to simplify creating, distributing and grading assignments. When you create a Google Classroom, your students will have a much easier time accessing their coursework online, facilitating better learning.
Plus, with other Google platforms, you can easily create quizzes and assignments that are completely compatible. With Google Forms, there are functions like adding points and setting correct answers. See an example of our Mandela Effect quiz for your students. Working with Google Forms and Google Classroom makes your grading process a lot more efficient—and you can further that efficiency with Form Publisher.
Interested in learning Google Classroom? check out this course to know more.
How to Add a Class in Google Classroom
If you know how to create a Google Classroom, you might be wondering how to add a Class to a Google Classroom. Luckily, it’s a simple process:
- Go to Google Classroom.
- Click the + at the top of the Classes page, then “Create class.”
- Enter the class name.
- You can click “Section” to add a description, grade level, or class time.
- You can click “Subject” to enter a specific class subject.
- You can click “Room” to enter location details.
- When done, click “Create.”
That’s it! Thankfully, if you know how to make a Google Classroom with Google Apps Script, these details will be filled out automatically.
Summary: How to Make a Google Classroom: Summary
We saw how easy setting up a Google Classroom with custom details in bulk using the Google Classroom API and Google Apps Script. To sum up:
- Created a menu function to run our code
- Added the Google Classroom API to the project
- Created classes by passing the details for each Class
- Got the Enrollment code for each Class
- Pasted the Enrollment code next to each Class in the Google Sheet.
I hope you have understood how to Create Bulk Classes in Google Classroom using the Google Classroom API and Google Apps Script. You can send your feedback to aryanirani123@gmail.com.