

If you're using Google Forms to collect data from respondents, you may find that you need to delete some of the responses. There may have been multiple submissions from the same respondent, or you may have submitted a test response you want to delete after.
Whatever the reason, it's easy to delete responses on Google Forms. In this tutorial, we'll show you how to delete individual and all responses on a Google Form, and we’ll discuss some important notes about deleting data.
How to delete a response on Google Forms
Step 1: Open up your Google Form to delete responses
The first thing you'll need to do is open up your form. Go to Google Forms and sign in with your Google account. If you need to, create your form and click on the ''Send'' button in the top right-hand corner to share it with your audience. It allows you to share your form via a link, social media, or email.
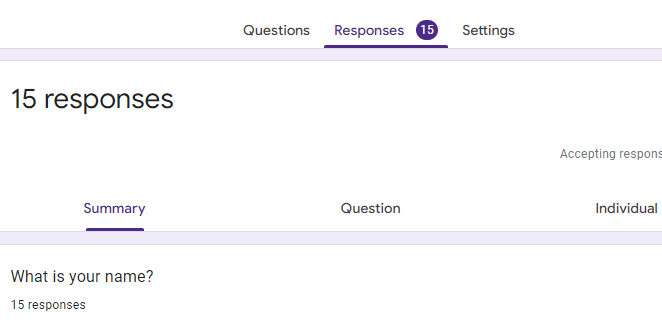
When your respondents begin to submit responses, you'll see them appear in the “Responses” tab automatically. This is the second tab at the top of the form.
Step 2: Find the response you want to delete
Once you've navigated to the "Responses" tab, you’ll see all of the responses. There are three tabs here: Summary, Question, and Individual. Summary provides an overview of results, Question shows the responses to a certain question, and Individual shows the responses from a single respondent.
If you want to delete an individual response from your Google Form, click on the ''Individual'' tab. Scroll through the responses with the arrow buttons until you find the one you’d like to delete.
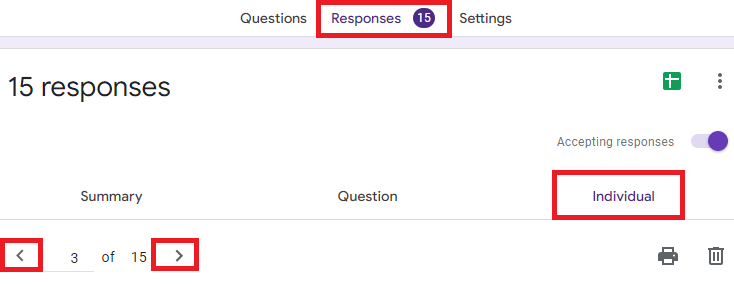
Step 3: Delete the Google Forms response
When you've found the response you want to delete, there should be a trash icon in the top-right corner next to the printer icon. Clicking this will cause a pop-up to appear asking you to confirm that you want to delete the response.
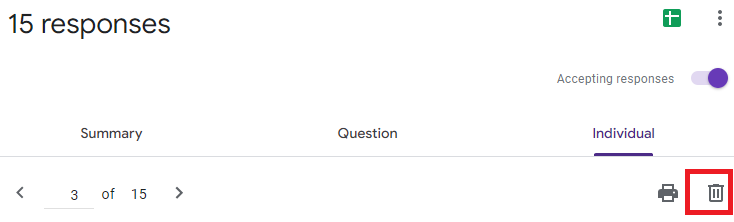
If you're sure, click ''Yes.'' That response will be permanently deleted from the form.
If you’d like to delete all Google Form responses, go to the ''Summary'' tab. Next, click on the three dots "More" menu and select the "Delete all responses" option. A pop-up will appear asking you to confirm that you want to delete all responses. If you're sure you want to erase all Google Form responses, click ''OK.'' All responses will be permanently deleted. If you’re wondering how to reset your Google Form responses, then the steps remain the same.

That's it! You've now learned how to delete both individual responses and all responses in Google Forms.
Important notes about deleting Google Forms responses
Deleted responses are removed from the Google Form permanently
If you’ve deleted the wrong response and are wondering how to recover deleted Google Form responses, then you can only do so in the linked spreadsheet. The reason is that when you delete a response in Google Forms, it is permanently deleted and cannot be recovered on the form. However, because Google Docs and Sheets have a version history feature that allows you to recover previous versions of a document, you can get the responses back there. If you accidentally delete the wrong response in Google Forms, there is no way to recover it, so be careful.
One way to avoid deleting the wrong response is to tag it as "Removed" on your spreadsheet. To do this, you can simply add a column to the spreadsheet and sort which responses you're removing, rather than actually deleting them. This can be a helpful alternative if you don't want to delete a response permanently.
Responses that have gone from Google Forms to Google Sheets are not affected
Fortunately, deleted responses don’t affect the linked spreadsheet. This means that deleting a response in Google Forms will not automatically result in the deletion the corresponding of the row from the linked spreadsheet. You can delete a response from your spreadsheet manually by deleting its entire row. If you want to keep these responses on your spreadsheet but don’t want to see them, you can always hide the row.
A great way to update a spreadsheet for deleted responses is to relink it. This means you’ll have to unlink form and Google Sheets before linking it again. If you want to know how to unlink a form in Google Sheets, here’s the process. Once you've deleted the response, go to the “Responses” tab and click the three-dots icon in the top-right corner. From the options, click “Unlink form.” This will separate the form from the spreadsheet.

Now, let’s see how to connect a google form to a Google Sheet. Click the Google Sheets icon or the “Select response destination” option. Link the form to the same spreadsheet, and it will be updated! This is great if you want to share your form with someone but don't want them to see the responses that you've already deleted.
Deleting responses on Google Forms is as simple as that!
There you have it! You now know how to delete responses on Google Forms individually and all at once. We’ve also shown you how to update your spreadsheet for any deleted responses.
We hope this article was helpful! Remember, always be careful when deleting responses; you can’t get them back once this is done.