
Variety is the spice of life. In the world of research and data collection, an excellent way to add variety to forms is by varying your question formats. Fill-in-the-blank questions maybe commonly known but not a commonly used question format in forms and surveys.
This guide will show you how to make a fill-in-the-blank line into your Google Forms in an easy way. While there may not be a direct feature for doing this, there’s more than one workaround. Let’s get started and make a fill-in-the-blank Google Form!
What is a fill-in-the-blank question in Google Forms?
A fill-in-the-blank question is a sentence, phrase, or paragraph with one or more blank spaces in it. It’s the respondent’s job to fill out then blanks with the appropriate words or information. It's like a word puzzle where you complete the missing parts.
Fill-in-the-blank questions are a versatile way to engage people, gather information, and assess their comprehension of a subject. These questions are often used in fill-in-the-blank quizzes to test your knowledge, memory, or understanding of a topic. However, they can also be used in surveys effectively, just like the linear scale or the checkbox grid question formats.
While there’s no particular feature for adding the fill-in-the-blank question format in Google Forms, it can be done. There are two ways to insert a fill-in-the-blank question in Google Forms. It’s not difficult either. We’ll walk you through it step by step below.
How to make a fill-in-the-blank line in Google Forms
Step 1: Open up your Google Form
Navigate to your Google Forms account.
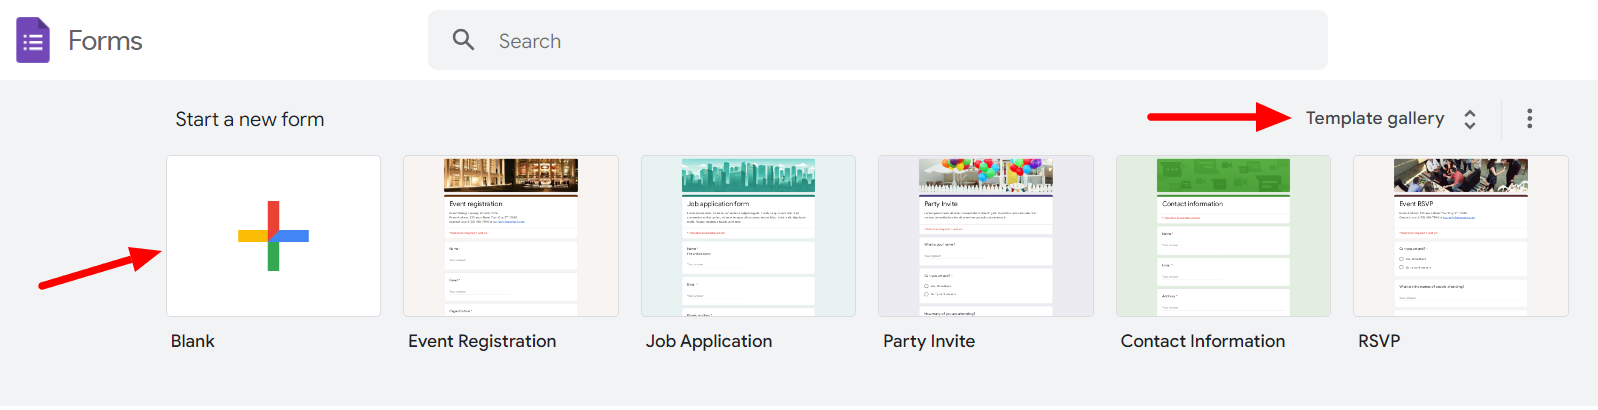
Start a new form by clicking the “Blank” button or choose a pre-made template from the Template Gallery.
Step 2: Add a new question
If you’ve started a new form, you’ll find that by default, a multiple-choice question will be added.
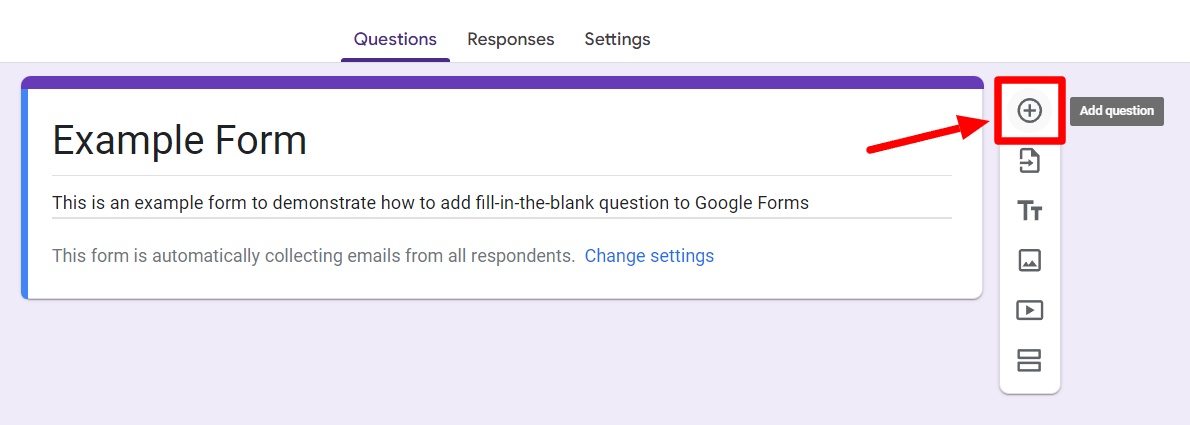
If not, or if you’re working with a template, add a new question by clicking the “Add question” button on the floating menu next to the form.
Step 3a: Choose a multiple-choice question
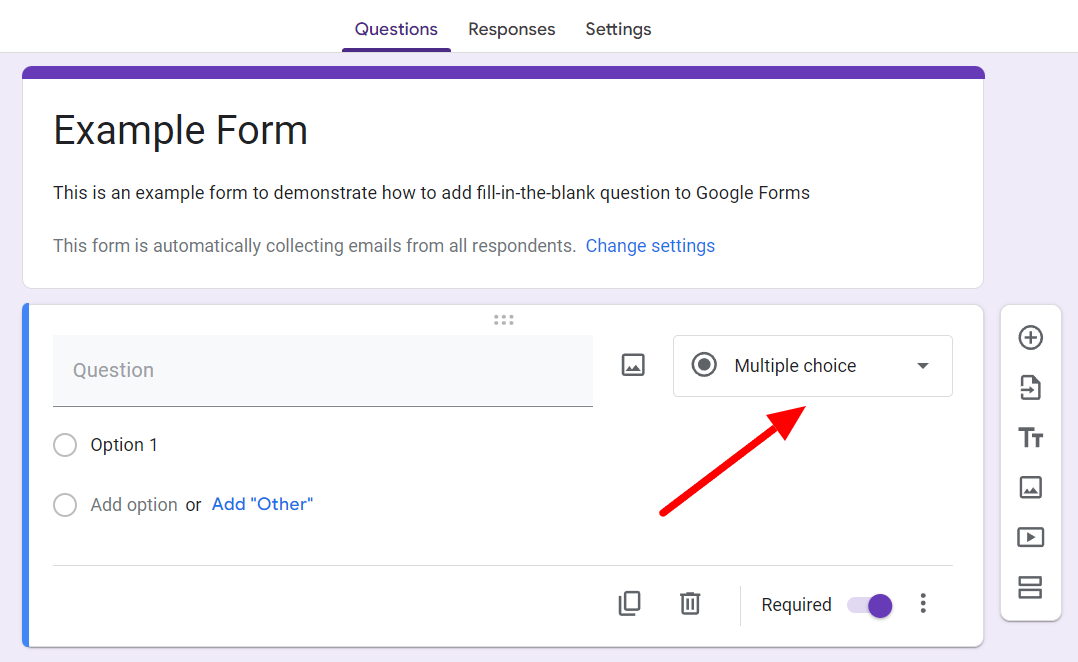
For the first method, ensure that you’ve selected the multiple-choice question format.
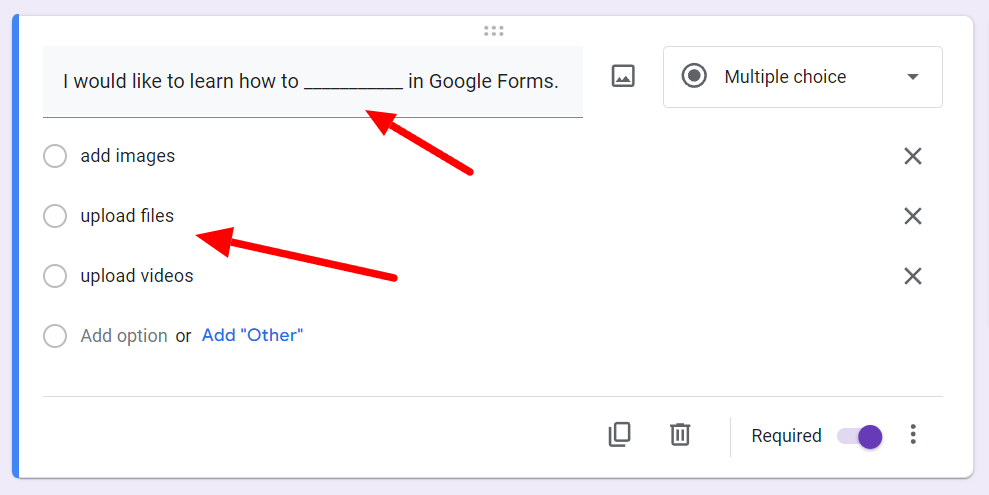
Now, add your question to the question field, leaving a blank at the appropriate spot. You can add the blank by using the underscore key on your keyboard. Add the answer options below. This option is well-suited if you have pre-decided responses for your fill-in-the-blank question.
Step 3b: Choose a short answer question
For the second method, add a question, as shown above.
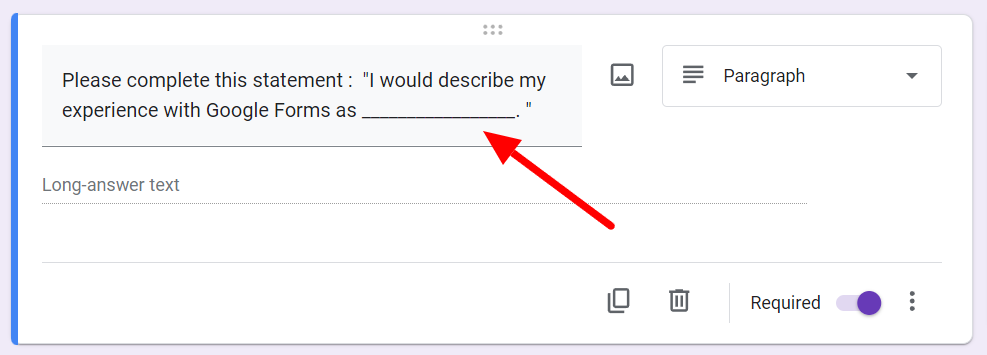
Now, add your question to the question field and leave the blank in the appropriate spot.
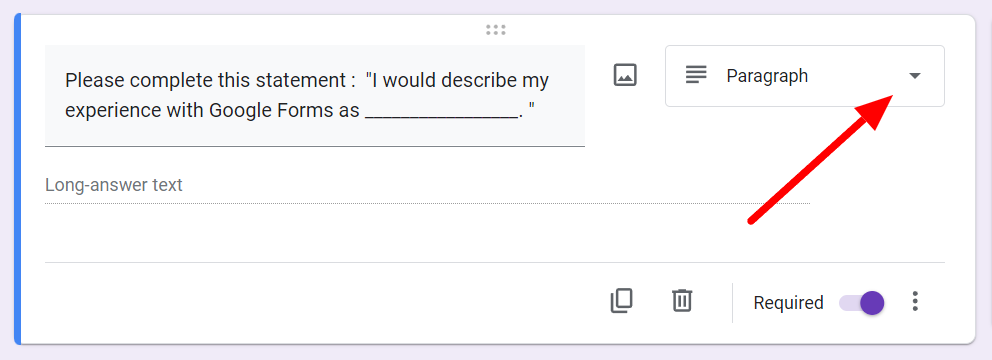
Click on the question format button to reveal all the question format options.
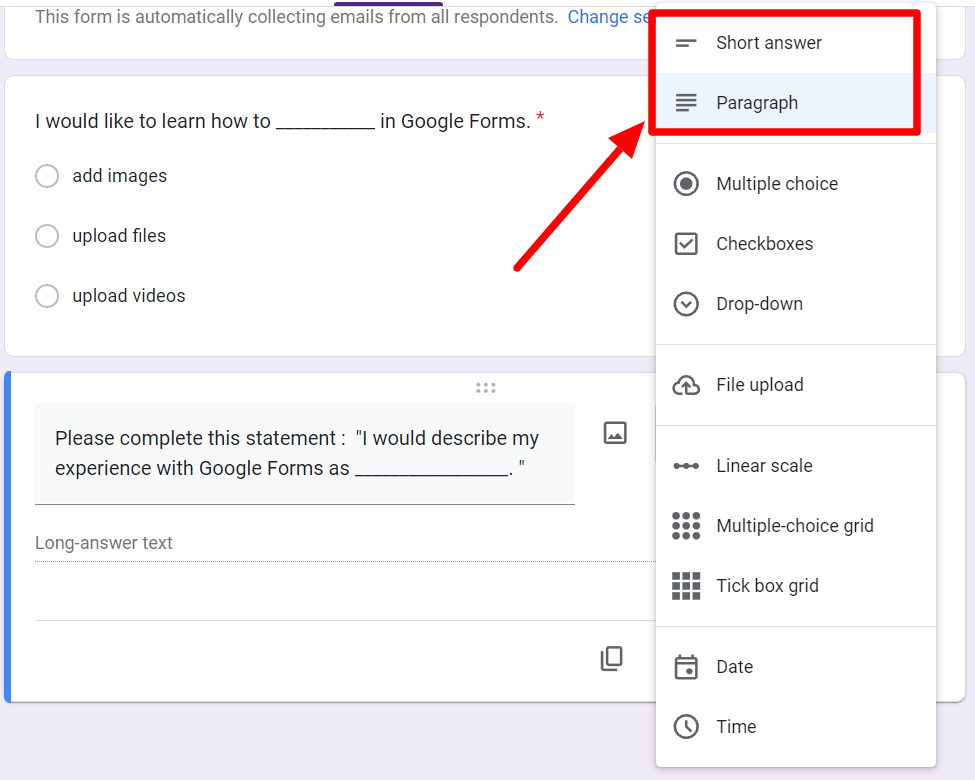
Pick either of the two descriptive answer formats (short answer or paragraph), depending on how you want your respondents to answer.
This option is better suited when you want the response in the respondent’s own words like, for example, when collecting feedback or generating qualitative data.
Step 4: Finish up your form
Once you’ve successfully added your fill-in-the-blank questions, you can move on to finishing your form. This means checking a few essential settings before sending out your form. Here’s what to check for:
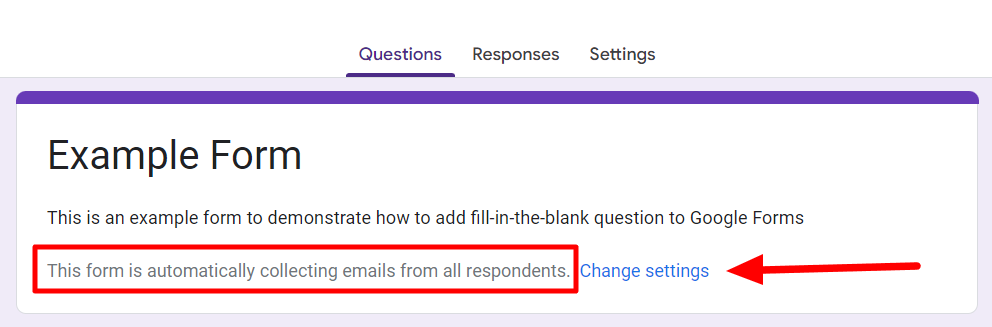
- Collecting Emails: Do you want your form to collect emails? If your form is collecting emails, It’ll be reflected right under the description of your form. To change that, click on the “Change settings” button.
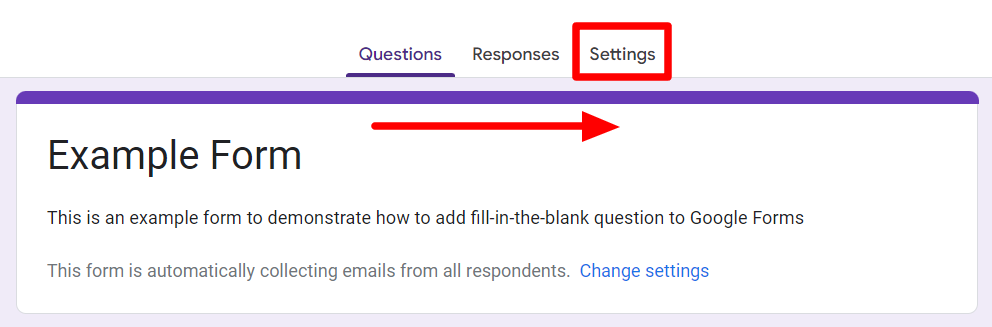
You can also toggle to “Settings” from the “Questions” tab.
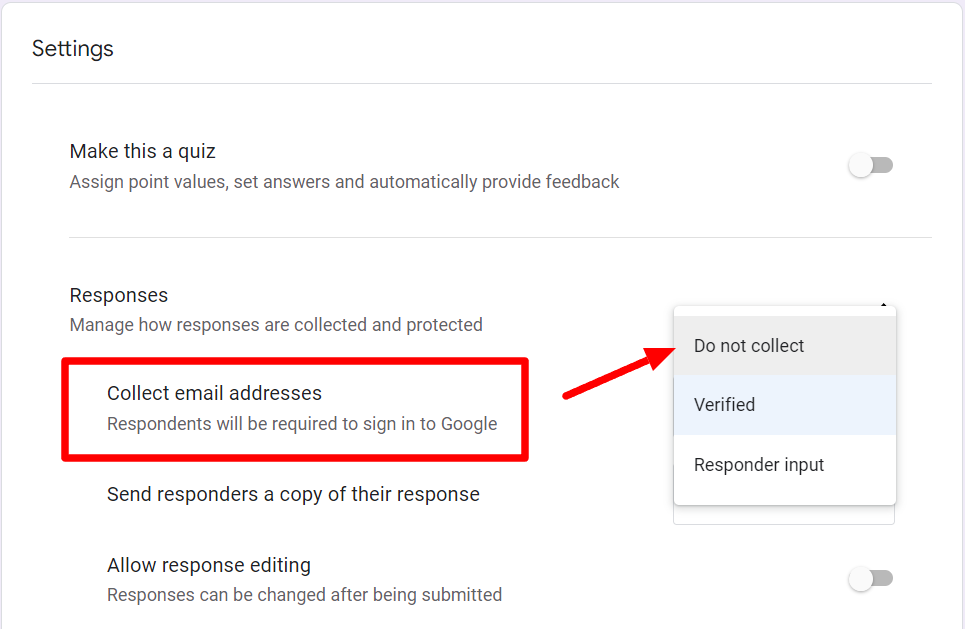
Under the “Responses” tab, select your preferred setting for whether you want to collect emails. You can also change other settings like ‘response editing’ or ‘sending responders a copy of their responses.’
If you’d like to send a copy of responses to people who respond to your form, there’s a better option: Form Publisher! Form Publisher allows you to send personalized and customized response summaries.
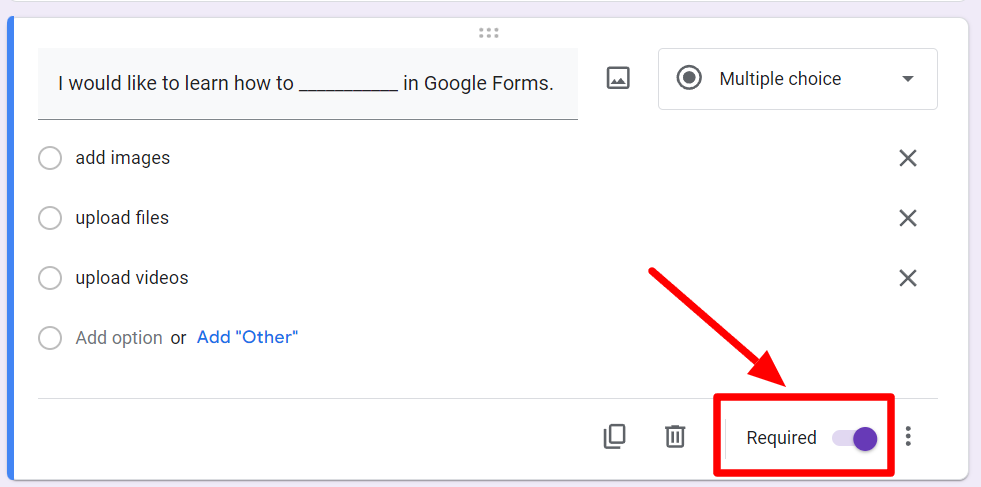
- Required Questions: If you have questions on your form that you don’t want your respondents to skip, simply toggle the ‘Required’ button to enable it. This also applies to your fill-in-the-blank questions.
With that, your form is done!
Step 5: Start collecting responses!
It’s time to send your form now.
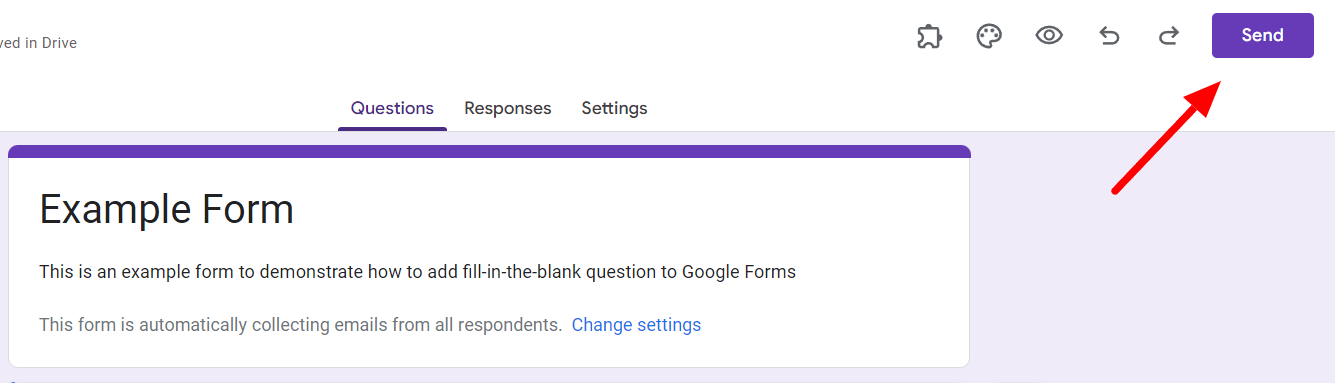
Click the ‘Send’ button in the top right corner.
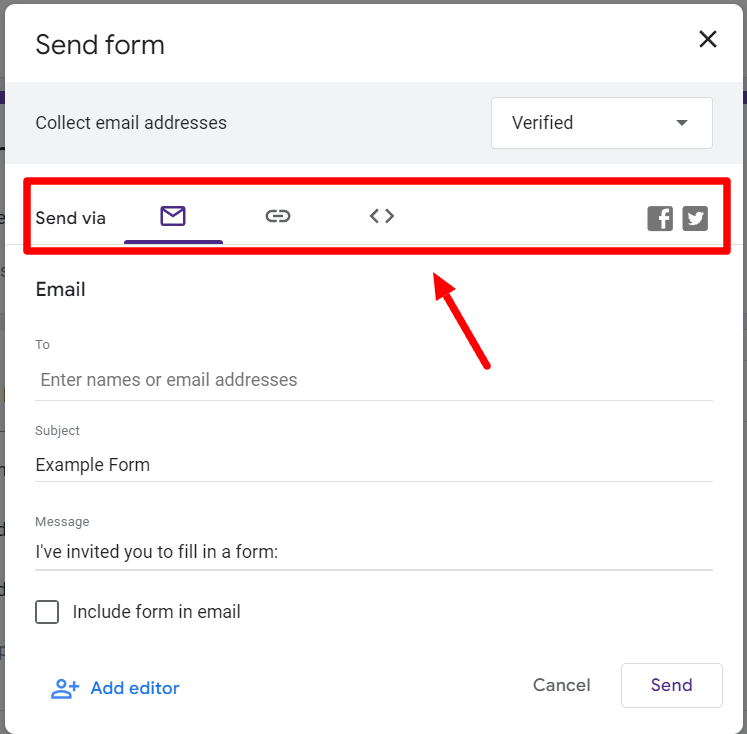
Choose how you want to share your form: by email, hyperlink, embedding, or social media, and click Send. Now, all that’s left to do is wait for the responses to collect.
Need to duplicate your Google Form? Click here to learn how.
Make better forms and surveys with Form Publisher
If you’d like something to give your Google Forms an edge, why not try Form Publisher? Form Publisher is a Google Forms add-on that instantly gives you more functionality and ease.
You can transform your responses into individual documents with it. You can store those documents in your preferred locations on Google Drive in your preferred file formats. You can even create robust workflow systems with Form Publisher if you like. Interested? Explore Form Publisher.