
Are you tired of sending out the same one-page Google Form and are looking to take your forms to the next level? This guide is for you! There are a lot of different Google Forms features to make your forms more in-depth and complex. But how can you learn what they are?
We’ll walk you through how to use the advanced features of Google Forms confidently. By the end of this article, you'll have the skills you need to create advanced and comprehensive forms using Google Forms. Here we go!
The advanced Google Forms creation functions
Below, we’ll explain a few advanced Google Forms features that often go unnoticed, but being aware of them is the key to creating more efficient forms. Some of these features could enhance your forms (e.g., creating sections), and some could change how you interact with your Google Forms (e.g., receiving email notifications for responses).
How to create sections in Google Forms
Ever wondered how to create sections in Google Forms? Sometimes, it makes sense to split up a long form into shorter sections. You may have questions that must be separate from the others or may want to split up your form into easy-to-fill-out pieces.
To create separate Google Form sections, go to Google Forms and open up the form you want to work on.
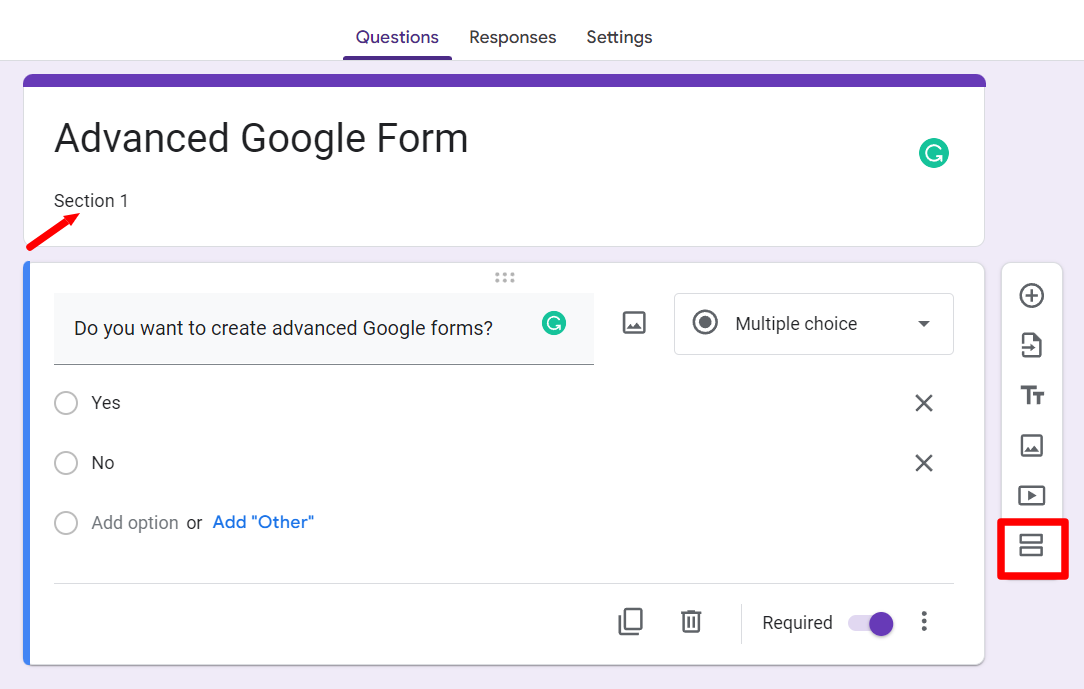
Select the “Add section” button from the drop-down menu to add a section to this form.
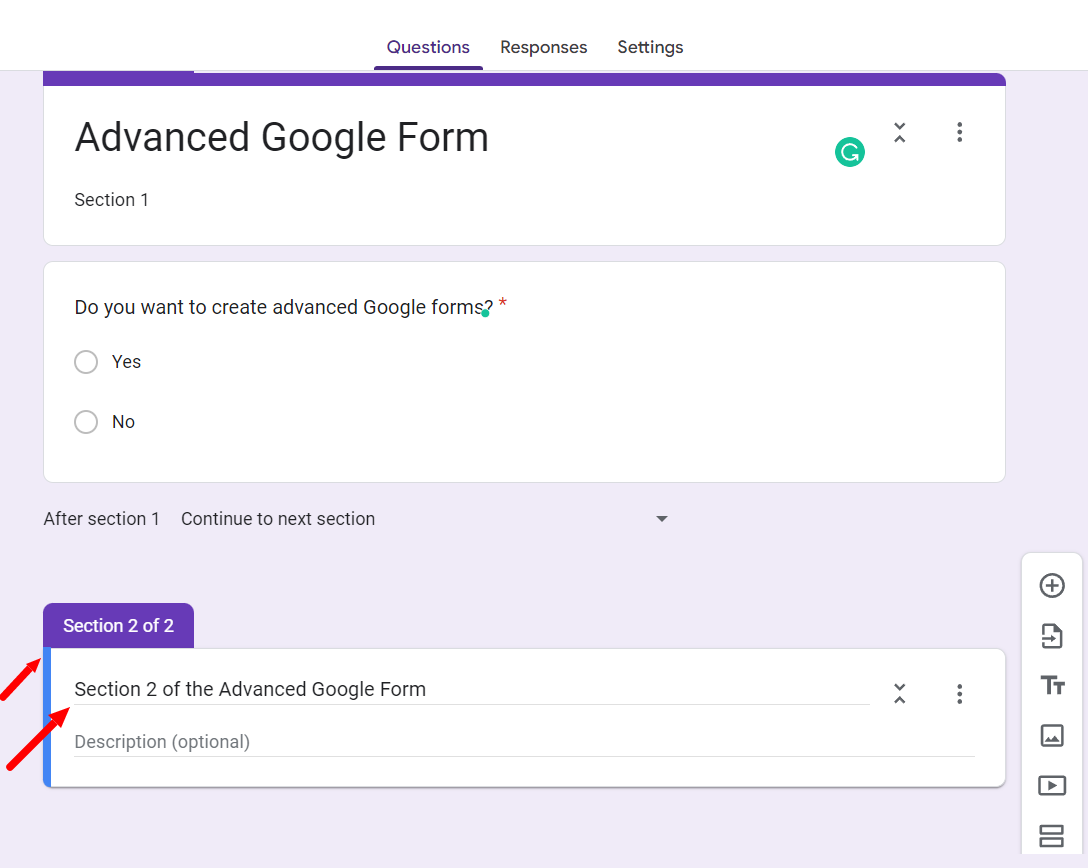
Doing this will split your form and introduce another section to it.
Now, you can enter a title for the section and add questions. To add another section, just repeat this process.
Branching and skip logic in Google Forms
Now that you have separate Google Form sections, you may realize that not all respondents need to answer all questions. If now your question is how to skip sections in Google Forms depending on the answers of your respondents, here’s where conditional questions come in.
This feature allows you to skip specific questions depending on the respondent's answer. For example, if someone answers “Yes” to a question, you can set it up so the following question in the form is skipped and the respondent is taken to the next relevant question. This skip logic in Google Forms allows you to create more personalized forms and makes it easier for people to fill them out.
Here’s how to set it up within your Google form:
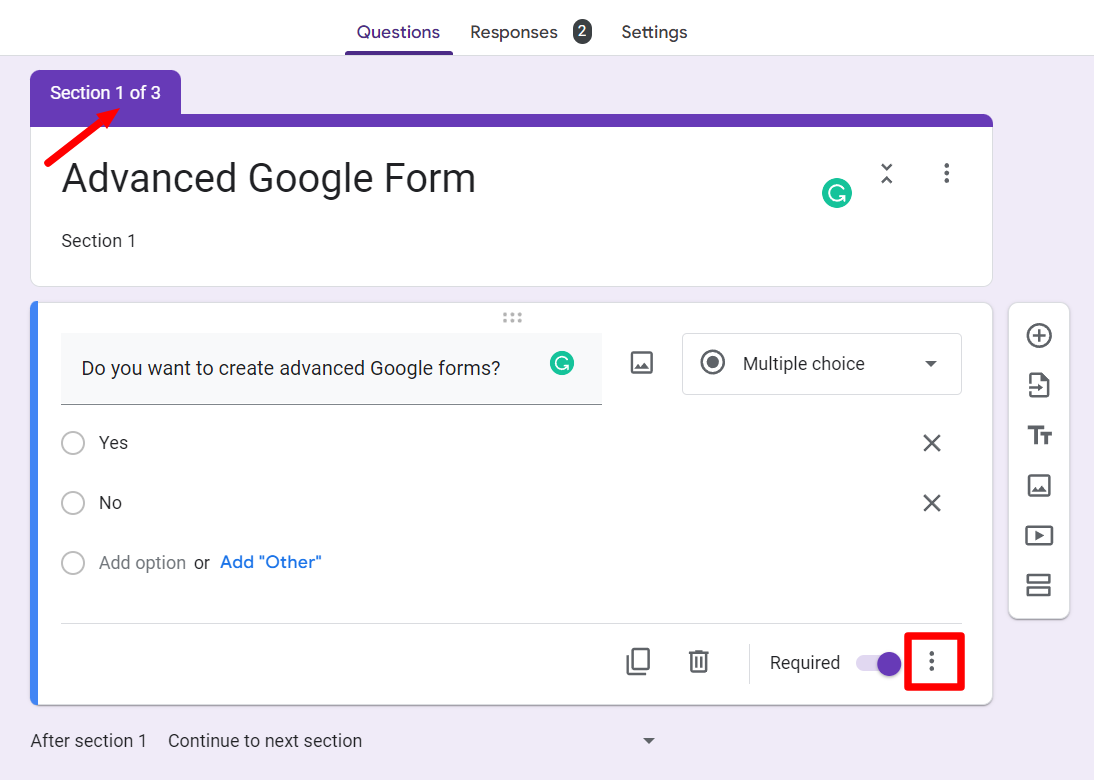
Go to the section where you want your form to split into different branches. The example form above has three sections shown by “Section 1 of 3” on top of the form. From here, we want to display a different section of the form to the respondents based on their answers.

Find the more options button (the three dots) at the bottom of the form and select “Go to section based on answer.” This will open new fields next to the answers.
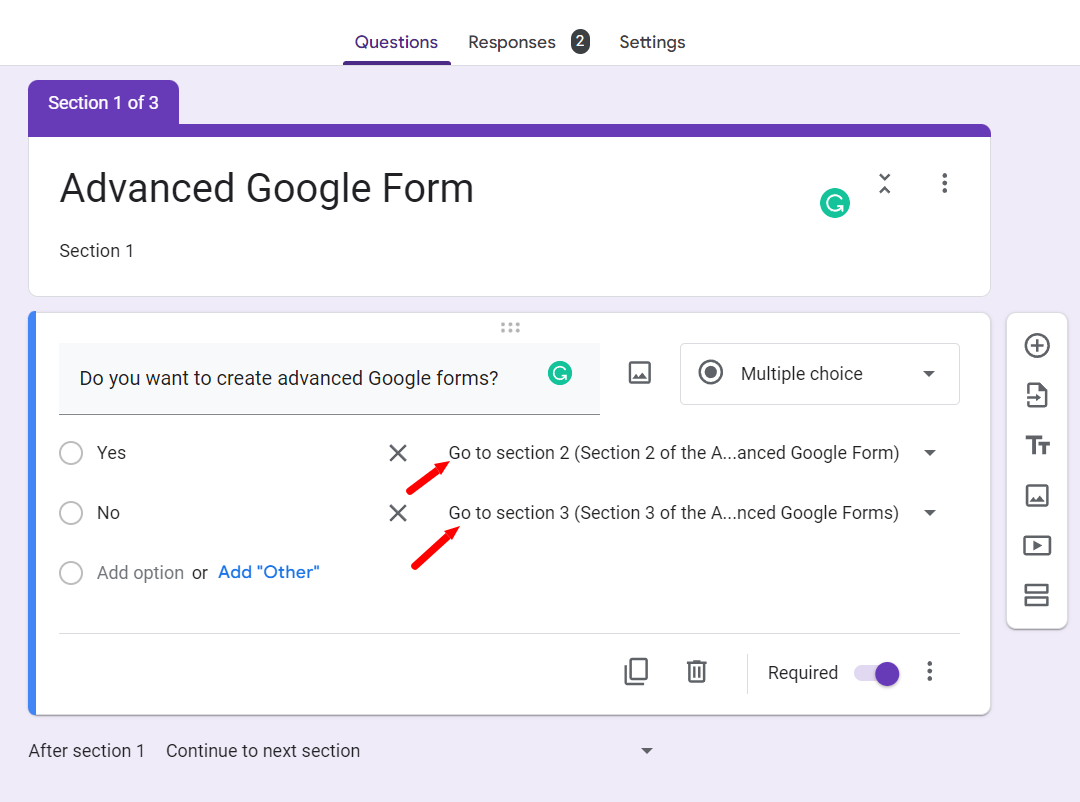
Now, using the drop-down menus next to your chosen responses, select which section of the form you want to divert the respondents to. You’re done!
Creating different Google Forms sections and using conditional questions in your forms are easy ways to take your forms to the next level. Read more on the Form Publisher blog to learn more about these features.
Choose a response destination
Now that you’ve started customizing your form for ease and efficiency, it's time to learn where you are collecting the responses. By default, Google Forms responses get collected in Google Sheets.
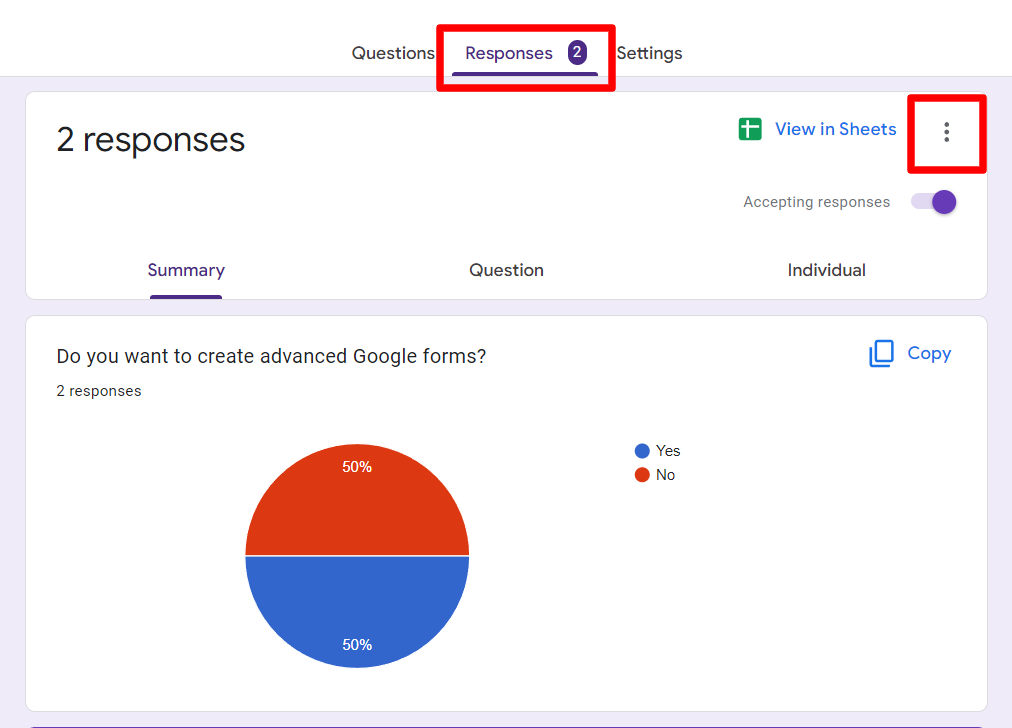
To choose a response destination. Go to the “Responses” tab and click the more options button in the top right corner.
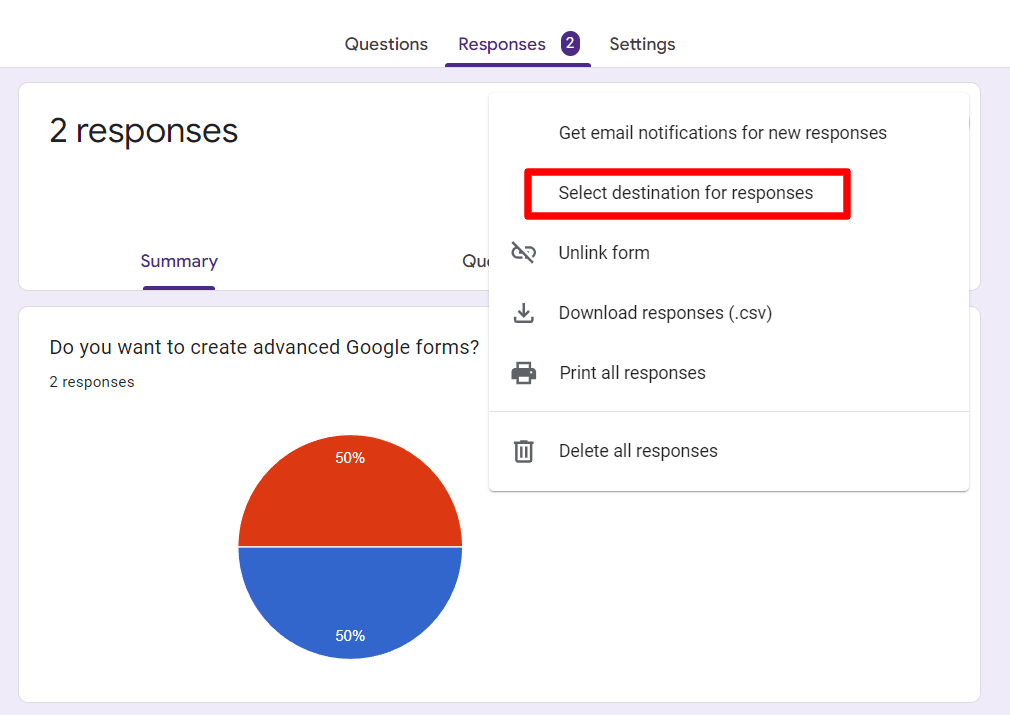
Click the “Select destination for responses” button. Another window will appear where you’ll have the option to select your destination folder.
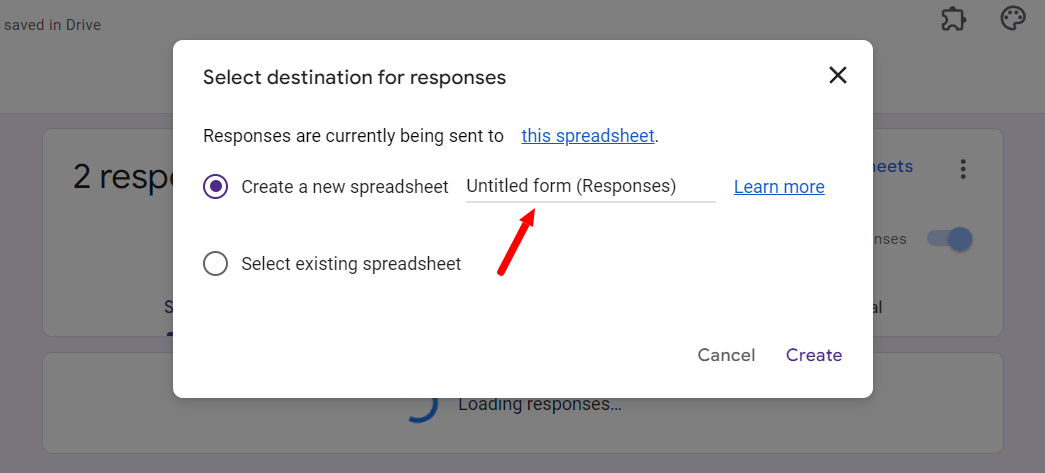
You can choose to create a new spreadsheet or have the responses collected in a pre-existing spreadsheet. Once you’ve selected your preferred option, press “Create” and you’re done.
Create a document with form responses
Now that you’re sending your responses to a spreadsheet of your choice, it’s time to get a little savvier. Google Sheets data is a reliable yet barebones way of saving the responses to your Google Form.
Sheet data is helpful; however, it could be a bit more presentable. The easiest way to create form response documents is Form Publisher. Form Publisher is a powerful add-on to Google Forms that can take your form responses and convert them into professional documents in various formats like PDF, Google Docs, and Microsoft Office. Learn how it works here.
Essentially, each respondent can be provided with a doc of responses for their reference. You can even loop in colleagues so they can approve responses. The best part is Form Publisher takes care of all of this, no coding required!
Auto-grade your Google Forms quizzes
Google Forms’ versatility is what makes it so popular. One of the many ways you can use Google Forms is in the form of quizzes. Quizzes need grading, but this is easily done, too.
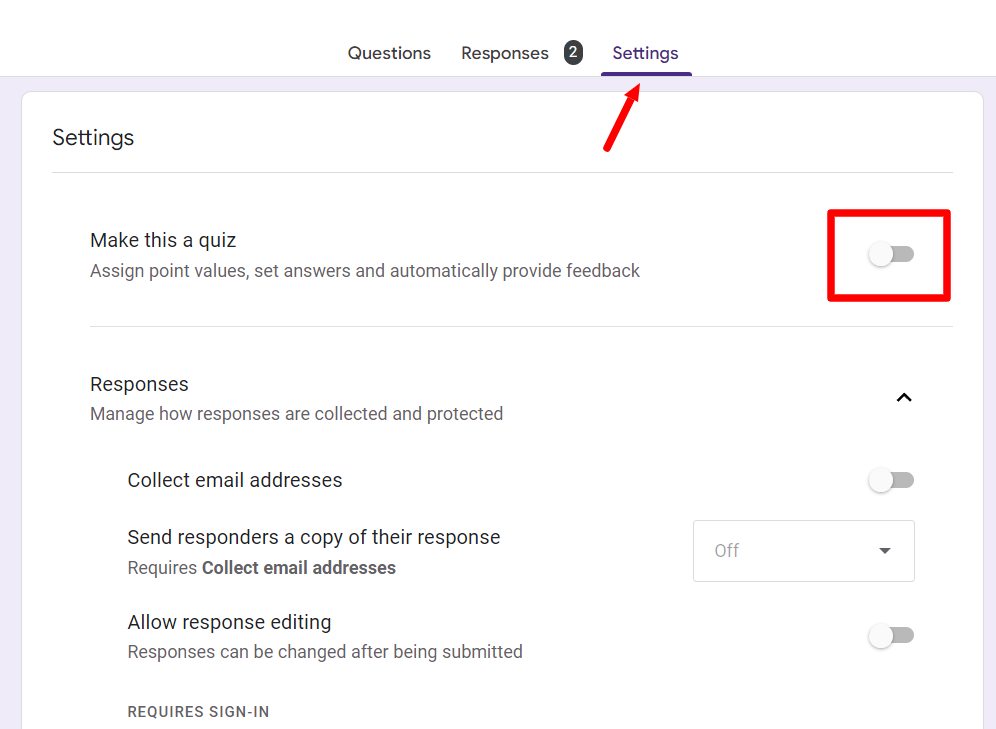
Go to the “Settings” tab of the form you want to turn into a quiz and enable the “Make this a quiz” feature. Doing this will open up a host of new options for you like this:
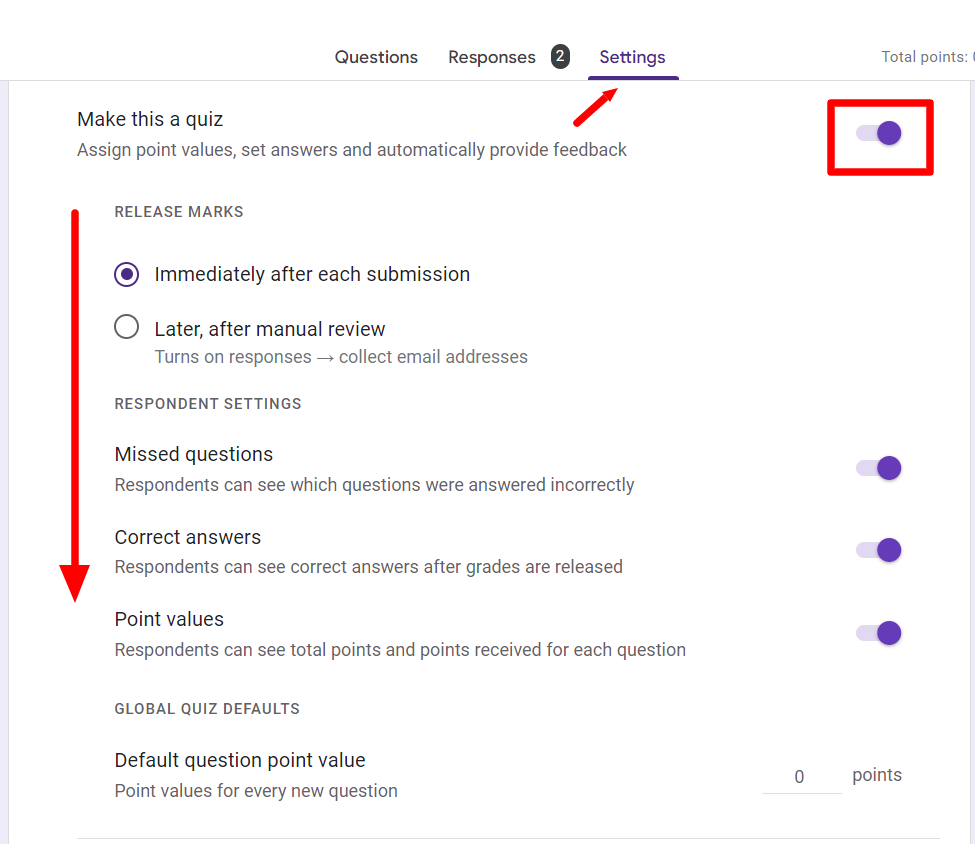
Here, you can configure how you want to grade the quiz. You can set a point value for each question and see the score's visibility options.
Here, you can also collect the respondent's email addresses, send them a copy of their responses to your quiz and also choose to allow them to change their answers if you want. Read How to Grade Google Forms to learn in detail about this feature.
Receive email notifications on form submission
If you’re all set with your form and have shared it, you may be excited to start receiving some responses.
An easy way to make the waiting easier is to set up email notifications so that every time someone submits their responses to your form, you get notified by email. Setting up email notifications is easy, but use the feature wisely if you expect many responses, as your inbox may get flooded.
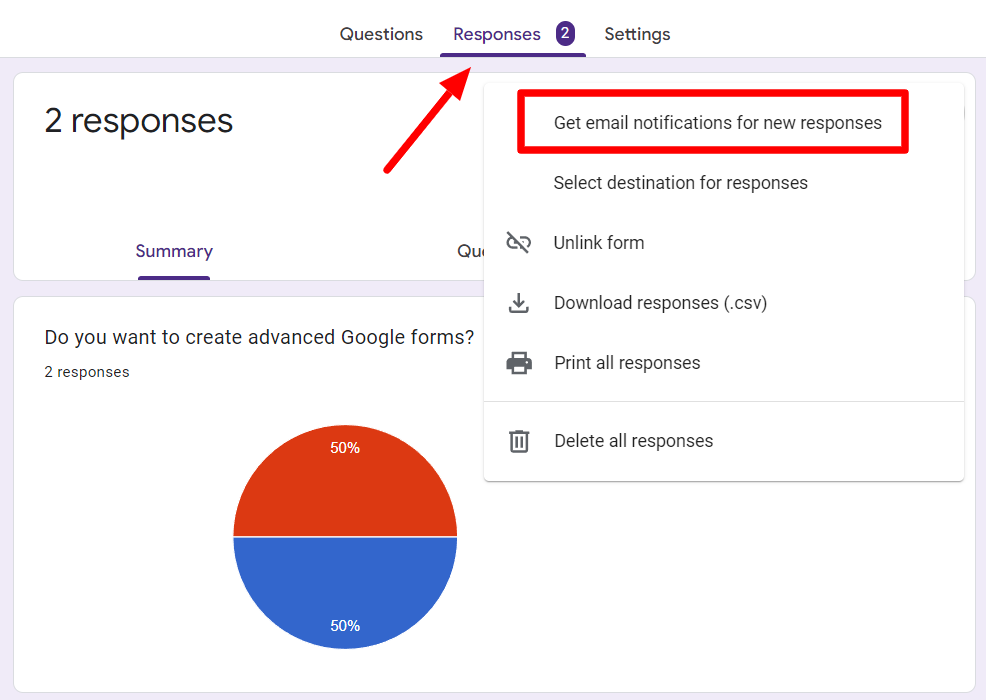
To set up email notifications, go to the Responses tab on your Google Form. Now press the More Options button and click “Get email notifications for new responses.” You will get a confirmation saying “Email notifications enabled.” You’ll now receive notifications on the email address you used to sign into Google Forms.
You can add another level of refinement to this feature by using Form Publisher and setting it up so that you and your collaborators can receive the form document and the email notification.
Unlock even more advanced Google Forms features with Form Publisher
Google Forms is a powerful platform. Advanced Google Forms features like creating sections, skip logic branching, choosing folder destinations, and more can help you easily create more efficient and functional forms.
While most advanced features in the Google Forms platform are intuitive, creating professional documents from Google Sheets data can be quite challenging. This is where Form Publisher can help. It’s a Google Forms add-on that creates customized, professional documents from the sheet data that originates from your responses in a few clicks. You can get started with Form Publisher for free!