

When you create a Google Form, you’ll need to share it. One popular way to do this is to embed a Google form in emails so recipients can fill out the form and submit their responses from their inboxes. Embedding a Google Form in an email is a great way to increase response rates and gather data from a wider audience.
So, how to embed a Google form in an email? In this article, we'll walk you through the steps for embedding a Google Form in an email, step by step. We’ll also discuss how to send out Google Forms to a large group of people.
Ready to get started? Let's go!
How to insert a Google Form into an email
Step 1: Create your Google Form
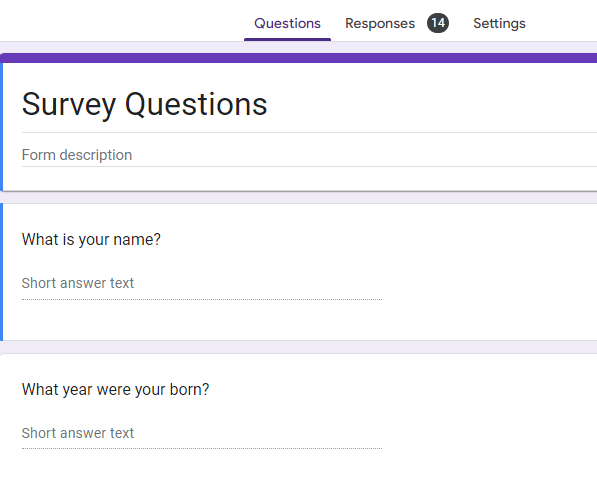
To embed Google Forms in emails, you'll need to first create a new Google Form. Creating a form is easy. You just need to go to Google Forms, sign in, and create a new form by pressing the “+” button. Then, you can give your form a title, description, and questions. You can customize your form’s theme, along with the font and images. Once you’re finished creating your form, you can hit the “Preview” button to see how it looks.
Click here to learn how to add an image header for your Google Forms
Step 2: Click “Send”
Once you're happy with your form, click the "Send" button in the top right-hand corner.

This going to open a menu for sharing your form. There are a few different ways to send your form, mainly via email, link, social media, and HTML code.
Step 3: Embed your Google form or choose another send option
You have a couple of options here. If you’re wondering how to email a Google Form, sharing via email is a pretty straightforward option. Whenever you do this, a Google Forms email is sent out to whoever you enter with your form.
To embed a Google Form, you’ll need to copy the Google forms embed link and insert it into your own email. This would be best if you already have an email drafted out and want to simply add the form to it. This link could also be used to create a QR code.
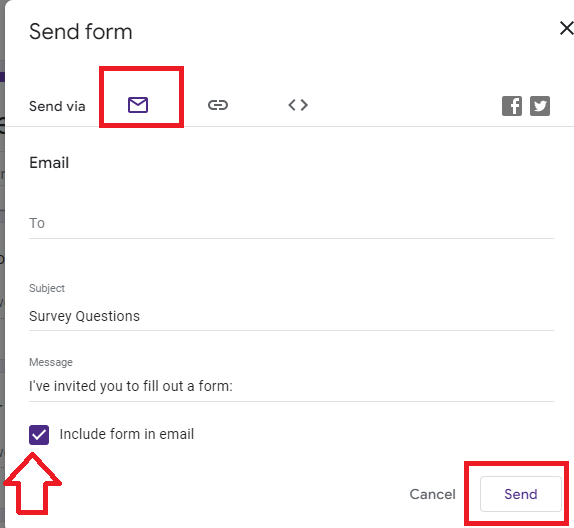
To share your form via email, click the "Email" icon and enter the email addresses of the people you want to share your form with. You can also add a brief message to go along with your form. Finally, don't forget to check the ''Include form in email'' box at the bottom of the screen. This checkbox is important if you want to embed your Google form in the email's message body.
Step 4: Send your email with the embedded Google Form and track responses
When you're ready, click the "Send" button to send your form to your recipients. That's it! Your recipients will now be able to fill out and submit your form directly from their inboxes.
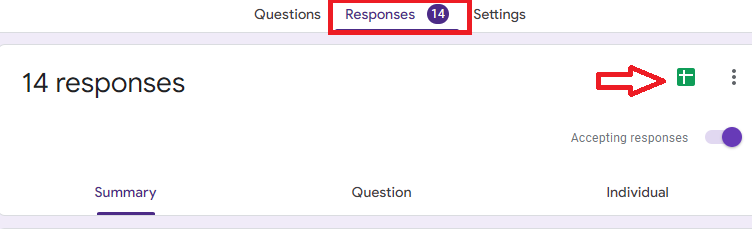
If you want to track responses to your form, you can do so by going to the "Responses" tab in Google Forms. From there, you can see how many responses you've received, view individual responses, and even connect your data to a Google Sheet.
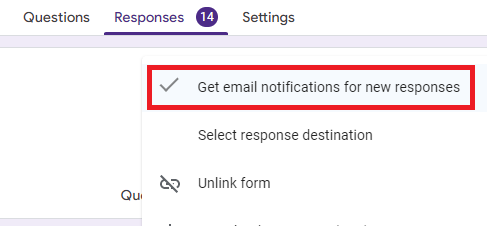
If you enable the option "Get email notifications for new responses from the more menu in the ‘’Responses’’ tab, you will also get an email notification each time someone submits your form.
These notifications could include a document with responses included with an add-on like Form Publisher.
Organizing an event? Learn how to organize RSVP's using Google Forms
How to embed Google Forms on a website
Now that you know how to embed a Google Form in an email, it is possible that you want to branch out and embed a Google Form on your website instead. Let’s run through how to embed a Google Form in a website.
Step 1: Get the HTML code to embed a Google Form
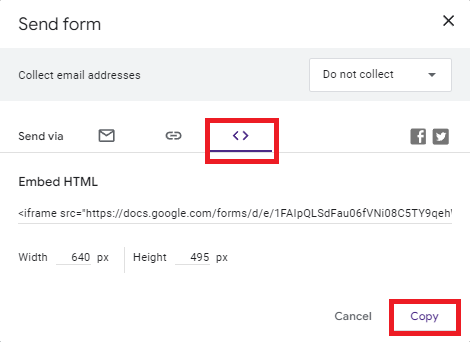
First, you’ll click the “Send” button on the form again, but this time you’ll go over to the embed option, which looks like two arrows pointing away from each other. This will produce an HTML code, which you can change the width and height of. When you’re satisfied, simply click copy.
Step 2: Go to your website backend
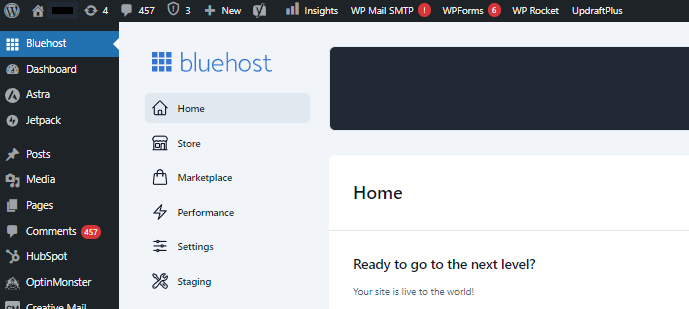
Next, you’ll need to log in as an admin to your website’s backend. This way, we can create a page or post that we can embed the form on. For our example, we’re using WordPress, but it will be a similar process for most hosts.
Step 3: Create a new page with the embedded Google Form
Last, all you have to do is actually embed the form. You can either open an existing page or add a new one. For our example, we’ll add a new page.
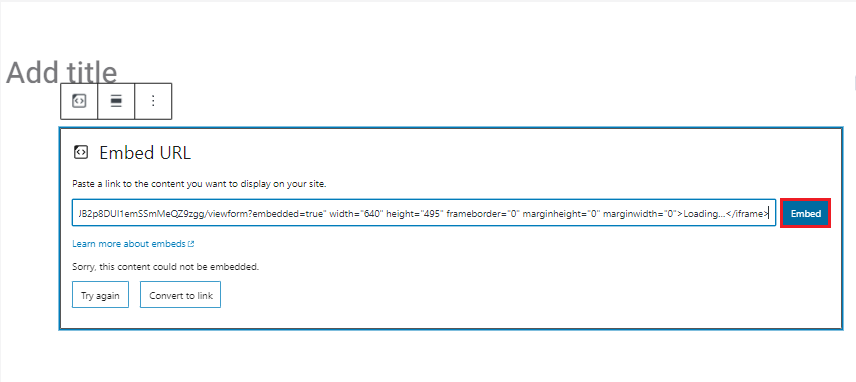
In the text editor, just paste the HTML code from before. Depending on the platform you’re using, a notification will appear asking if you want to embed. Enter the code and click “Embed.”
Once you’ve saved, your Google Form should appear on your site!
A mail merge can help you share your Google Form with more people
Now we know how to embed a Google Form in an email but can you embed Google Forms in emails then send them to a large number of people like an email marketing list? Of course, you can.
If you want to send out mass emails with your embedded Google Form, then you'll want to check out a mail merge like YAMM.
YAMM is a tool that makes it easy to send mass emails with Google Forms embedded in them. With YAMM, you can send your form to a list of recipients with just a few clicks. Plus, YAMM can personalize each email with the recipient's name, so your recipients will feel like the email was written just for them.
When you use YAMM to send your form, you can also track results in real time. YAMM will automatically keep track of who opens your email and clicks your form link, which will show up in your Google Sheets contact list.
If you want to send out mass emails with your Google Form, try out YAMM today.
Google Forms are easy to create and share
So, there you have it! Google makes it easy to share your Google Form in multiple ways, and it’s simple to embed your Google Form in an email. The next time you want to share a survey or poll over email, try out these steps and see how easy it is to collect data yourself!