
With a Google Form, you can collect a large amount of data from tons of respondents. But where do the Google Form responses go? You can view your responses in the Form itself, but you also collect your Google Forms responses in a Google Sheet. Google Sheets offer a lot when it comes to viewing and organizing your data, like creating charts and graphs.
In this tutorial, we’ll discuss how to get responses in Google Forms into Google Sheets and some tips about the process after the fact. Let’s get started!
How to create a Google Form that populates a Google Sheet
Step 1: Go to your Google Form
If you want to link your Google Form to Google Sheets, the first step is to open the Google Form in question. You can do this by going to Google Forms and selecting the form from your list or by opening the form directly from your Google Drive.

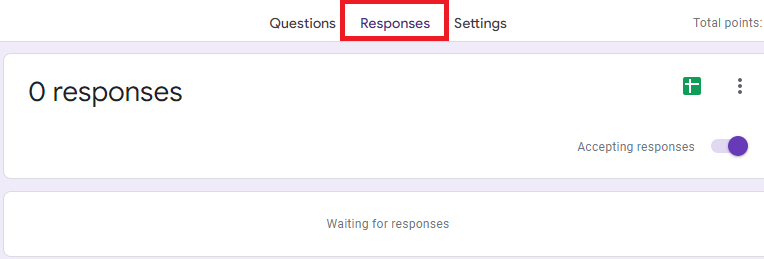
Step 2: Go to the Responses tab
Once you have your form open, click on the "Responses" tab at the top of the page. This will take you to a page where you can see all of the responses submitted to your form.
Step 3: Select response destination
At the top right of the Responses page, you should see a three-dot menu. Click on this menu and select "Select response destination." You can also open the same pop-up window by clicking on the Google Sheets icon at the right of the "Responses" tab.
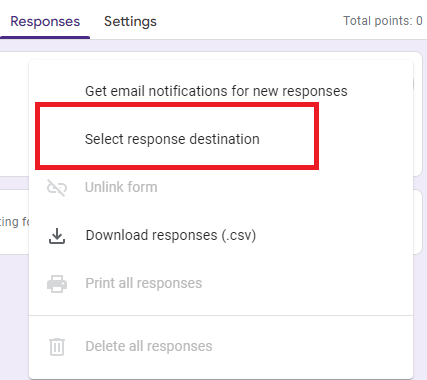
This will bring up a pop-up window where you can choose where you want your responses to be sent. If you’re wondering how to create a Google Sheet from Google Forms responses, the new pop will have an option for that. It will also give you the option to choose a spreadsheet you already created to link the Form to.
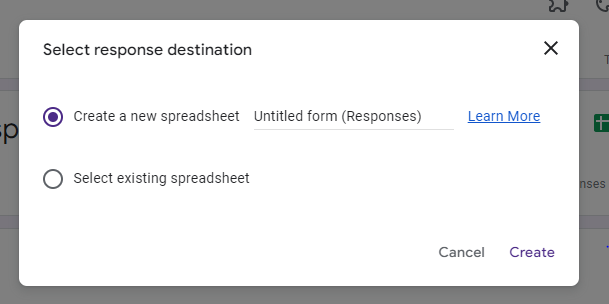
Step 4: Select or create a spreadsheet from Google Forms responses
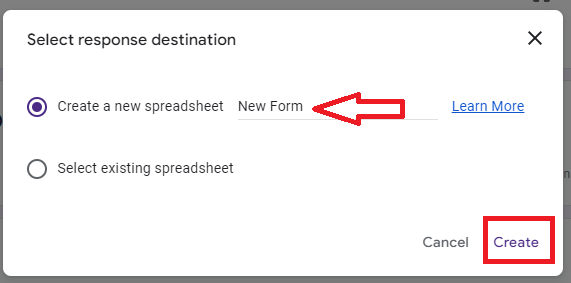
If you choose to create a new spreadsheet, select the "Create a new spreadsheet" option, give the Sheet a name by entering it into the text box, and then click on the ‘’Create’’ button. This will create a new spreadsheet and link it to your form so that any new responses will be added automatically.
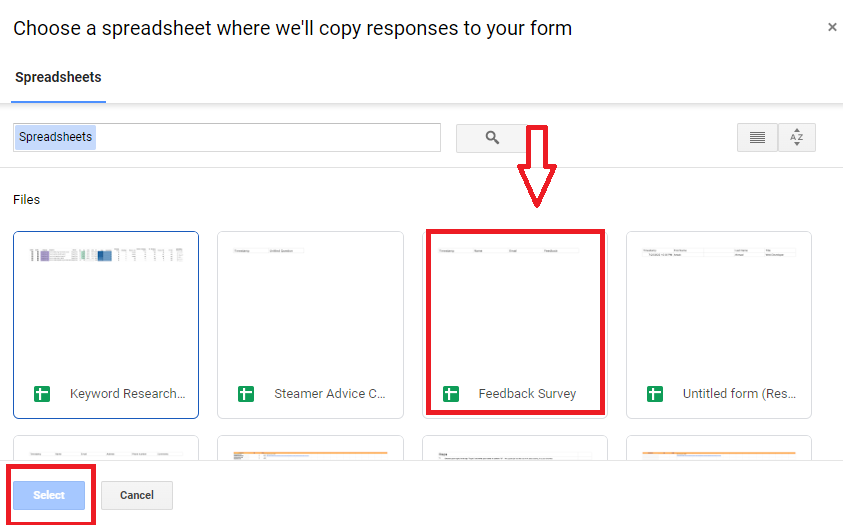
If you want to use an existing spreadsheet, click that bubble and you’ll be taken to a list of spreadsheets. Select the one you want to use from the list and then click on the "Select" button.
This will link the selected spreadsheet to your form so that any new responses will be added automatically. If you do this, the spreadsheet will have a new tab where these responses will be added. This means you don’t need to worry about your data overlapping with what you already have on the spreadsheet.
Step 5: Test if the Google Forms to Google Sheets link is working
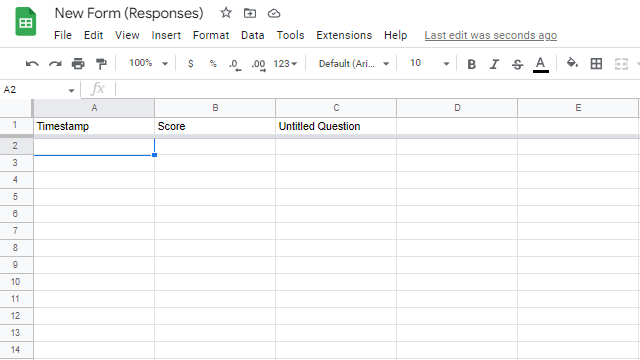
All of the columns will correlate between the Google Sheets and Google Forms except for the first one: the “Timestamp.” Whenever a new question is added to your Form, a new column is automatically created in the Sheet.
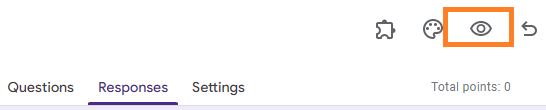
Once you've linked your form to a spreadsheet, it's a good idea to test the Google Forms and Google Sheets link to make sure everything is working properly. To do this, fill out the form on your own by clicking on the ''Preview'' button at the top of the page.
Once you've submitted a response, go to your spreadsheet and make sure that the response appears in the correct column. You can also check the timestamp to confirm that the response was added in real-time.
You should also test out different types of responses—such as multiple-choice, drop-down, and text fields—to make sure that they are all being added correctly. If there are any issues, you might need to go back and change something in your Form.
You've now successfully converted your Google Form to a Google Sheet. Easy, right?
Need to edit your Google Forms responses? Learn how to delete Google Forms responses here.
Important things to note about your Google Forms responses spreadsheet
You have to remove collaborators separately
If you have collaborators on your form, they'll probably have access to the new spreadsheet, too. However, the two are separate from one another with separate permissions. If you want to remove collaborators, you'll have to do so on both the Google Form and the Google Sheet.
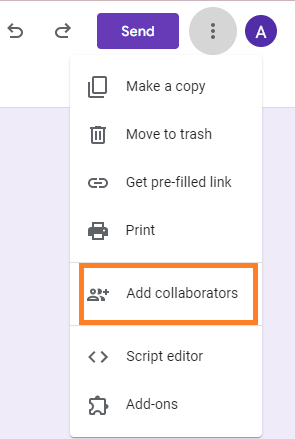
To remove collaborators from your Form, click the Menu icon (three dots) in the top right corner of the screen and select "Add collaborators" from the drop-down menu.
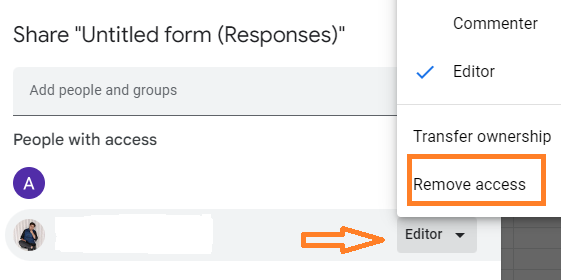
On the Collaborators tab, hover over the collaborator you want to remove and click the ‘’Editor menu’’ that appears next to their name. Then, click on the ‘’Remove Access’’ option. Click "Save" when you're finished.
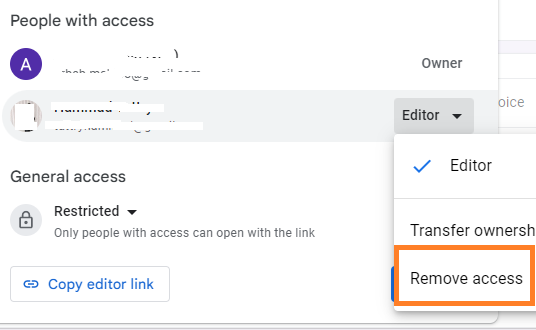
To remove a collaborator from your spreadsheet, open the spreadsheet that you want to remove a collaborator from. Click on the ''File'' tab. Under the ''File'' tab, click on the ''Share'' option.
A list of all the collaborators will appear. To remove a collaborator, click on the arrow next to their name and then click on the ''Remove Access'' option.
After doing both of these, the collaborator will no longer have access to the data in both the Form and the Sheet.
You can unlink Google Forms and Google Sheets and switch the link to a new one
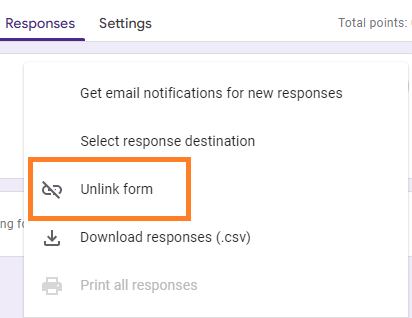
So, you know how to link a Google Form to a spreadsheet but what if you wanted to unlink them? To unlink your form from the spreadsheet, simply go to the "Responses" tab and click on the three-dot menu. From there, select "Unlink form." This will break the connection between your form and the spreadsheet, and any new responses will no longer be added automatically.
You can still export your responses manually, but you'll have to do it yourself each time.
This is useful if you ever want to switch which spreadsheet responses are going to. Maybe that spreadsheet is getting too large or you want to organize information in a new spot. After unlinking your spreadsheet, just go through the process of linking the Form to a new spreadsheet. The process is the same!
Learn how to create fillable forms in Google Docs
Create more than Google Sheets from Google Form responses with Form Publisher!
Taking responses from Google Forms to a spreadsheet is a super easy process. However, if you want your responses to be filled out into different documents, like a Google Doc or PDF, the process isn’t as simple. Unless you want to learn how to use Google Apps Script, you should consider downloading the Form Publisher add-on!
With Form Publisher, you can take your Google Forms responses and turn them into amazing-looking documents in different formats with just a few clicks. You select a template for how your document will look, too—no design experience is needed. Plus, it’s free to get started!
And if that's not enough, you can also take advantage of our approval workflows, personalized email notifications, and automated sharing features to make sure that everyone who needs to see your form results gets them quickly and easily.
Ready to try out all that Form Publisher has to offer? It's easy—just install the extension from the Google Workspace Marketplace today!