
Google Forms is a fantastic tool for creating online surveys, questionnaires, and feedback forms. More importantly, if you’re looking to gather valuable information from your website visitors, there’s no better way than embedding Google Forms on your website.
It provides a convenient and efficient way to collect insights about your website visitors, helping you make data-driven decisions and improve your overall business strategy.
However, if you’ve never done it before, the process can seem a bit daunting. So, in this guide, we'll show you exactly how to embed Google Forms in just a few simple steps. Let’s dive in!
How to embed a Google Form in a website
You don’t need a ton of coding know-how to embed a Google Form successfully on your website. All you need is a ready Google Form and some basic knowledge of your Content Management System (CMS). Here are the steps to embedding a Google form!
Step 1: Create a Google Form
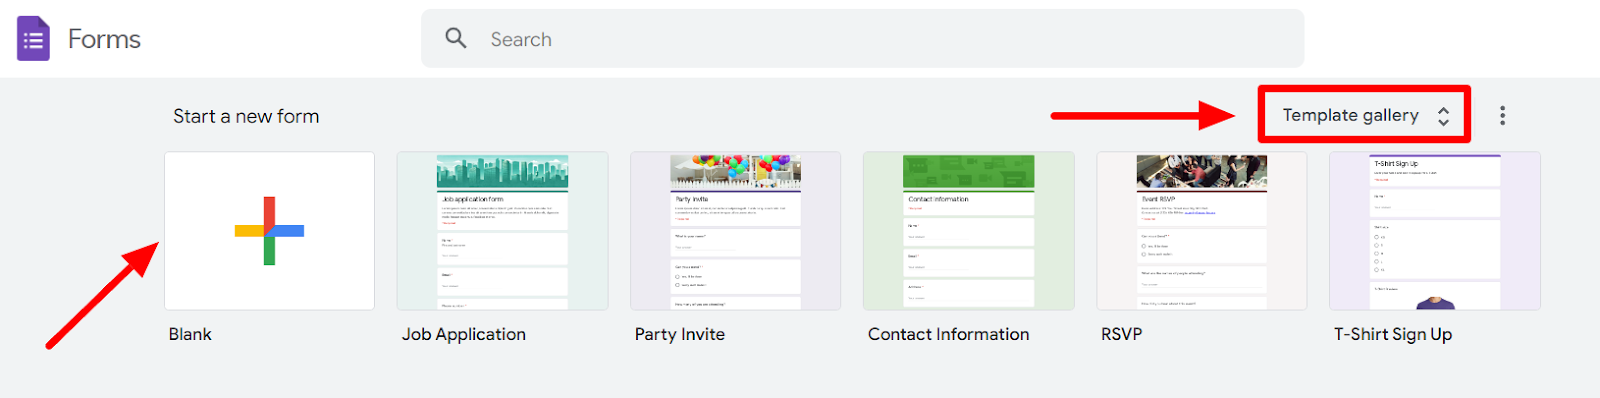
Navigate to Google Forms. It’s time to create or choose the Google Form that you’ll be embedding on your website.
You can start a blank form by clicking the “Start a new form” button, or you can go through the “Template gallery” to find a template to start with. Learn all the detailed steps involved in making a Google Form.
Did you know that Google Forms offers many advanced features and functions? Once you have a basic form ready, consider making your form more efficient by using some of these advanced Google Forms features.
Step 2: Click “Send”
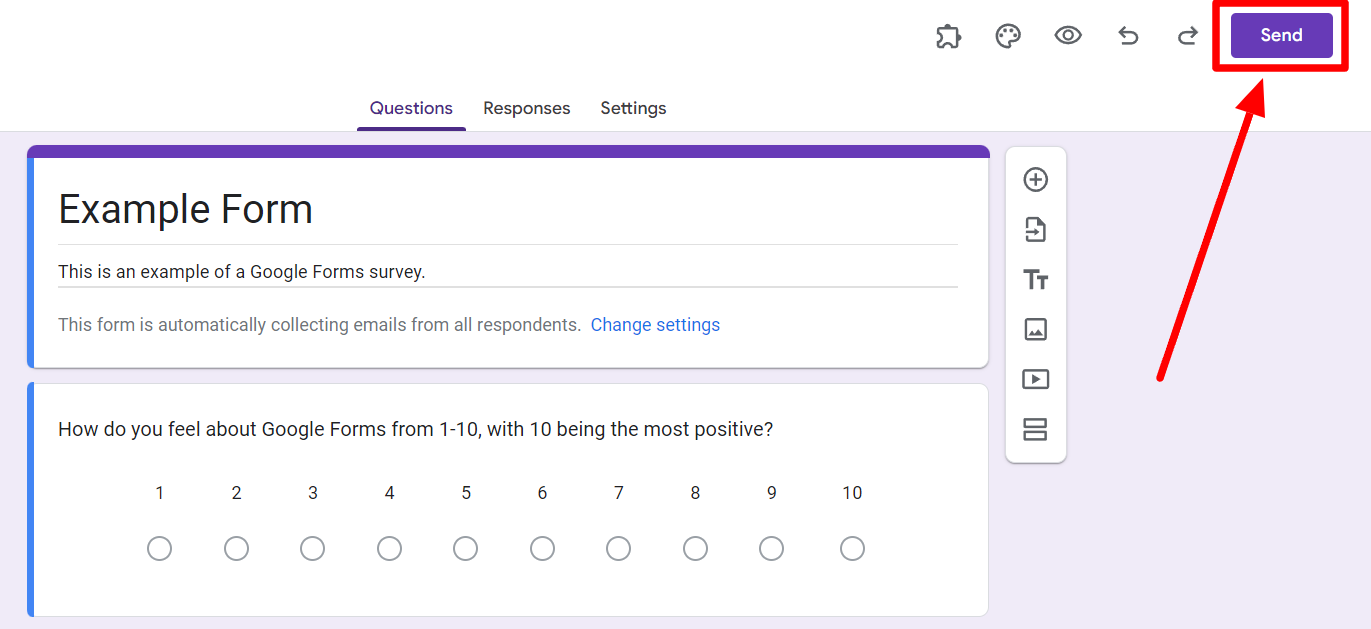
By now, you should have a form ready. Click the “Send” button in the top right corner of your form.
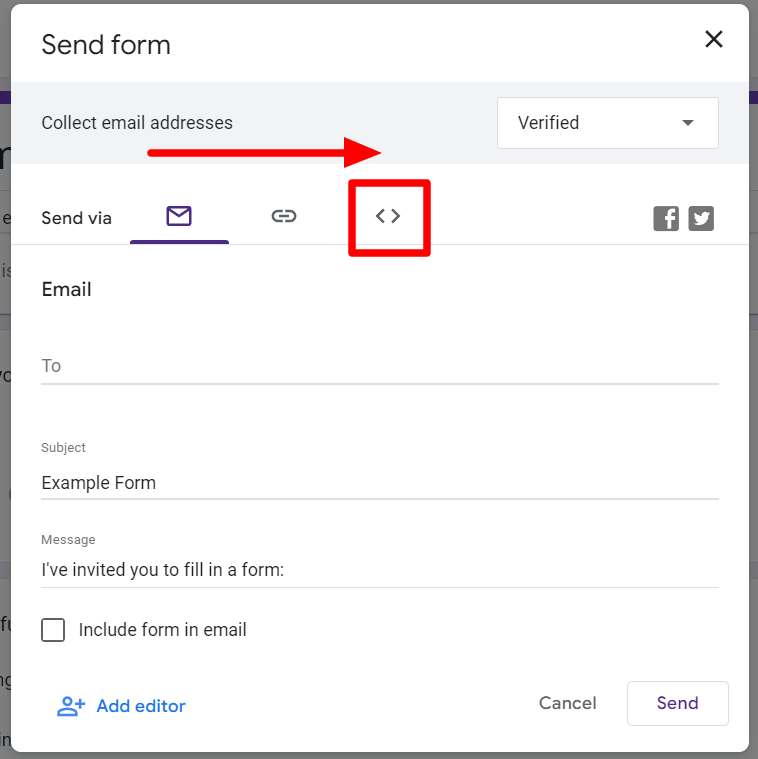
This will open a window where you can see all the options available to send the form. In the “Send via” column, toggle from “Email” to the “Embed” button (the icon with the angular brackets).
Step 3: Copy iFrame code
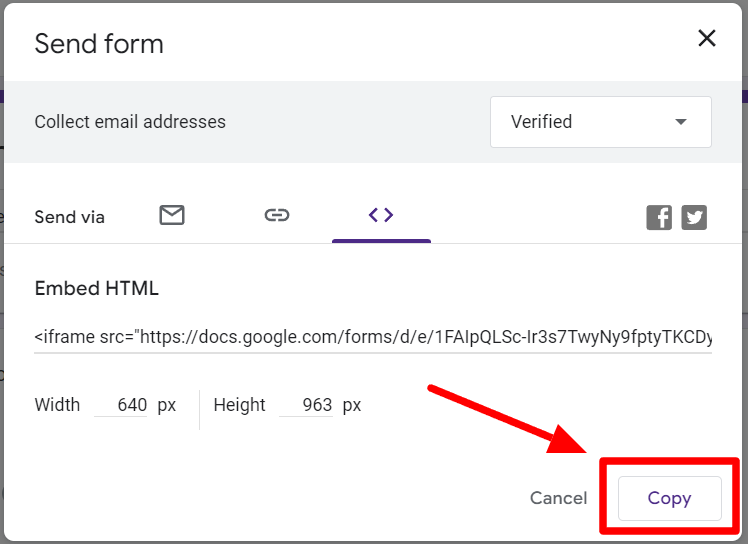
Now that you’re in the Embed section, you’ll be able to see the iFrame HTML code for your Google Form. Under it, you’ll also see the width and height in pixels. These are so you can change how the form appears on your website. Don’t worry about this just yet.
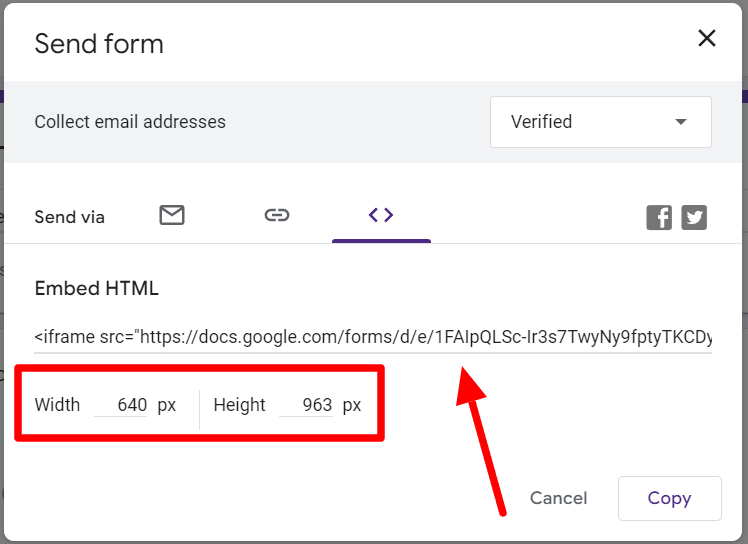
Click “Copy” to copy this HTML code to your clipboard.
Step 4: Open your website CMS
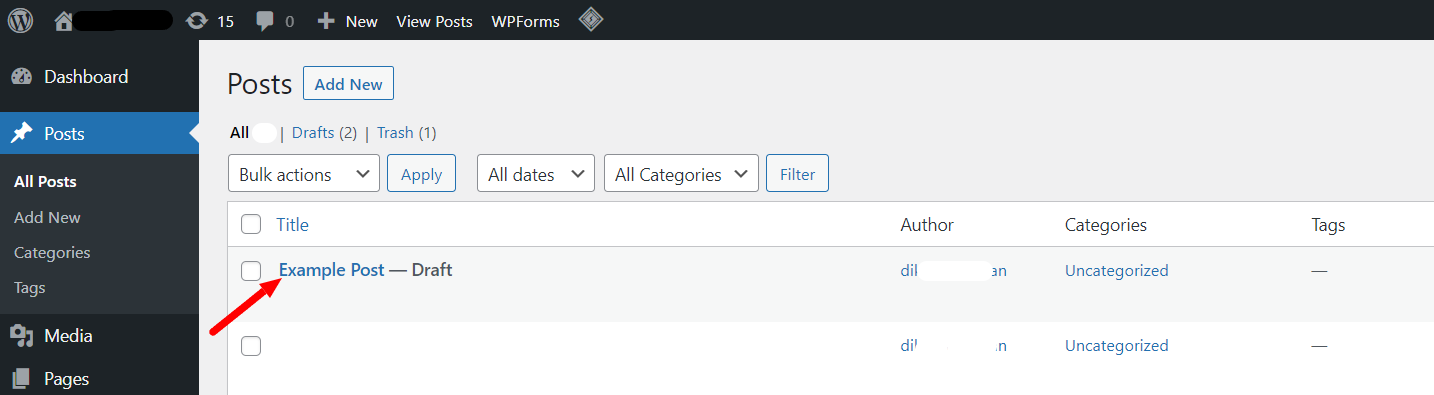
Now, navigate to your website and sign into your CMS. We’ll be working with WordPress. Let’s say you’re writing a blog post, and you’d like to embed your form there. Open the post or page where you’d like to embed your form.
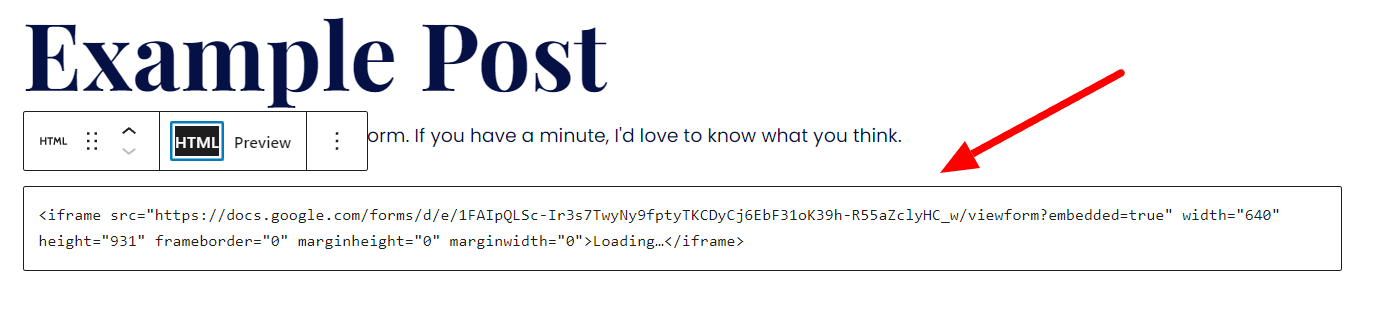
Step 5: Paste iFrame where you need the form
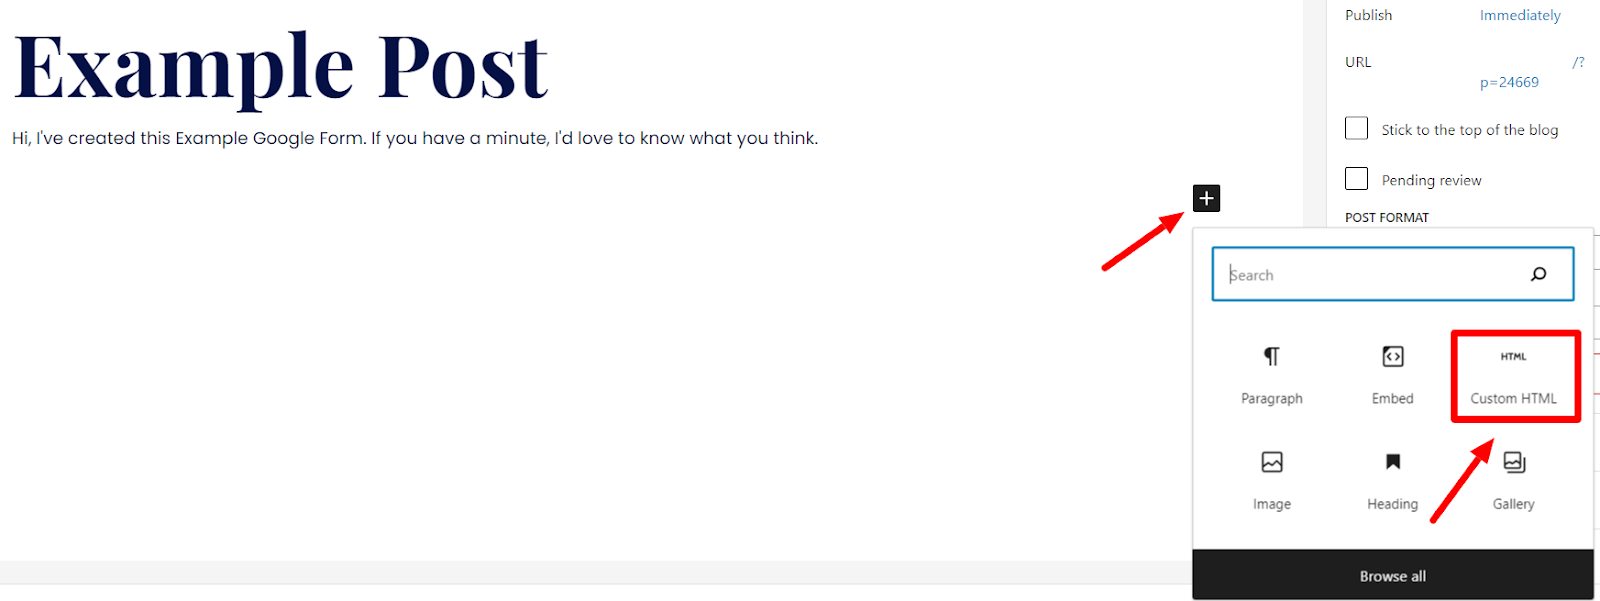
After entering your title and body text, click the “Add block” button (+ sign). Find and select the “Custom HTML” block button.
This will open the HTML block.
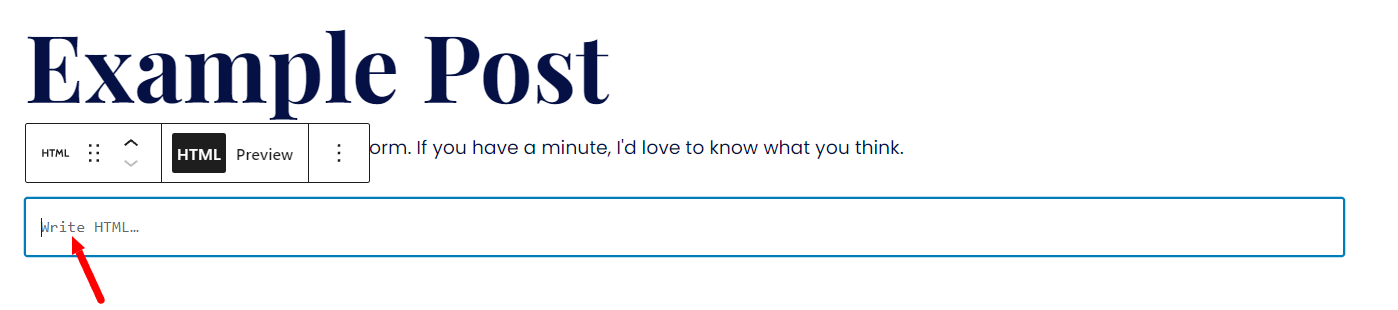
Now simply paste (Ctrl + V) the iFrame code that you’ve already copied into your clipboard.
To see how your form appears on your website, toggle to the Preview mode. Now you can view just how it appears to your website visitors.

If, at this point, you feel like you want to change the dimensions of the form, you can easily do that too. Simply return to your form, click “Send,” and change the width and height. It’s important to know that the iFrame code changes once you do that, so you’ll have to re-embed the form on your website.
Woo! You’re done!
Extra tips when embedding a Google Form on your website
Why would you want to embed a Google Form?
Embedding a Google Form into your website can have a lot of benefits. Google Forms’ data collection capabilities can provide a lot of insights into your audience’s preferences and behaviors. It’s also very familiar and easy to use.
By simply embedding the form, you eliminate the need for visitors to navigate away to a separate form page, creating a seamless user experience, reducing friction, and increasing the chances of form completion. The better your form completion rates, the more complete your data.
Does the Google Form have to be public on your website?
The Google Form you embed on your website doesn't have to be public. You’ll still be able to embed the form if you’re collecting emails, allowing only Google-verified users, or limiting it to one response per user only.
However, embedding the form on your website is a great way to receive many responses. By not making the form public, you’ll be defeating the purpose of making the form visible to a larger audience. Keeping the form public is another way of removing friction in the form-filling process.
How can you keep track of so many responses?
Google Forms makes it very easy to keep track of your responses. Google Forms responses are saved in Google Sheets. Here’s how you can open Google Forms responses in a spreadsheet. And if you’re overwhelmed by sheer number of responses you receive, there’s an easy way to limit Google Forms responses.
The best way to track and analyze your Google Form responses is through Advanced Summary. Advanced Summary is a powerful Google Forms add-on that can summarize and sort out your data by any response field (name, location, preference) used in your form.
Get deeper insights into your website survey with Advanced Summary!
So, there it is! Bet you didn’t think embedding a Google Form into your website would be so easy, huh? Now that you have your Google Form ready to appear in front of all your website users, you should expect many responses.
With so much data, you need a way to sort it. Manage, track, and gain valuable insights from your collected data with Advanced Summary. It’s free to get started!