
PTO request forms are something that all HR managers or small business owners have to deal with regularly. Creating a user-friendly and comprehensive PTO form ensures a seamless process for requesting time off and streamlines your HR workflow.
This post is dedicated to making a PTO form that will benefit both your employees and your HR workflow. Ready? Let’s dive in!
PTO request meaning
An organization needs PTO request forms for several reasons. They provide a structured and standardized method for employees to request time off. When you have a well-crafted form, all necessary information, such as dates, reasons for leave, and employee details, is collected uniformly.
PTO request forms also facilitate better organization and planning for employees and employers. Having a documented record of requested time off allows managers and HR personnel to manage staffing and divide the workload more efficiently.
However, all this is only possible when your PTO request forms are crafted and managed well. Let’s see how to create an effective PTO request form:
How to make a paid time-off request form in Google Forms
Step 1: Start with a PTO request form template
Navigate to your Google Forms.
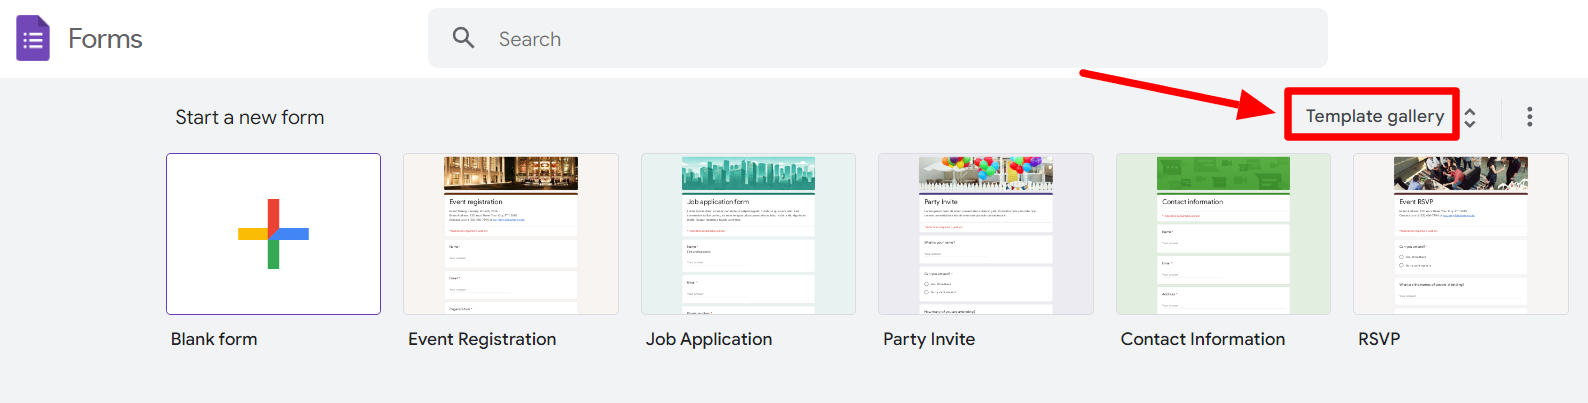
Click on the ‘Template gallery’ button to open the full gallery of templates.
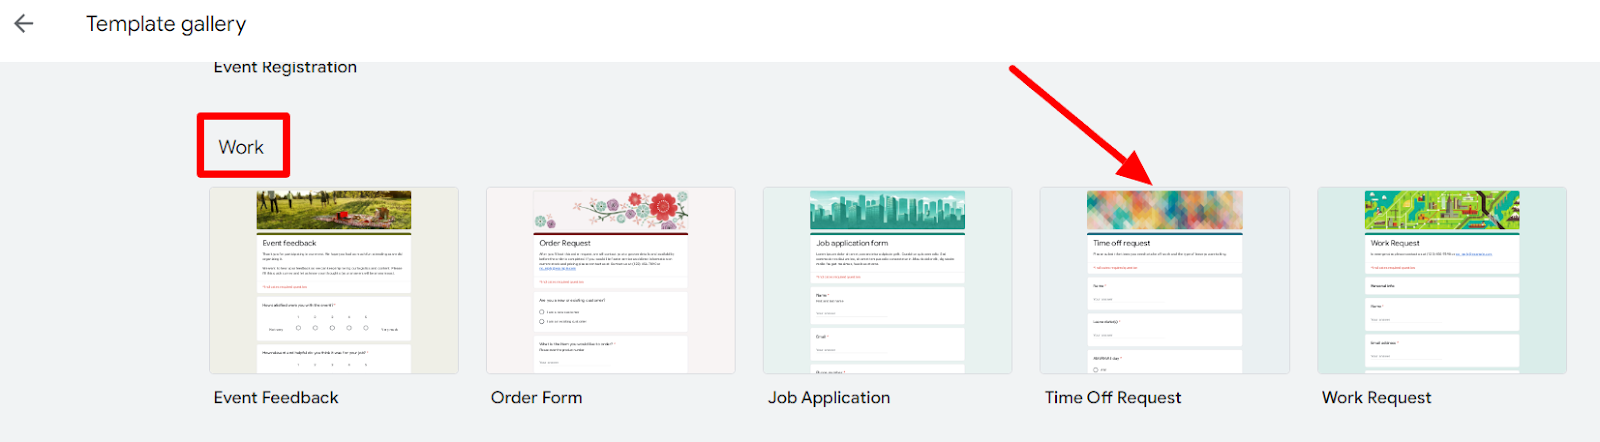
Scroll down to the ‘Work’ section in the gallery and choose the ‘Time off request’ template.
Step 2: Ensure employee can fill out their personal details
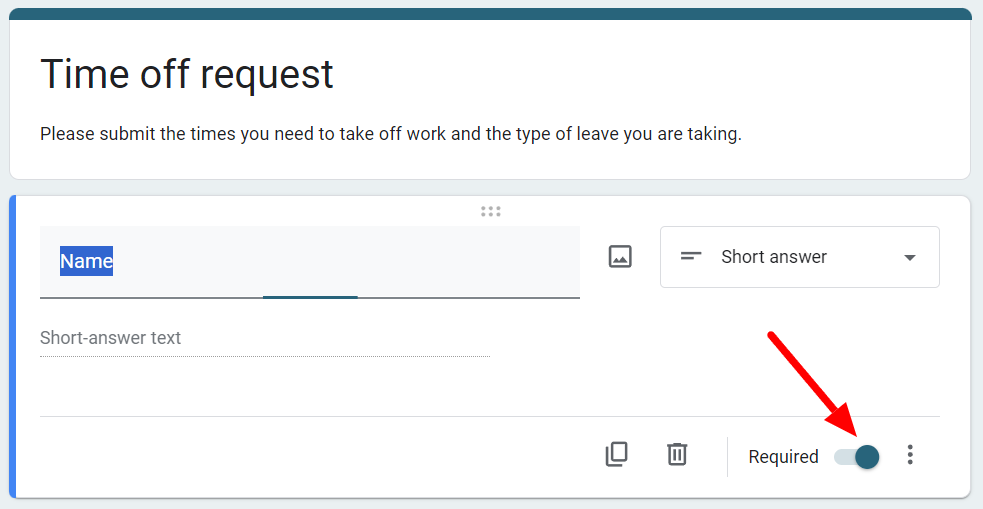
One by one, review the questions to ensure that essential questions like personal details are ‘Required.’ That is usually the default setting in this template. However, if you find a critical question you don’t want your employees skipping, even by mistake, simply turn on the ‘Required’ setting under the question.
Personal details would include things like name, employee ID number, phone number, etc. Whatever you need of their personal details for your records, include that first.
Step 3: Choose to include type of leave or not
You may want to ask for the type of leave, and there are questions for that already on the template. If you don’t want to inquire about the reasons behind a PTO request, you can delete the questions inquiring about the reason for the request.
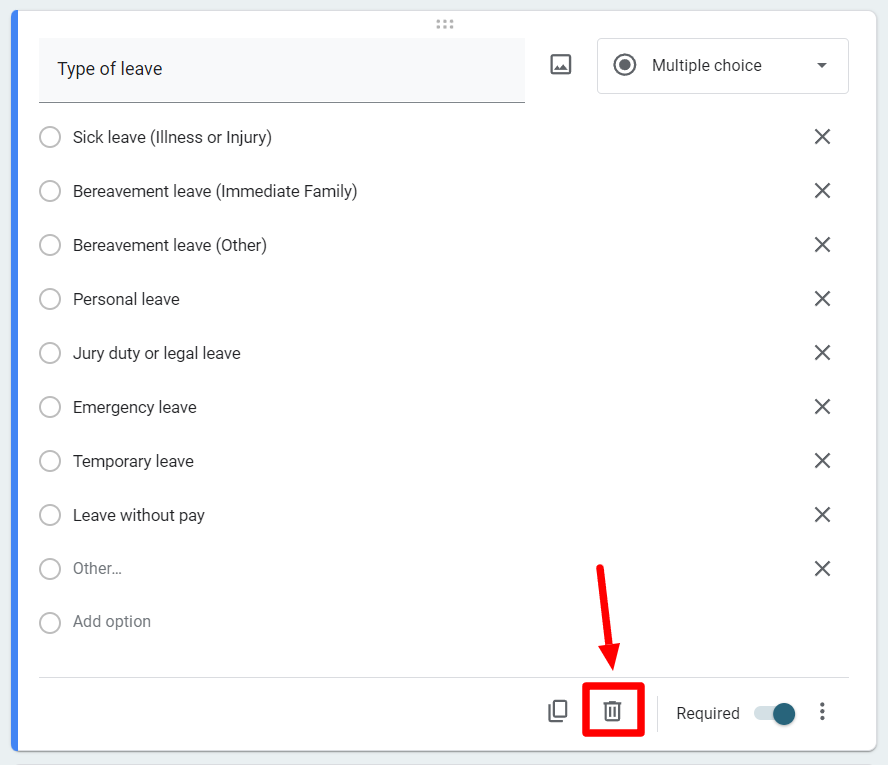
Simply click the delete button at the bottom of the question box. There are two questions on this template enquiring into the reason for leave. Remember to remove both if you want your form to refrain from delving into the reason for the request.

If you want to keep a flexible approach, you can keep the questions but remove certain choices and make them optional. In such a scenario, an employee can choose to disclose their reason for leave or decide against it.
Step 4: Include date questions for PTO timeframe
The next important parameter to consider in a PTO request form is the leave dates. By default, the date question uses the short answer format in this template. If you choose, you can change the question format to the date format for ease of use.
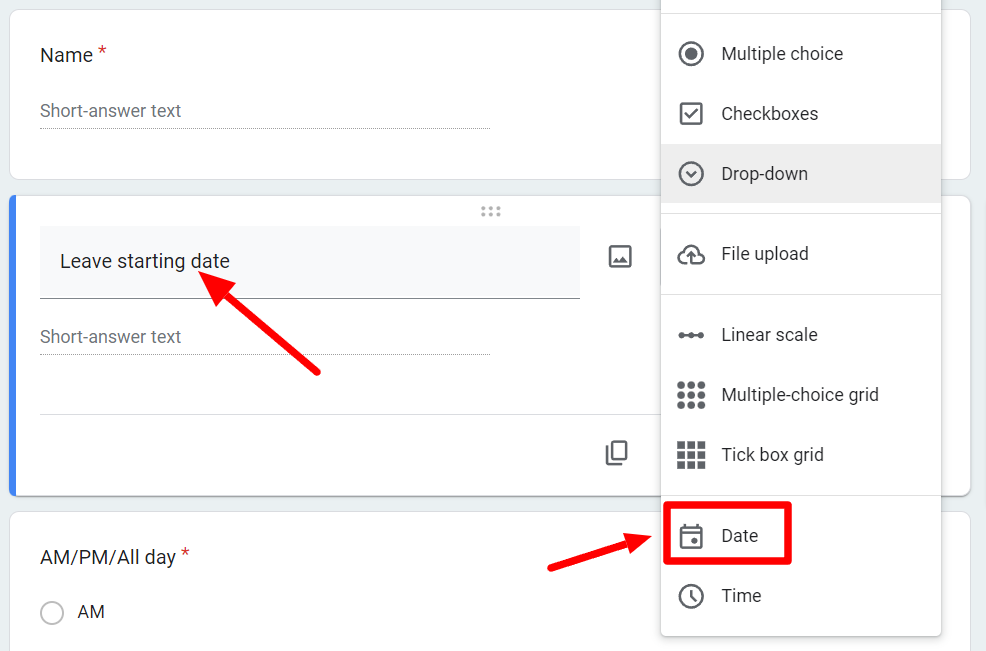
To do this, change the question to ‘Leave starting date’ and pick the ‘Date’ format from the drop-down menu.
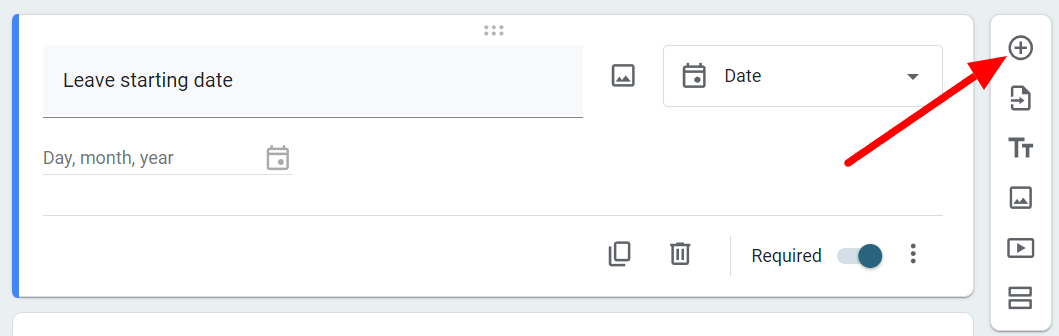
Now click the ‘Add question’ button in the floating menu.
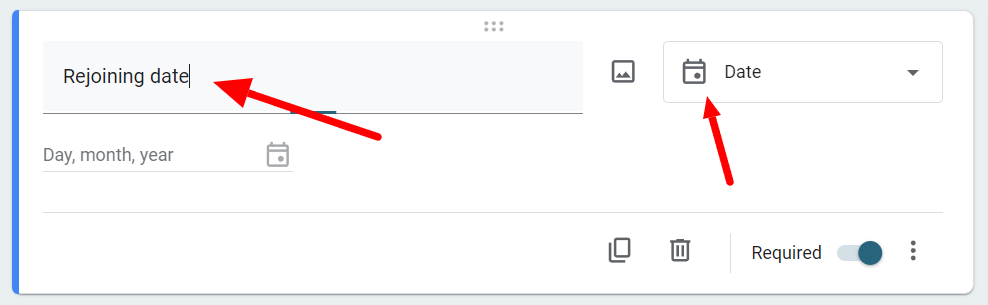
Add another question for the rejoining date and choose the ‘Date’ format. Ensure that both questions are ‘Required’. Now, you can collect the starting and ending dates of the requested leave in the calendar format. With that, you’ve successfully created an efficient PTO form for your organization.
Learn how to add a signature in Google Forms
PTO request form is submitted! Now what?
While you can leave it at that, we’ll give you three ways by which you can enhance the efficiency of this humble PTO form. Every enhancement layer will take this form to a new level of functionality and usability. Here are your options:
Open up the Google Sheet of responses
Many businesses use Google Sheet to organize their operations, so why not view responses in Sheets?
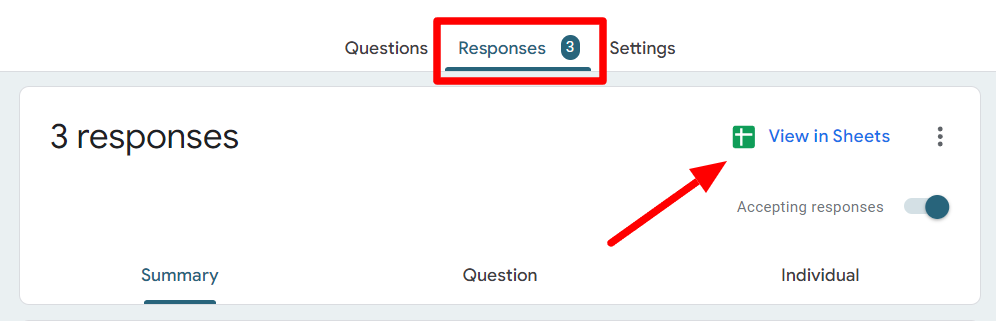
Click ‘View in Sheets’ under the ‘Responses’ tab. If you’ve not connected your PTO form to a Google Sheet yet, learn how to connect your Google Form to a Google Sheet.
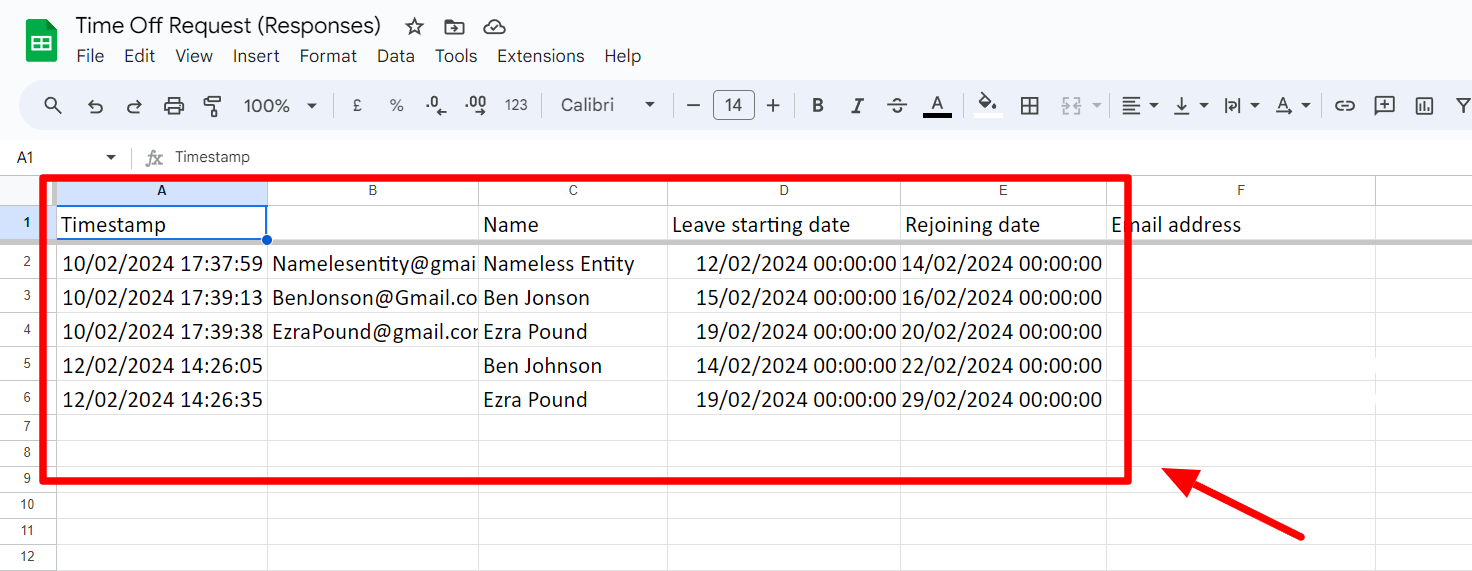
Once you’ve connected your PTO request form to a Google Sheet, you instantly have all your data in a well-organized sheet that is easy to sort. Learn how to use the query function in Google Sheets to sort through Sheets data.
Use Form Publisher to automate documentation
Now, you may need to turn these leave requests into individual documents to print for approval from the competent authorities or even store them as part of employee records. While it is possible to print Google Forms and download Google Forms responses individually as PDFs, you’ll find that it is a cumbersome process that doesn’t lend itself to productivity.
A better way is to use a simple add-on, Form Publisher, to automate your documentation. There are several benefits of doing this. Firstly, once installed, it automatically turns a form response into a file in your preferred format. With Google Forms, you have to carry out this process manually every time, and even then, you only get a PDF.
Secondly, these form documents are fully customizable. This means that instead of using PDFs with a Google Forms logo, you can have customized business forms and documents for your office records.
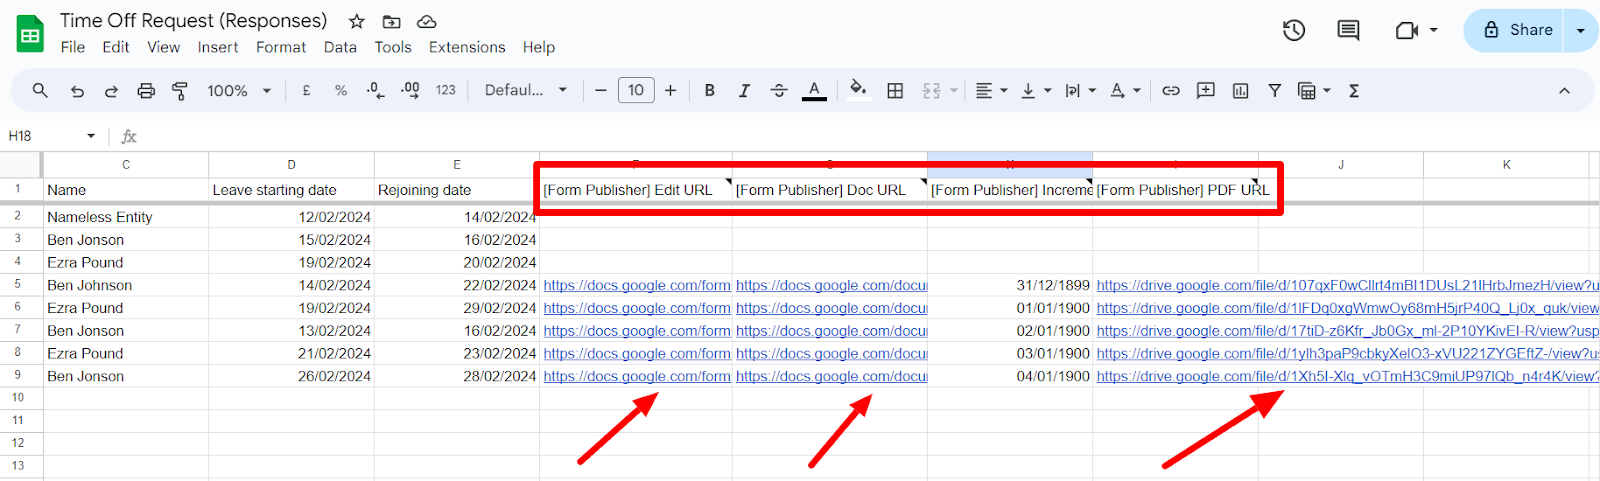
Also, whenever a document is created with Form Publisher, you can see its link in your Google Sheets along with the other details. This means you can always access it in a moment and don’t have to search through your records when needed.
Can you deny PTO requests? Set up approval workflow with Form Publisher
The last and most effective way to turn your form into a Google Forms workflow. Not just that, since leave request forms usually require approval, you can use Form Publisher to turn this PTO form into an approval workflow.
Once you set up an approval workflow with the email address of the approving authority, every time a PTO request form is filled, they will be notified by email notification. Once they approve or reject the request, it will be emailed to the form respondent.
This means you won’t ever have to send a form document for approval again manually. Congratulations, you’ve successfully automated your organization's entire PTO request form approval process. Now, you can repeat this process for other important HR forms, too.
Easily document PTO request forms with Form Publisher
Here’s something else to make your HR process easier. With Form Publisher, you can safely store these requested leave documents in your Google Drive automatically under a naming convention of your preference.
If you’re using Google Forms, adding Form Publisher is the next logical thing to do. Collect data through Google Forms and then automatically convert these submissions into professional official documents within seconds.
If you think that’s something that could benefit your workflow or workplace, try Form Publisher. It’s free to get started!