

If you're looking to collect data from a large group of people, a survey is a great way to do it. And if you're looking for a free, easy-to-use tool to create your survey, Google Forms is a great option.
In this article, we'll walk you through the process of creating a survey in Google Forms step-by-step. We’ll also share some tips on how to make your Google Forms surveys even better.
So let's get started!
Learn how to create fillable forms in Google Docs
How to make a survey using Google Forms?
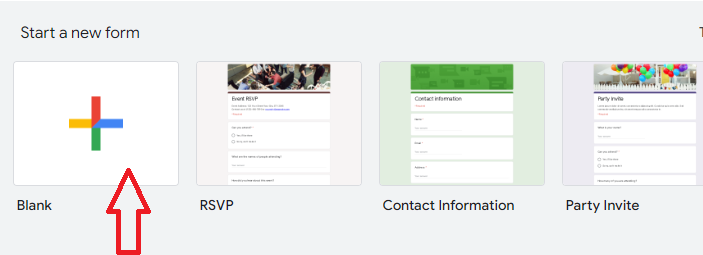
Step 1: Create a new Google Form
To create a new Google Form, go to forms.google.com. You will see a blank form that you can start customizing to your needs.
Step 2: Name your Google Form survey
forms.google.com will always open with an “untitled form” at the top. Click on this and name your Google Forms survey. For our example, we'll name it "Customer Satisfaction Survey." You can also add a description of your survey here if you'd like.

Step 3: Fill in the questions for your Google Forms survey
Now it's time to start adding questions to your survey. Google Forms makes it easy to add different types of questions, including multiple-choice, short answers, or linear scales.
For our customer satisfaction Google Forms survey, we'll add questions like:
- How satisfied are you with our product?
- What feature of our product do you like the most?
- What feature of our product do you like the least?
- If you could change one thing about our product, what would it be?
- Is there anything else you'd like to tell us about our product?

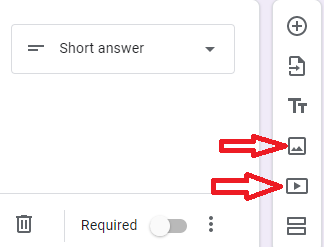
You can also add images (or videos) to your questions from the right-hand side panel.
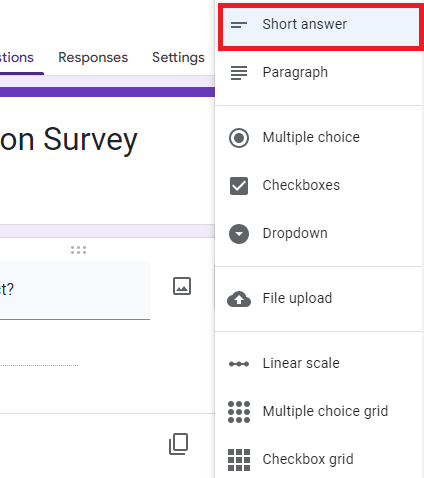
Step 4: Choose how people will answer your Google questionnaire
Now that you've added all of your questions, it's time to choose how you want people to answer your Google Form survey. Google Forms gives you a few different options for how people will answer your questions.
For example, you can choose from multiple choice, short answer, paragraph, or linear scale.
If you wish to create a Google Forms Poll and want your respondents to pick between different options, multiple-choice is a good question format. If you want your respondents to describe their experience, a short answer or paragraph format would be best. If you want to gauge your customer’s satisfaction from 1-5, then go with a linear scale.
For our customer satisfaction survey, we could choose the option ''Short Answer'' for the question, “What feature of our product did you like the most?”
Step 5: Customize your Google Forms survey theme
One reason why so many people choose to create Google Form surveys is that you can customize the look and feel of your survey to match your brand.
To do this, click on the "Customize Theme" icon in the top right-hand corner. From here, you can browse through different themes or search for a specific theme. For our customer satisfaction survey, we'll choose a theme that is clean and simple so that it's easy for respondents to answer the questions.

You can also change the color scheme, font, and background of your Google Form survey to match your brand.
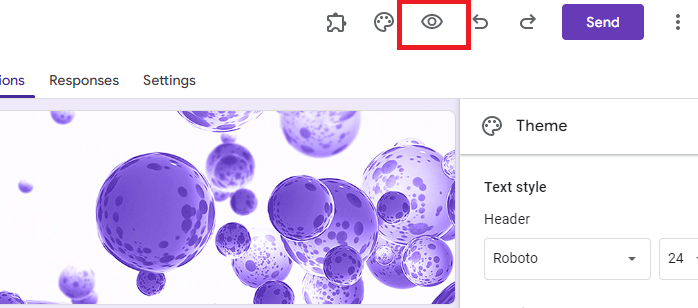
Step 6: Preview your Google Forms survey
Before you send out your Google Form survey to respondents, it's always a good idea to preview it first. This way, you can make sure that everything looks the way you want it to and that all of the questions are worded correctly.
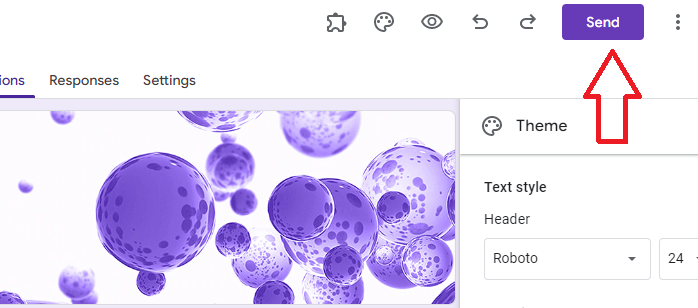
To preview your survey, click on the "Preview" button (the eye) in the top right-hand corner.
This will open up a new window where you can take your survey. As you're going through the questions, keep an eye out for any typos or errors.

If everything looks good, then you’ve now created a survey with Google Forms and are ready to send it out!
Learn how to sort your Google Form responses here
Step 7: Send your Google Forms survey out
Now that your Google Forms survey is ready, it's time to send it out to respondents. To do this, click on the "Send" button in the top right-hand corner.
From here, you can choose how you want to share your survey. You can email your survey to specific people, share it on social media, or embed it on your website. For our customer satisfaction survey, we'll choose to email it to our customers.
To do this, enter the email addresses of the people you want to send your survey to in the "To" field. Then, add a subject and message for your email and click "Send."

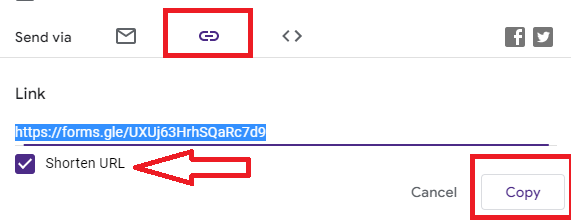
If you’d like to share it via a link, just go over to the paperclip icon and Google Forms will create a link for you. Make sure to hit the “Shorten URL” box if you want to avoid having a long, confusing link.
If you’d like to send out your survey to a large email list and want to track who clicks it, try out Yet Another Mail Merge! YAMM is a Google Workspace add-on that makes it so you can send out emails to your contact lists directly from Google Sheets. You can even personalize the messages to improve engagement.
That's it! Your survey is now on its way to respondents. All that's left to do is sit back and wait for the results.
Learn how to add QR codes to your Google Forms
Step 8: Observe the results of your Google Forms Survey
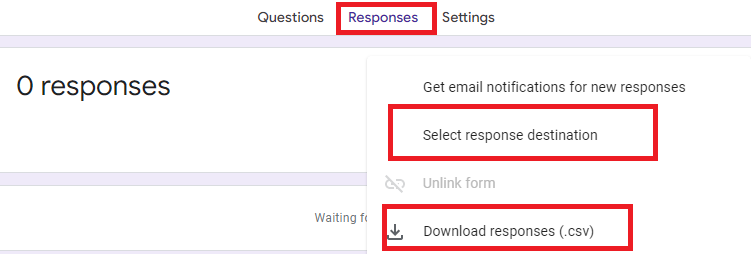
Google Forms makes it easy to track responses as they come in. To do this, click on the "Responses" tab in the top right-hand corner. From here, you can see how many people have responded to your survey and view the results.
Google Forms automatically generates charts and graphs for each question, which makes it easy to analyze the results. You can observe your results on an automatically generated Google Sheet, or you can choose to download the results as a CSV file.
If you are looking for an easier way to observe your survey responses, Form Publisher can help! This Google Workspace add-on can generate beautiful documents from your survey responses, which is handy if you need to share the results with your team or clients.
So there you have it! With this step-by-step guide, you now know how to use Google Forms for surveys. But wait, there's more!
Show your Google Form responses in a chart
How to make your Google Form survey even better
Once you create a survey in Google Forms, there are a couple things you can do to make them as effective as possible:
Get email notifications when someone answers your Google Form survey
When you create a survey in Google Forms, you can choose to get an email notification every time someone responds.
To do this, go to the Form Editor and click the "Responses" tab. Then click the three-dot menu and select "Get email notifications for new responses." This will ensure that you're notified as soon as someone completes your survey, so you can follow up with them if necessary.

However, once you get the notification, you’ll have to go back to the Google Forms UI in order to view the response, which can be annoying. If you’re using Form Publisher, you’ll get a notification with your document included automatically, meaning you don’t need to leave your email client. This is especially handy for mobile users.
Learn how to add ranking questions to your Google Forms
Collect survey responses in documents in addition to Sheets
If you're using Google Forms to collect data from a survey, Google Forms will default to collecting your responses in Google Sheets. There are ways to generate documents from these responses along with your spreadsheet, though.
This can be useful if you need to share some of the responses with someone who doesn't have a Google account and if you want to make the written responses easier to read through a PDF or Google Doc.
We've got the perfect tool for the job: Form Publisher. This nifty Google add-on turns your survey responses into beautiful documents (Google Docs, PDFs, or Microsoft Office), making data analysis and presentation a breeze. If you’re looking to cut down on administrative efforts, Form Publisher automates the process of transferring responses to other documents.
To do this, simply install Form Publisher from the Google Workspace Marketplace, then choose your template and recipients. Form Publisher will do the rest! It's free to use Form Publisher with a personal Google account, and there are paid plans available if you're using it with a work or school account.
Sign up for the Form Publisher’s free plan today to see how it can help improve your surveys!